Contents
How to change your webcam background with AI virtual background images
7 reasons to add a virtual background to your videos
Tips to get the most out of virtual backgrounds
Replace Webcam Background with AI-Powered Virtual Background Changer
Looking for a way to remove or replace your webcam background without a green screen?
You are in the right place.
This post shows you how to blur, remove, replace, or change your webcam background using Vmaker. Most built-in webcam apps do not have a virtual background option, so a screen recorder like Vmaker is the easiest way to do it.
Let's get into it.
How to change your webcam background with AI virtual background images
Prefer to read? Follow these steps.
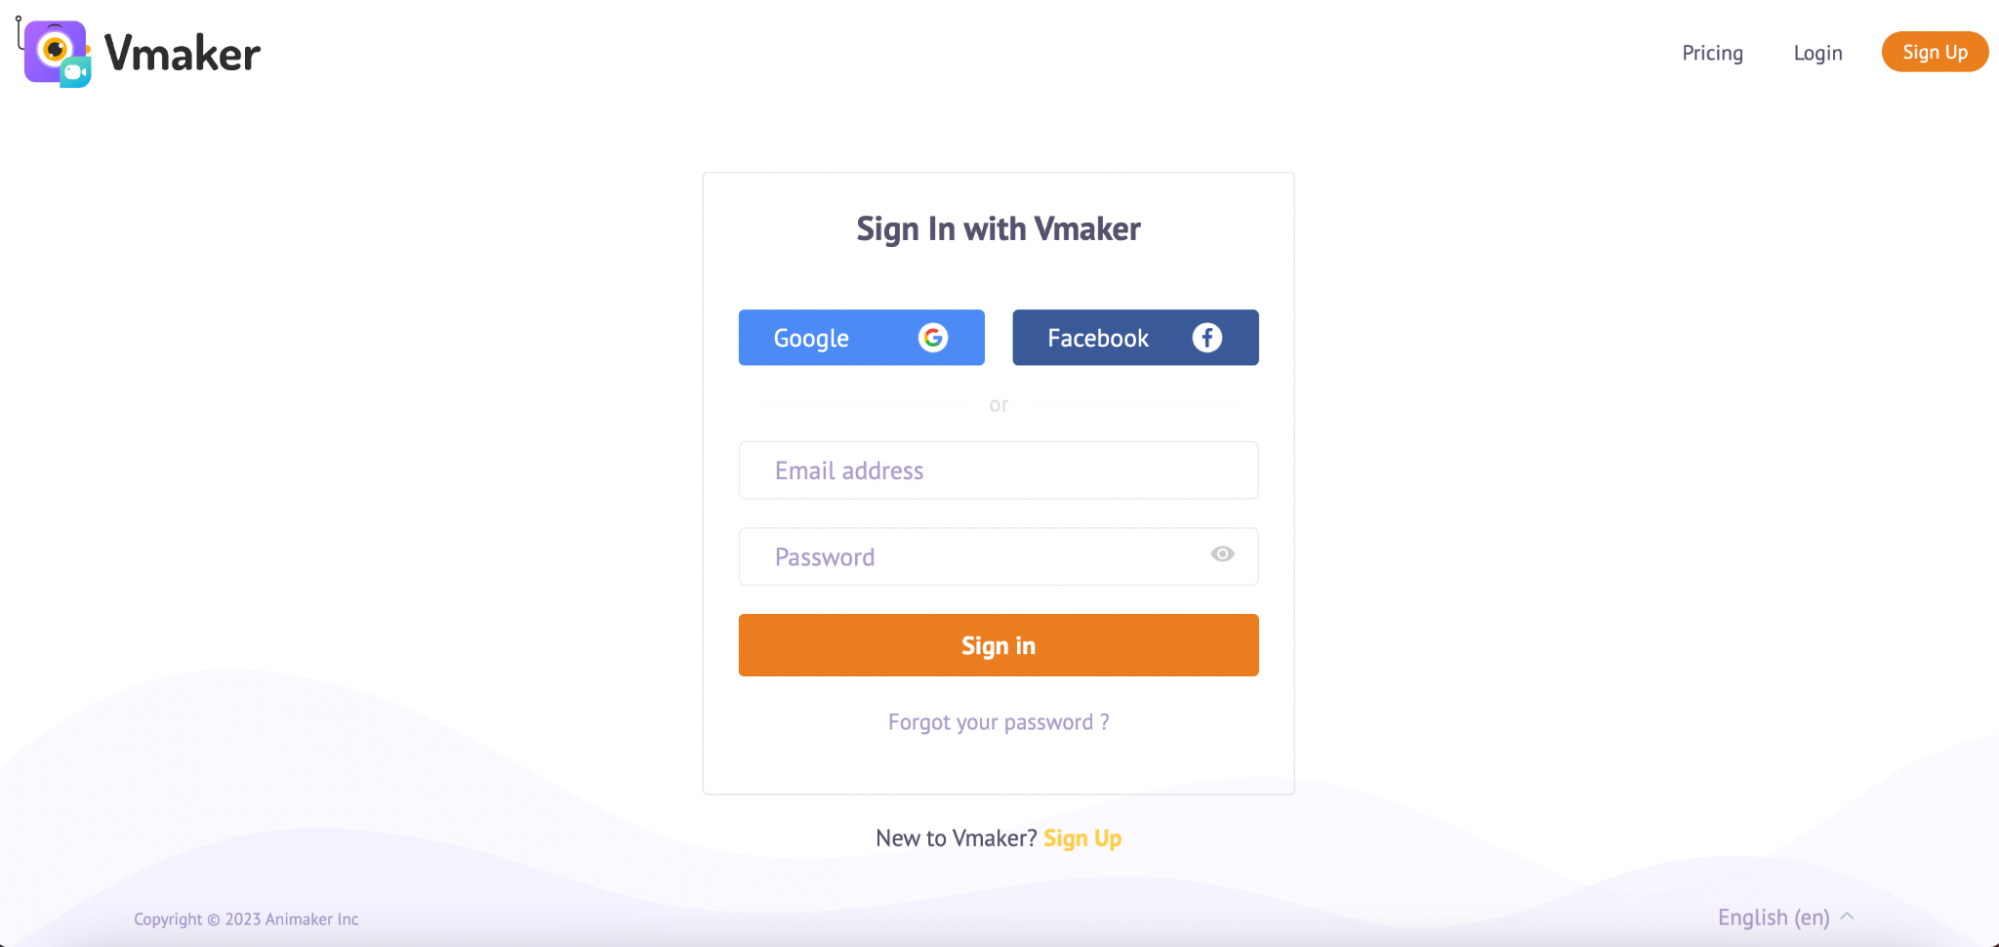
Step 1: Sign up and download Vmaker
- Go to Vmaker's home page and sign up.
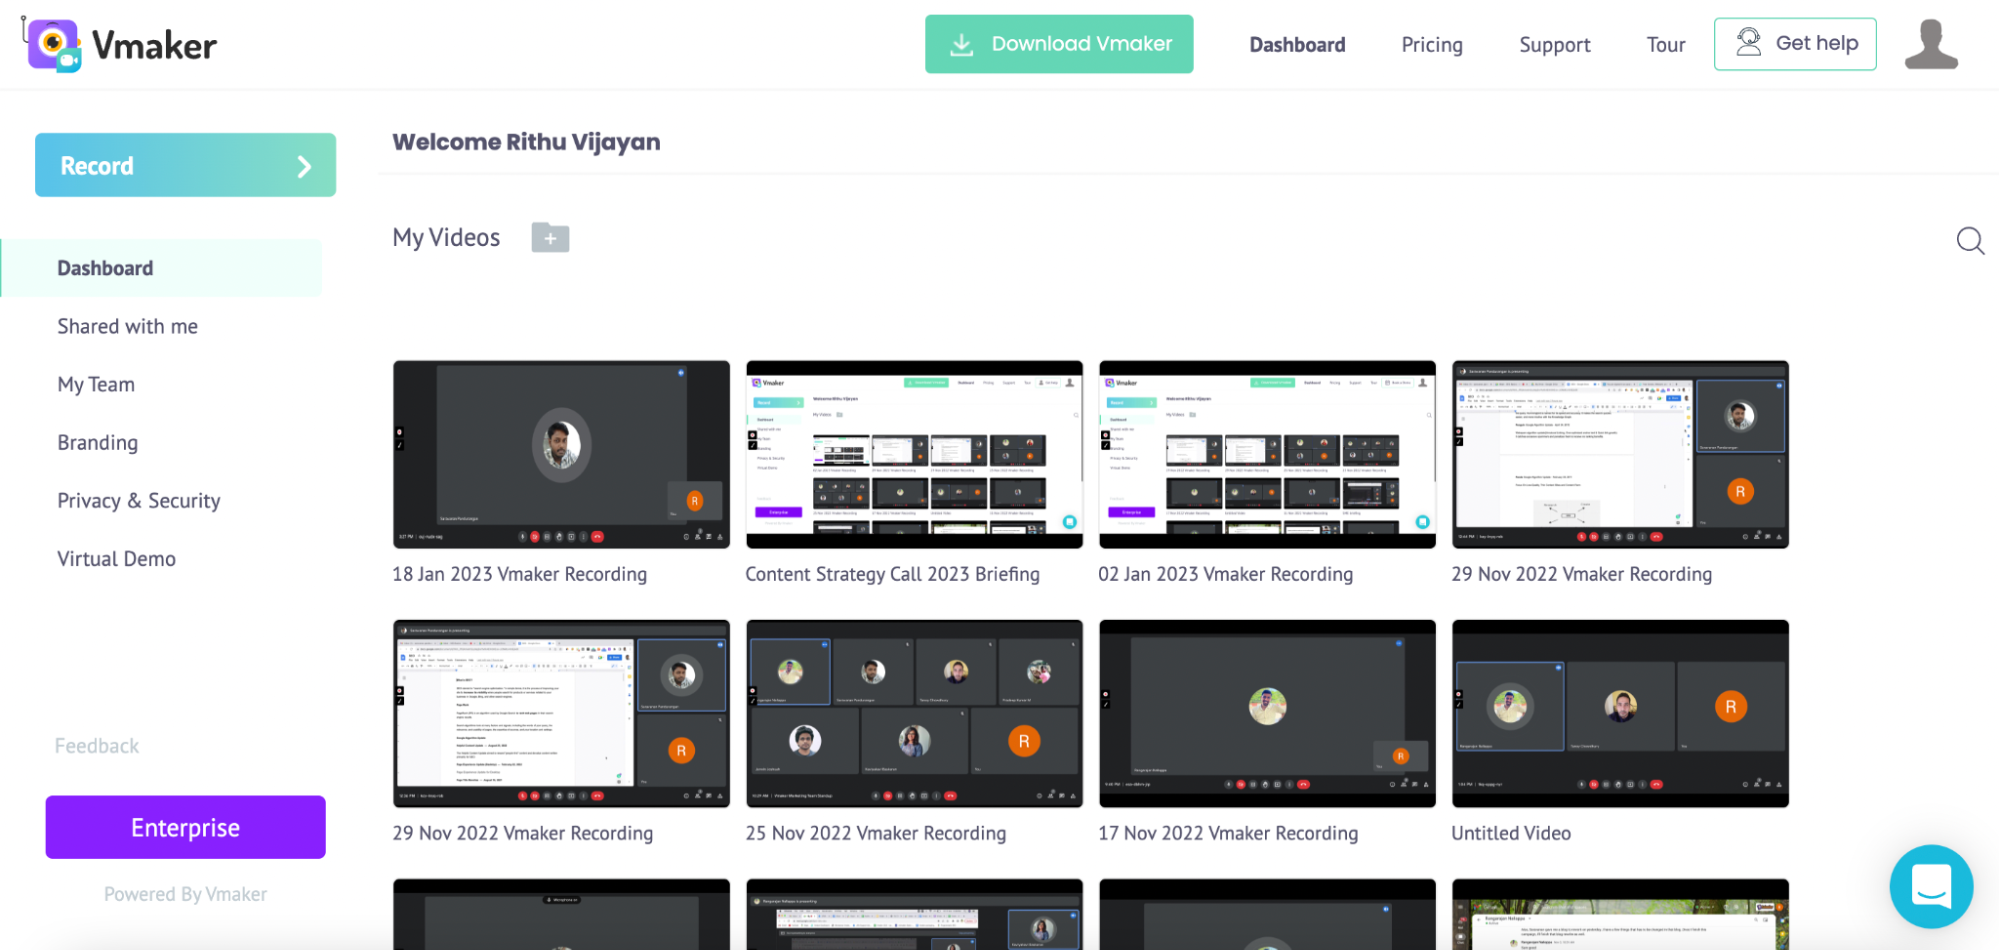
- Once you sign up, you will land on the dashboard.
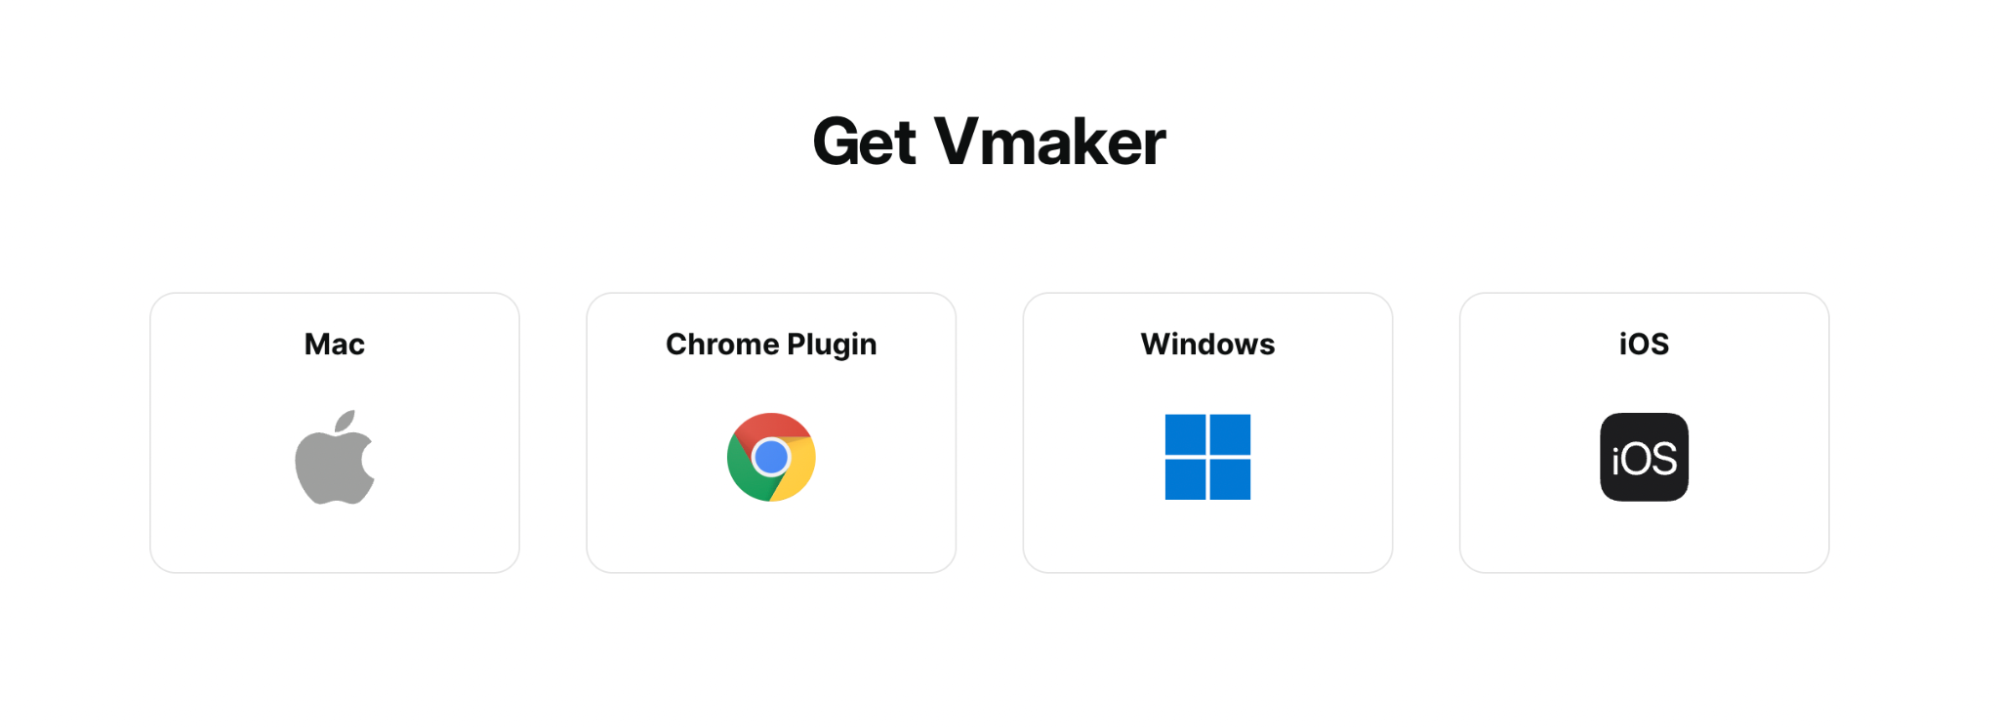
- Click "Download Vmaker". You will see a list of download options. Vmaker is available as a Windows app, Mac app, Chrome extension, and iOS app (beta).
- Pick the one that fits your device.
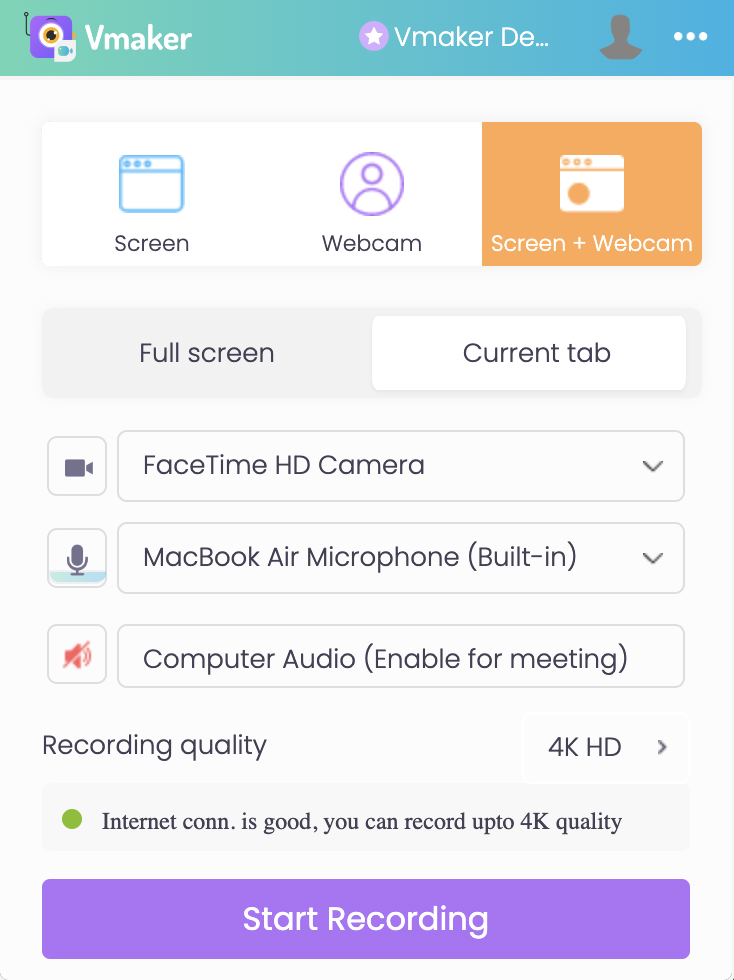
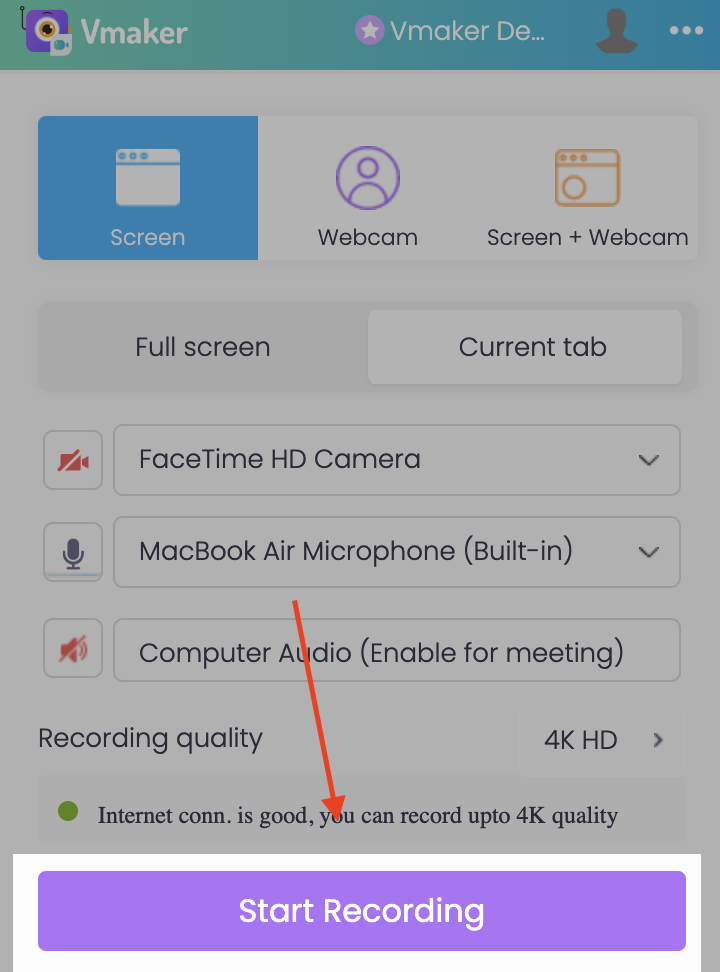
Step 2: Pick screen + webcam mode
- Open Vmaker on your system. A small pop-up will appear.
- Pick the screen + webcam recording option.
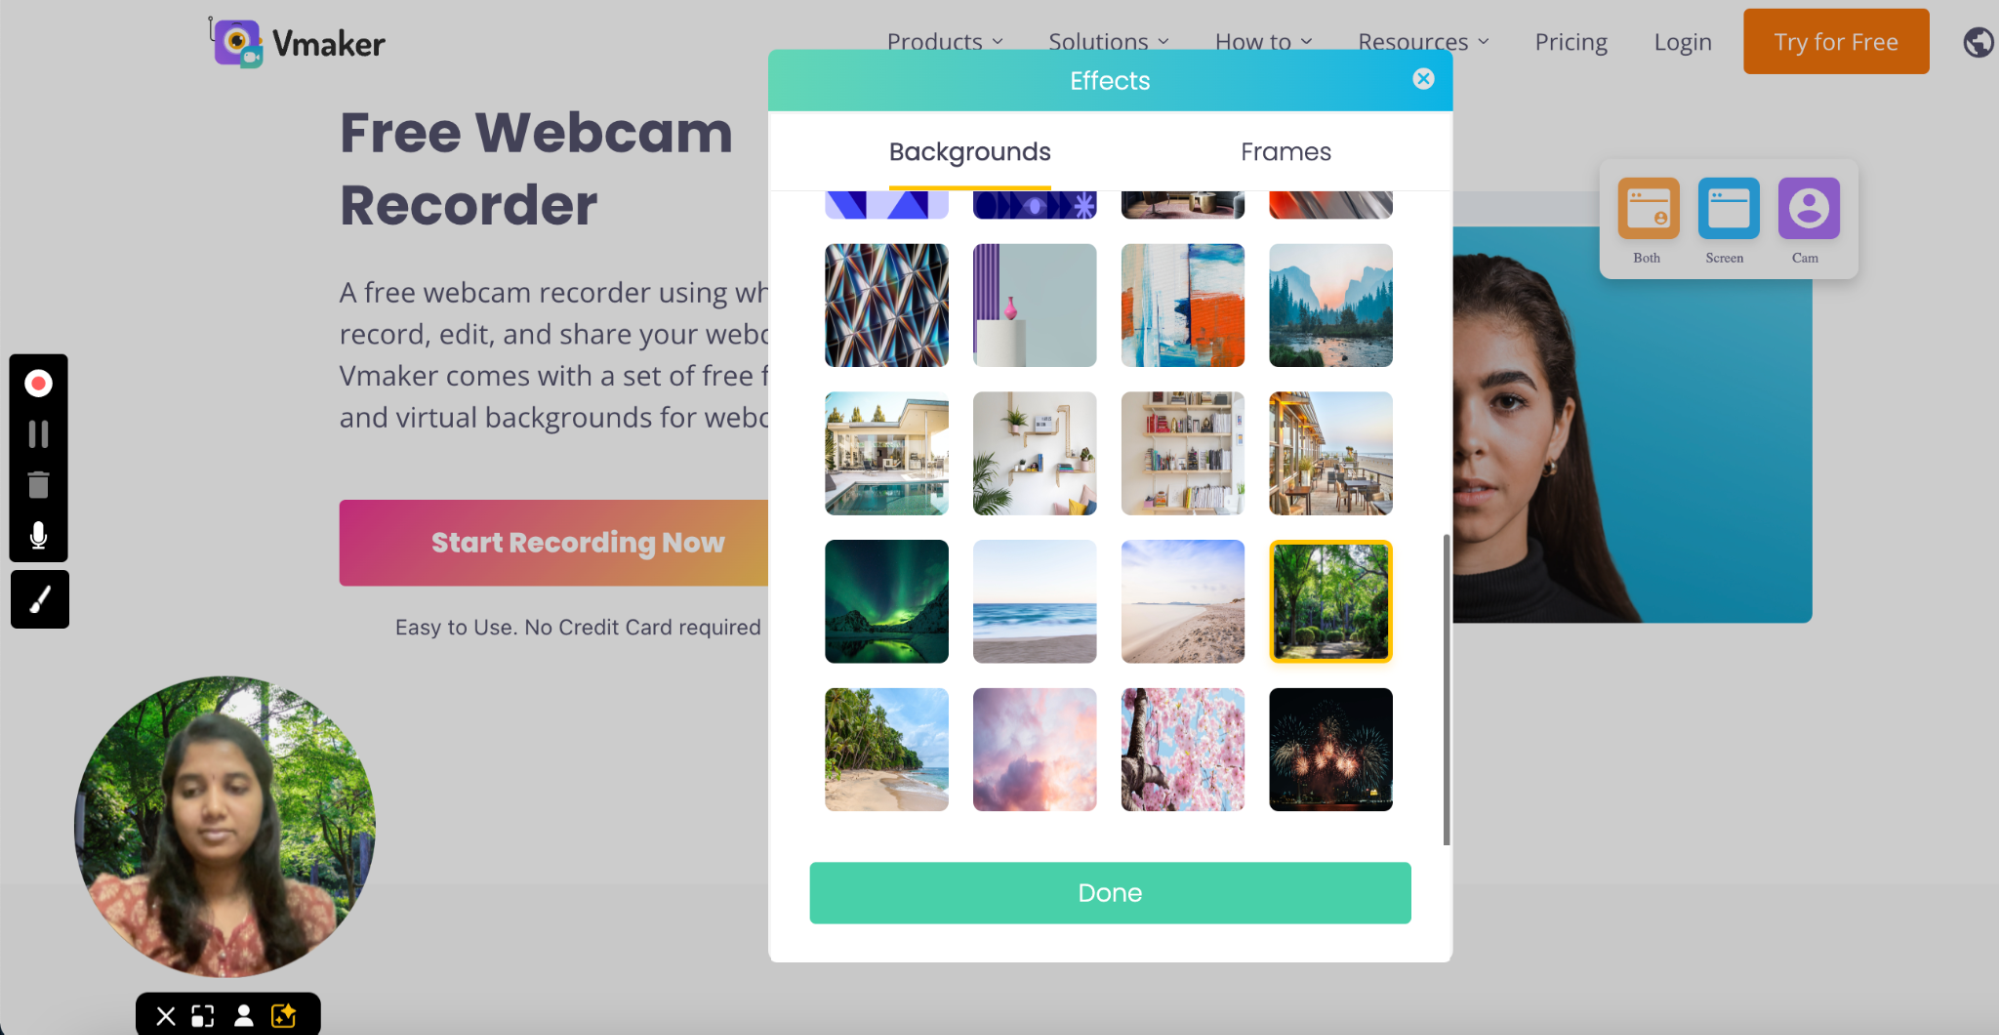
Step 3: Open the virtual background tool
- Click the virtual background icon below your webcam bubble. The AI virtual background tool will open up.

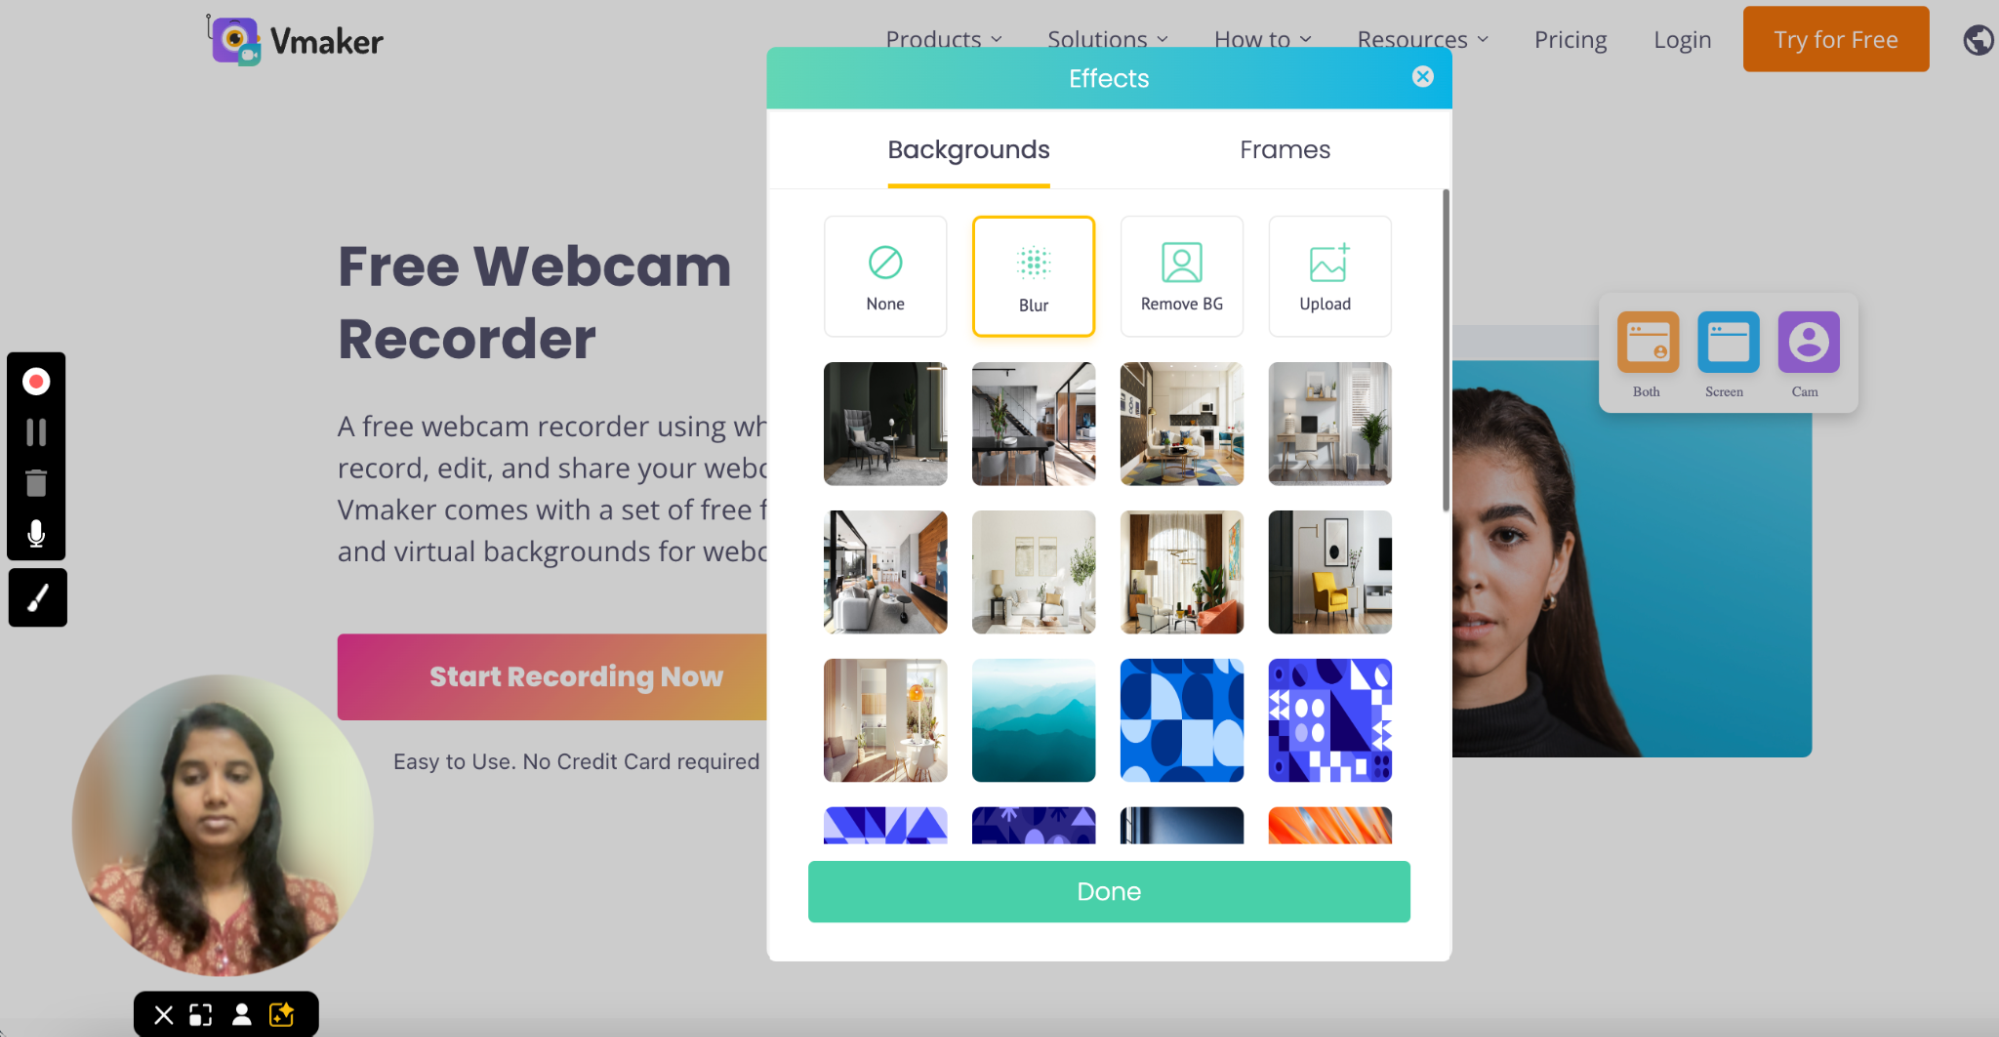
Step 4: Remove, blur, change, or upload your background
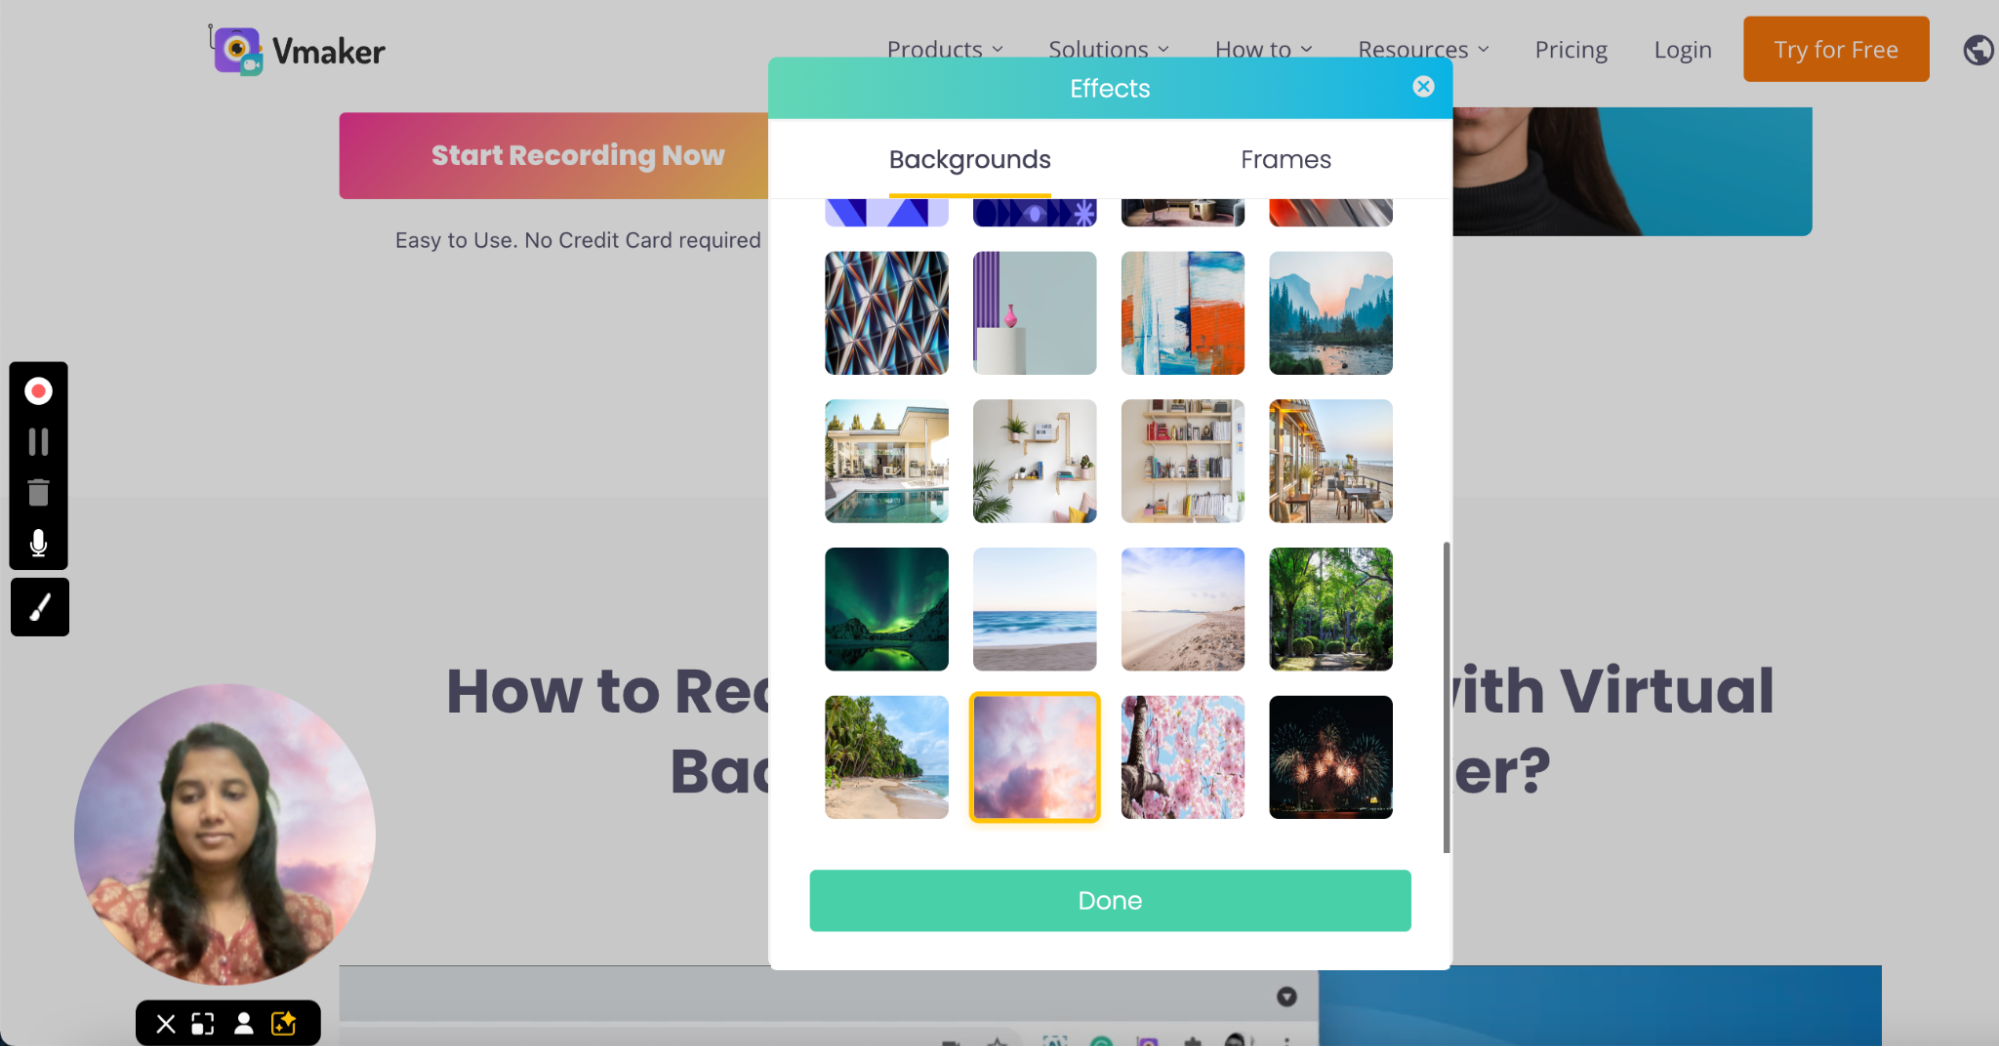
- A pop-up will show up with a few options.
- Pick any of the ready-made virtual backgrounds.
- Want to remove your background? Click "Remove Background".
- Want to blur your background? Click "Blur".
- Want to use your own image? Click "Upload" and pick the image from your device.
- Once your background is set, you can start recording.
- Click "Start Recording" in the pop-up. Recording begins.
- To stop, click the red dock icon at the left edge of your screen.
- You can now share the video on Facebook, Twitter, LinkedIn, YouTube, and more.


Step 5: Record and share


That's it.
You can now turn on your webcam and try a fresh background every day.
Bonus tip: Edit your recording in the Vmaker AI video editor for free.
7 reasons to add a virtual background to your videos
Here are seven reasons you should not skip a virtual background.
1. It builds brand recognition
Adding your brand image to your webinars, live streams, and tutorials helps people spot your brand fast.
A clear brand background lets you show your message before you even speak. Add your colours, logo, and tagline. Once in a while, drop in a line about a key product or service.
Tip: Use a logo design tool or hire a designer if you don't have one yet.
2. It hides a messy room
Recording at home is hard. Setting up a clean office takes time. A virtual background fixes this in one click.
Just turn on the virtual background and start recording. Your room does not have to be perfect.
3. It keeps you looking professional
Many of us now work from cafés, hotels, and even beaches. But you still need to look professional when you record a meeting, webinar, or podcast.
A virtual background keeps the focus on you. You can also snap a photo of your office and use that as your background. Vmaker lets you upload your own image, so the look stays consistent.
4. It lets you stand out
You don't have to stop at a logo. Add product shots, GIFs, or a short brand message. Make it fun if your brand voice is fun. Make it sharp if your brand voice is sharp.
5. It gives you privacy
With a virtual background, you don't have to worry about kids or family walking behind you.
It hides anything that moves in the back. You can record in peace.
6. It keeps team videos uniform
Managers can use this too.
Ask every team member to use the same brand background in calls. The team looks polished and feels more focused on the talk.
Tips to get the most out of virtual backgrounds
Here are a few extra tips.
1. Get your lighting right
Lighting matters. Pick a spot that is well lit.
Don't sit with your back to a window. The light from behind makes your face look dark.
If your room is dim, use a small ring light or desk lamp.
2. Don't move too much
Sudden movement breaks the virtual background. You will see a halo or flicker around your edges.
Stay still. Place your laptop on a fixed surface and try not to shift around.
3. Use the right resolution
Match your background image to the screen ratio of your video tool. A wrong ratio looks stretched or cropped.
Pixel quality matters too. A low-res image looks grainy on a big screen.
Save your image as an RGB JPG. That format keeps the colour and quality clean.
4. Use a good webcam
Most laptop webcams are not great. For decent video, you need at least 720p.
If you record often, get a 1080p webcam. They are cheap now.
You now have everything you need to change your video background. Go ahead and start recording.
Recommended Reads
How to Record Gameplay on PS4 with Webcam and Voice Narration
The Ultimate Guide to Webcam Recording Software
Tips and Tricks for More Professional-Looking Videos
10 Best Free Webcam Software for Windows 7, 8, 10 & 11
How to Use an iPhone as a Webcam on a Mac
How to Record Screen and Yourself on Windows