Contents
How to Change Your Webcam Background With AI-generated Virtual Background Images?
7 Reasons Why You Shouldn't Miss Adding a Virtual Background To Your Videos
Bonus: Tips & Tricks to Make The Best Use of Virtual Background Feature
Replace Webcam Background with AI-Powered Virtual Background Changer
Looking for ways to remove or replace your webcam background without using a green screen?
You’ve come to the right place!
In today's post, we'll show you how to blur, remove, replace, or change your webcam background using a user-friendly screen recorder called Vmaker. Since most of the built-in desktop webcam applications don’t provide virtual background features, you can try using a user-friendly screen recorder to change and remove your webcam backgrounds.
Without any further ado, let’s see how it’s done.
How to Change Your Webcam Background With AI-generated Virtual Background Images?
Prefer reading? Follow these simple steps!
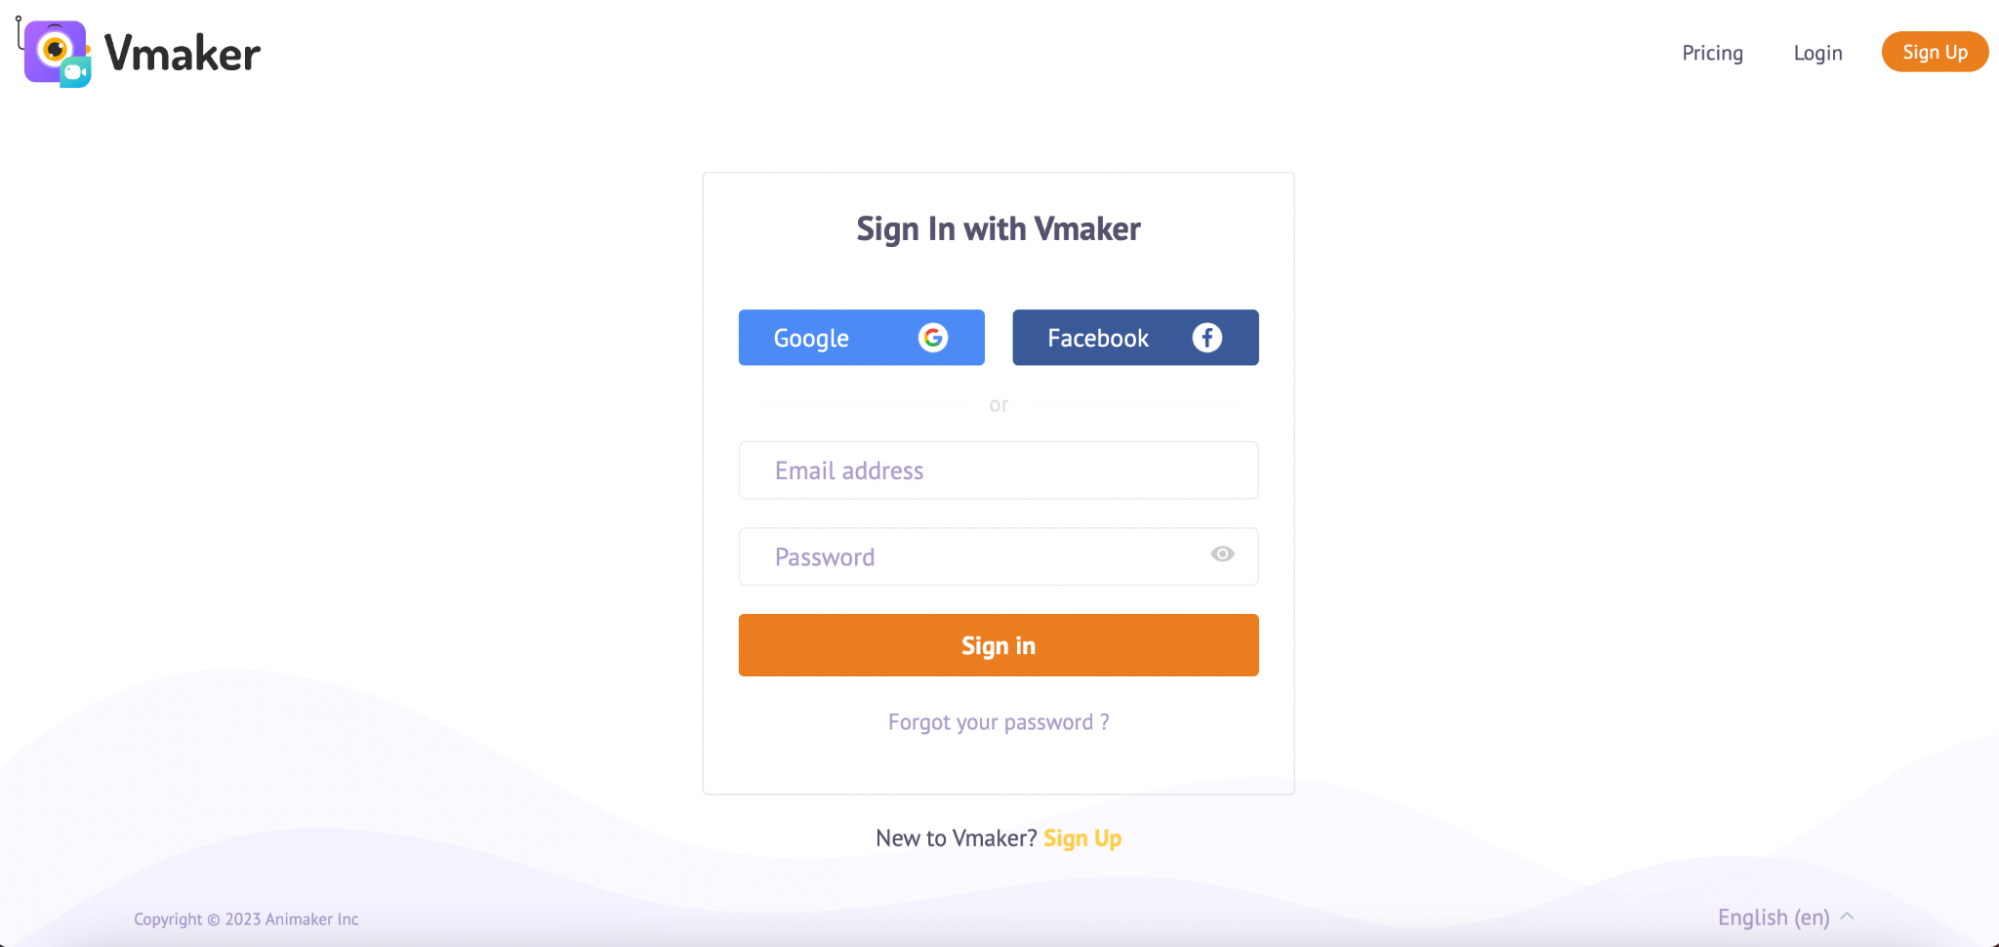
Step 1: Sign up & download Vmaker
- Head over to Vmaker's home page and sign up for Vmaker.
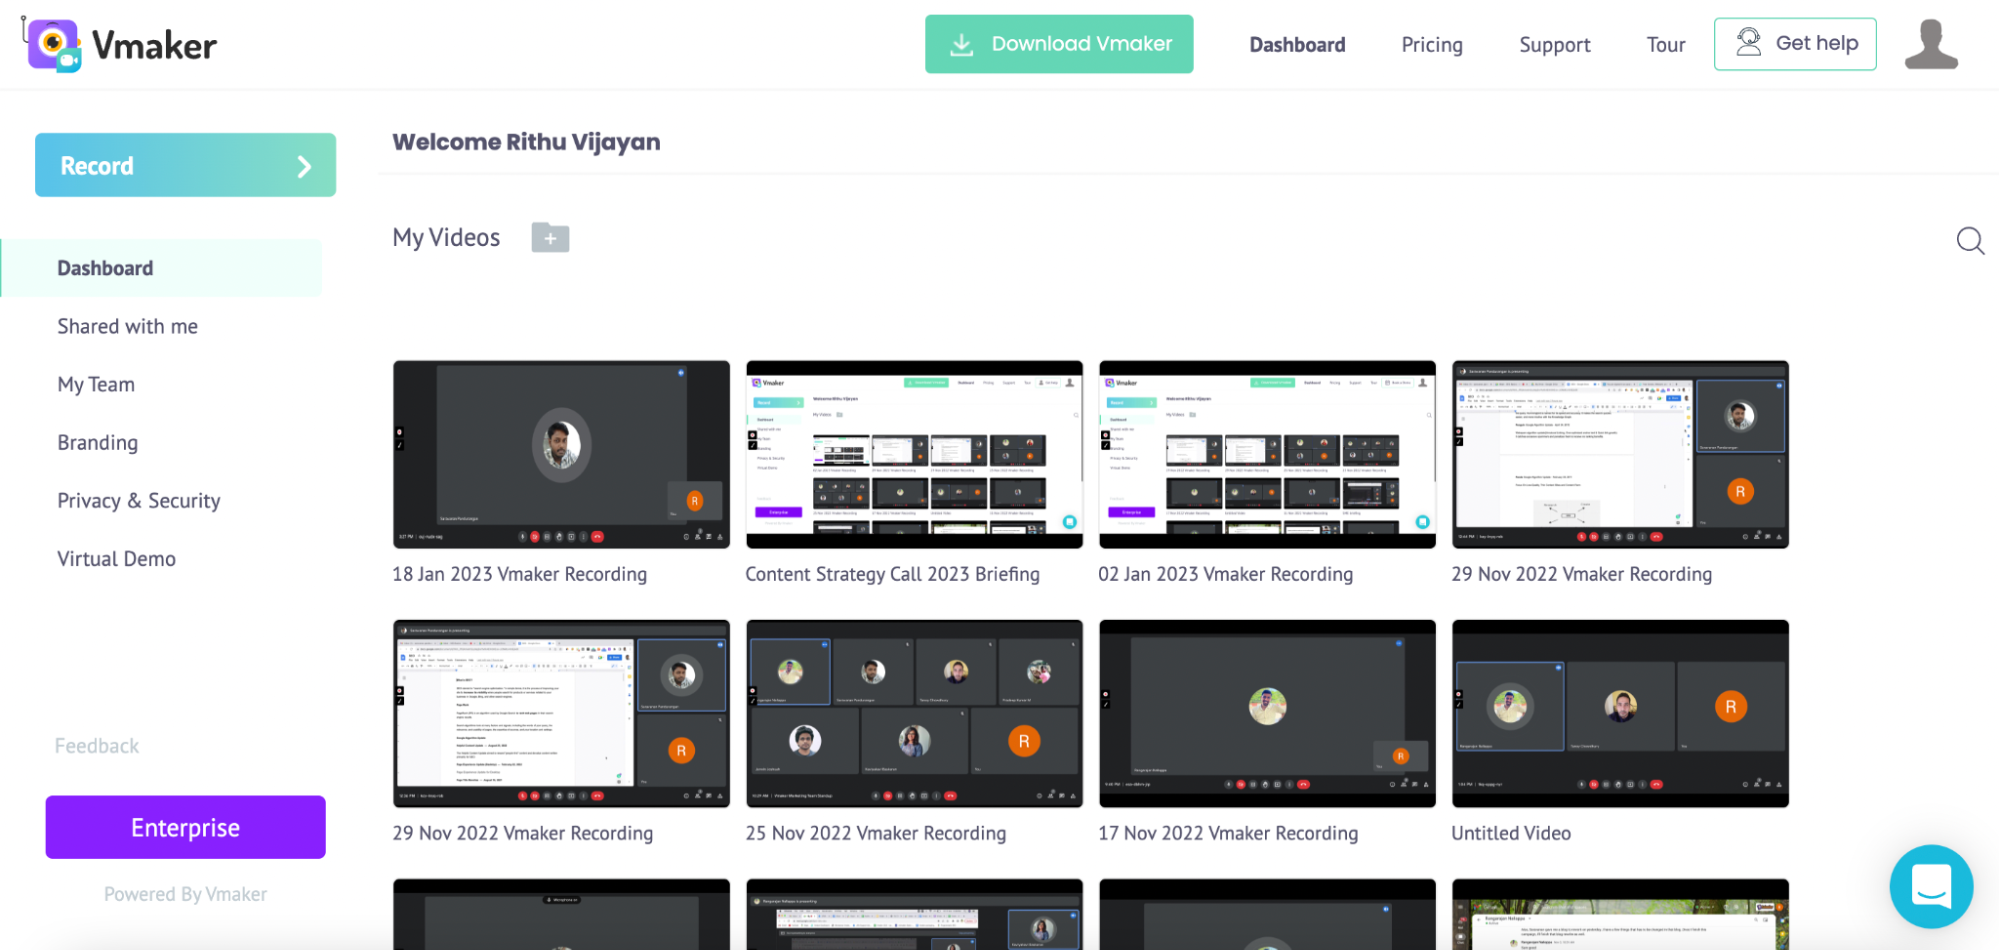
- As soon as you sign up, you'd be directed to Vmaker's dashboard.
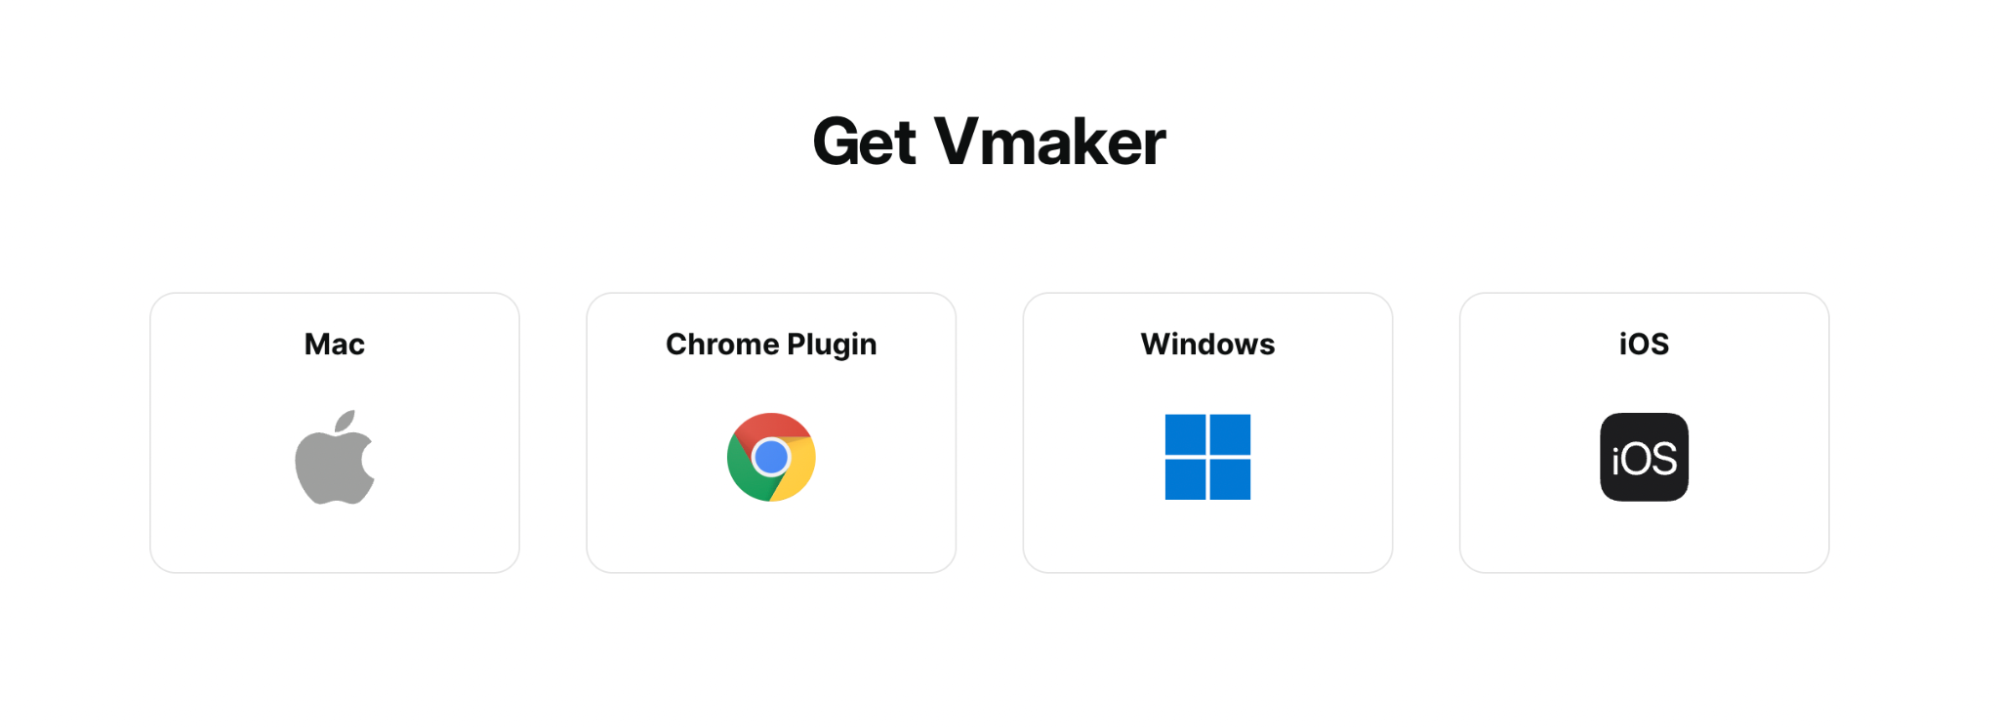
- Click on the ‘Download Vmaker’ option. You will be presented with options to download the application. Currently, Vmaker is available as a Windows application, Mac application, Chrome plug-in, and iOS application (beta version).
- Download the application that's compatible with your device.
Step 2: Select screen + webcam option
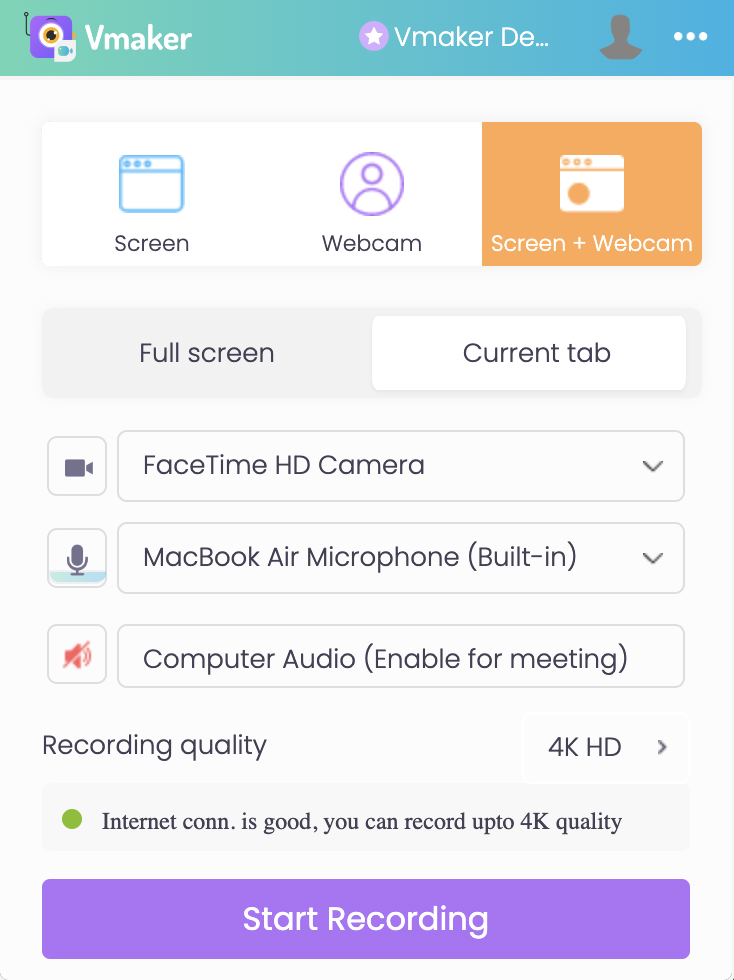
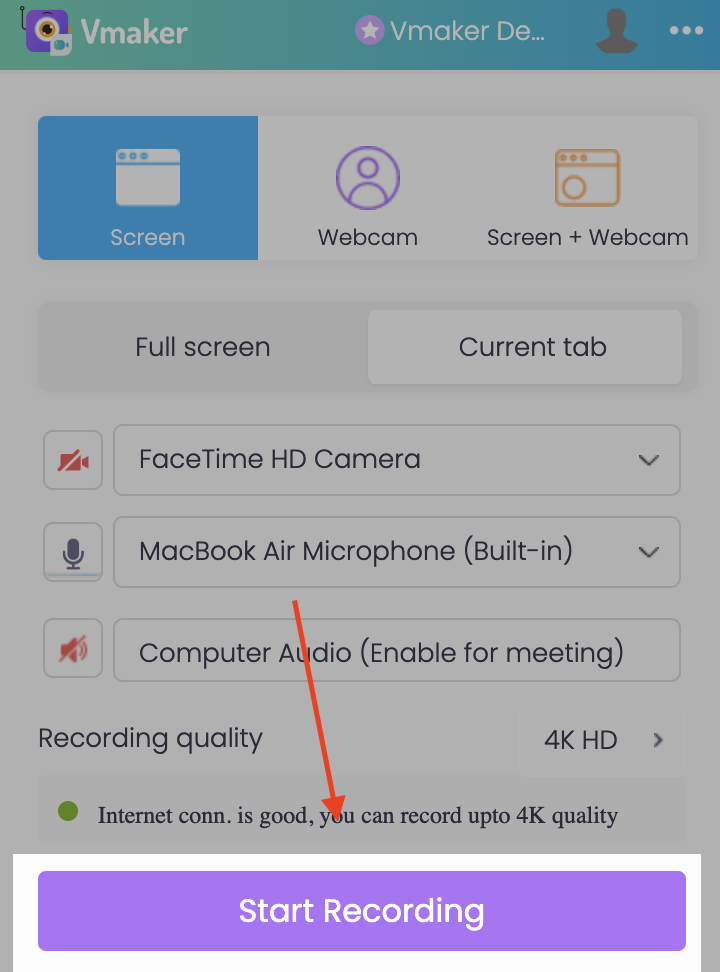
- Launch Vmaker on your system. A small pop-up box will open up.
- Select the screen + webcam recording option.
Step 3: Click on the virtual background feature
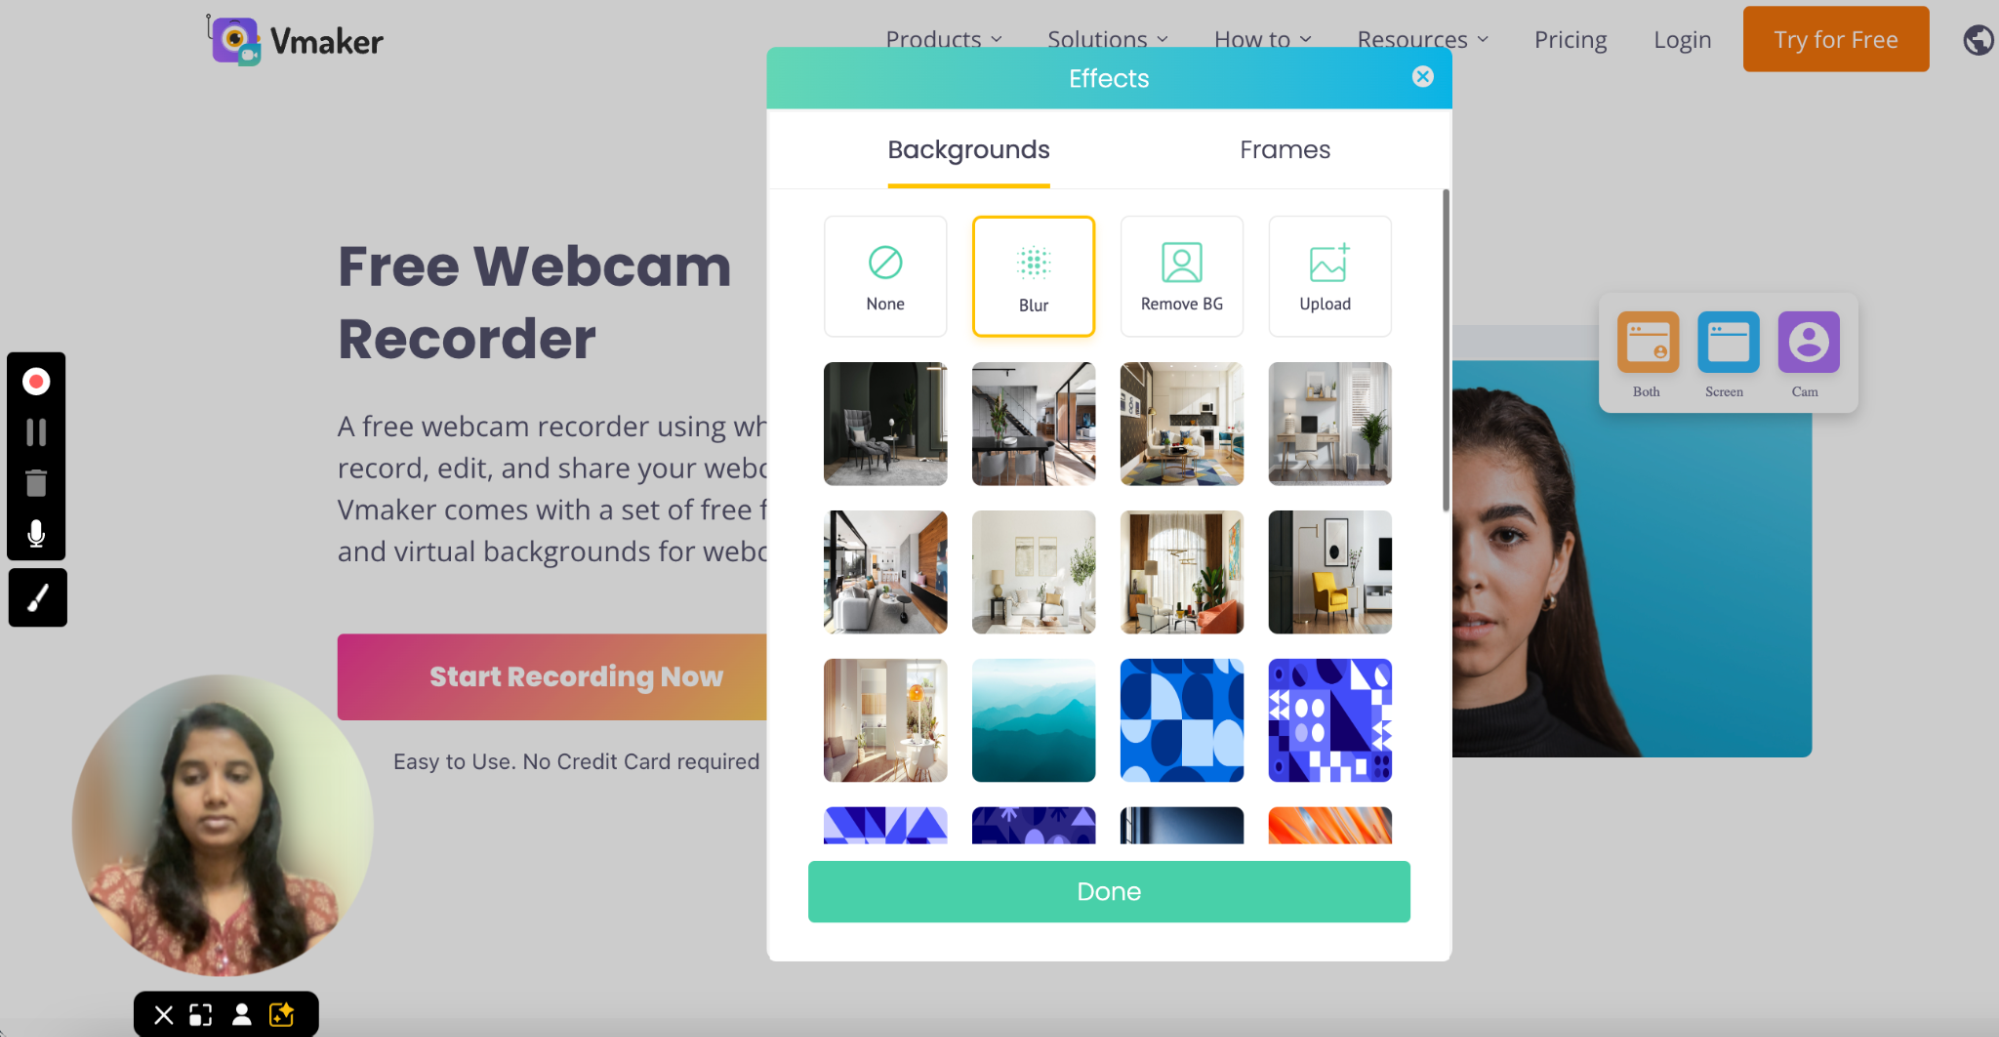
- Now, you can make use of the AI-powered virtual background feature to hide your personal space. Click on the virtual background icon below your webcam bubble.

Step 4: Remove, blur, change, or upload your own background image
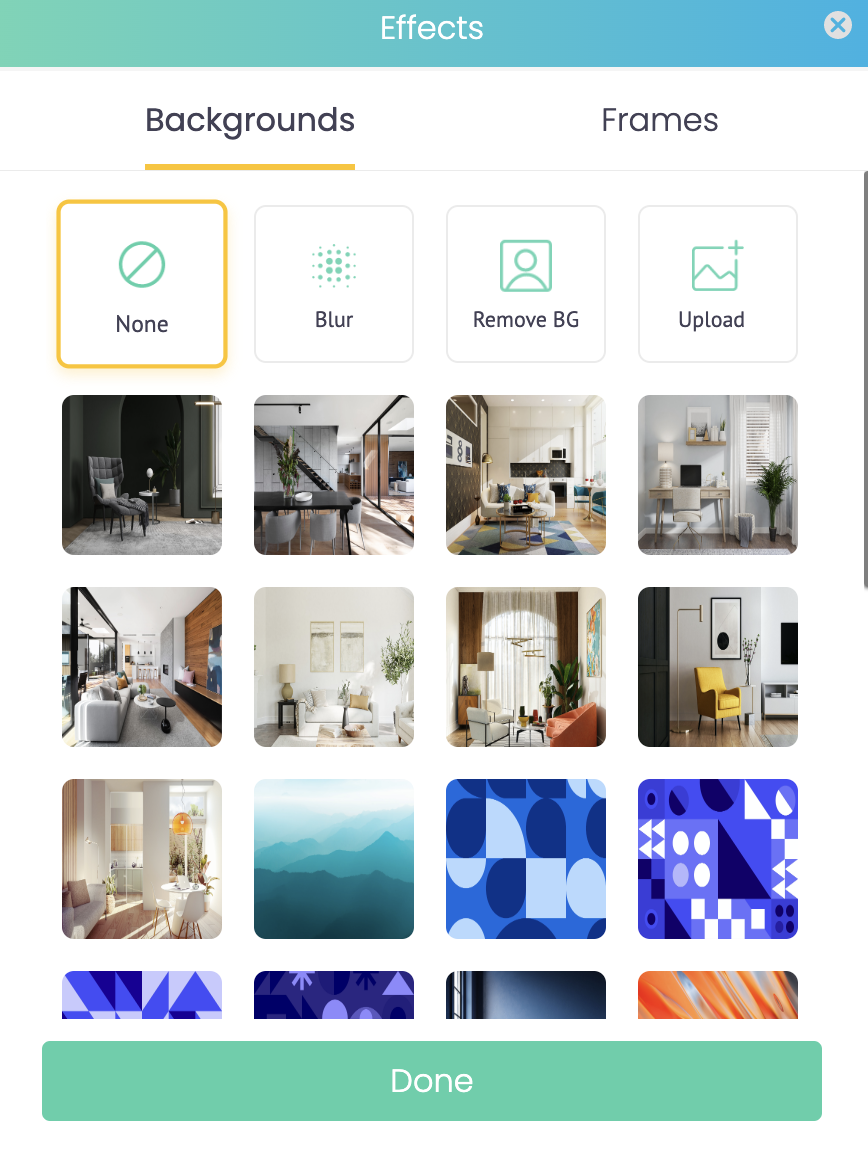
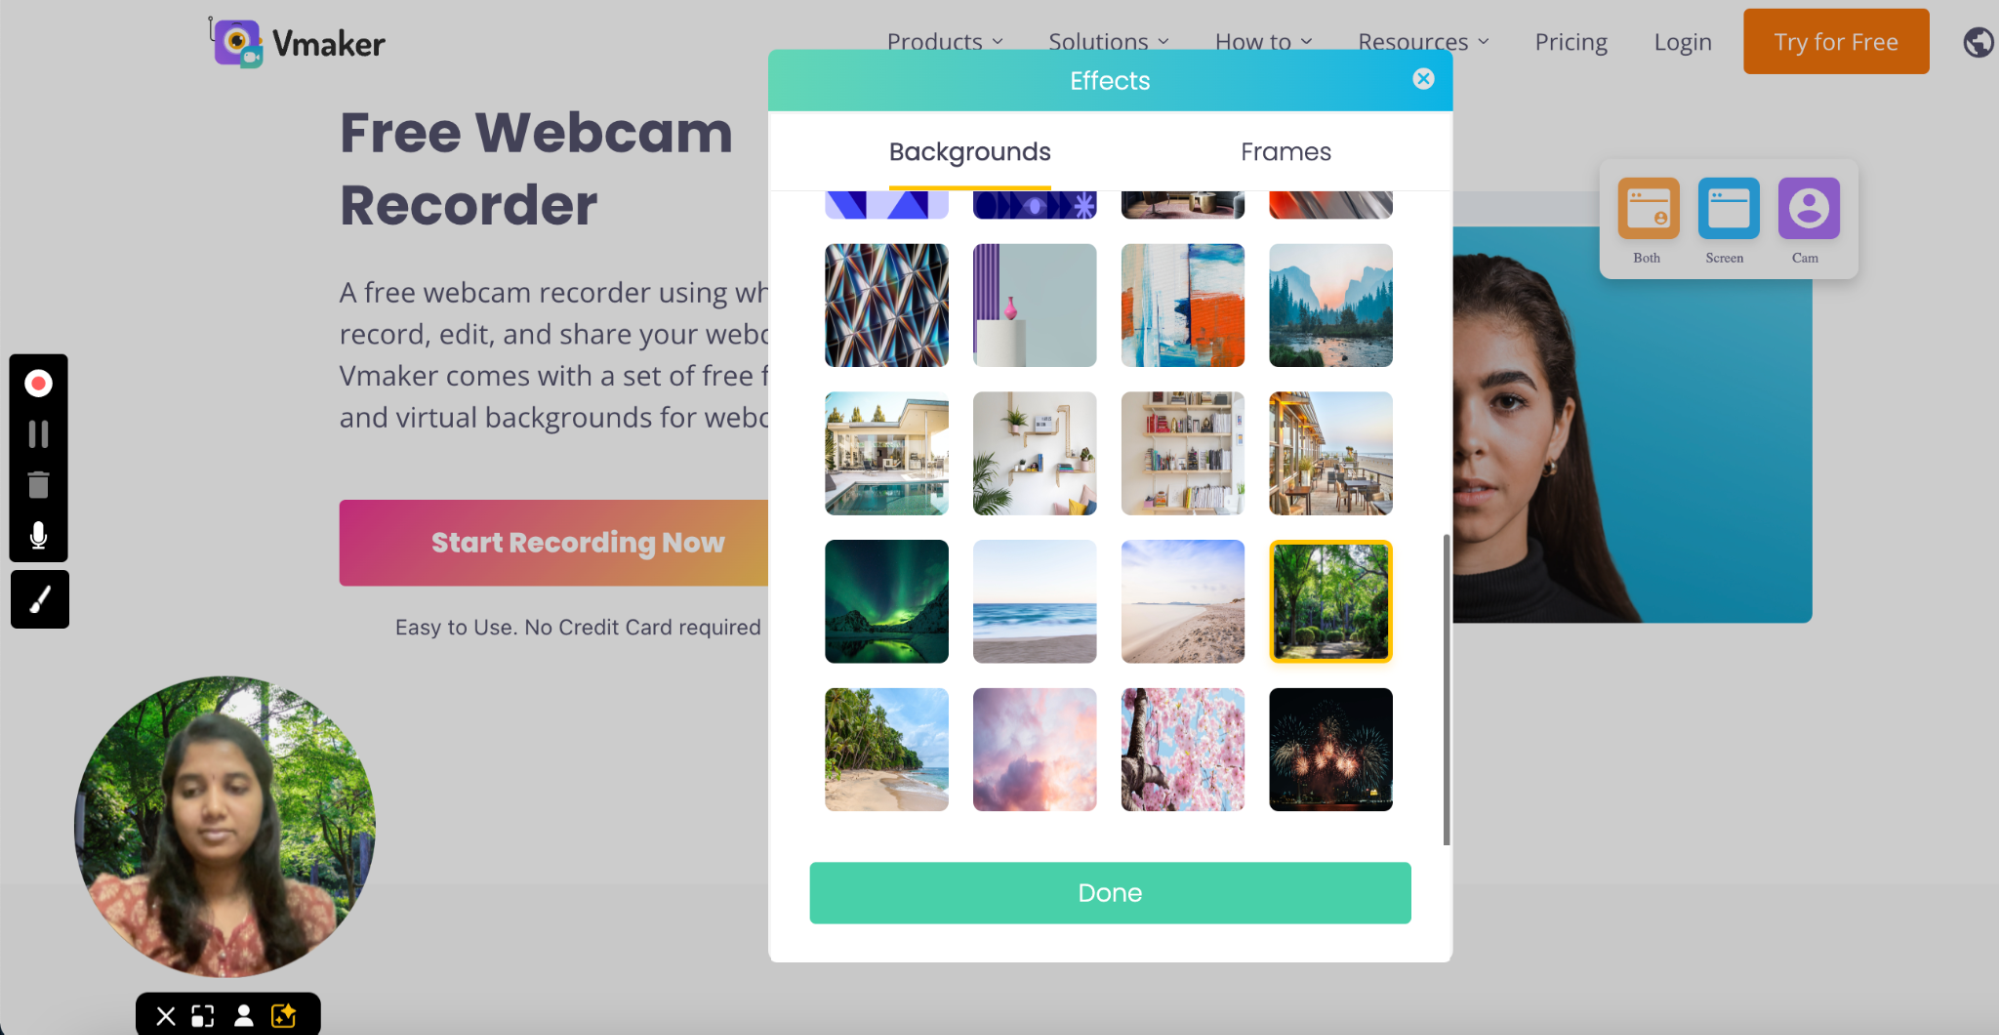
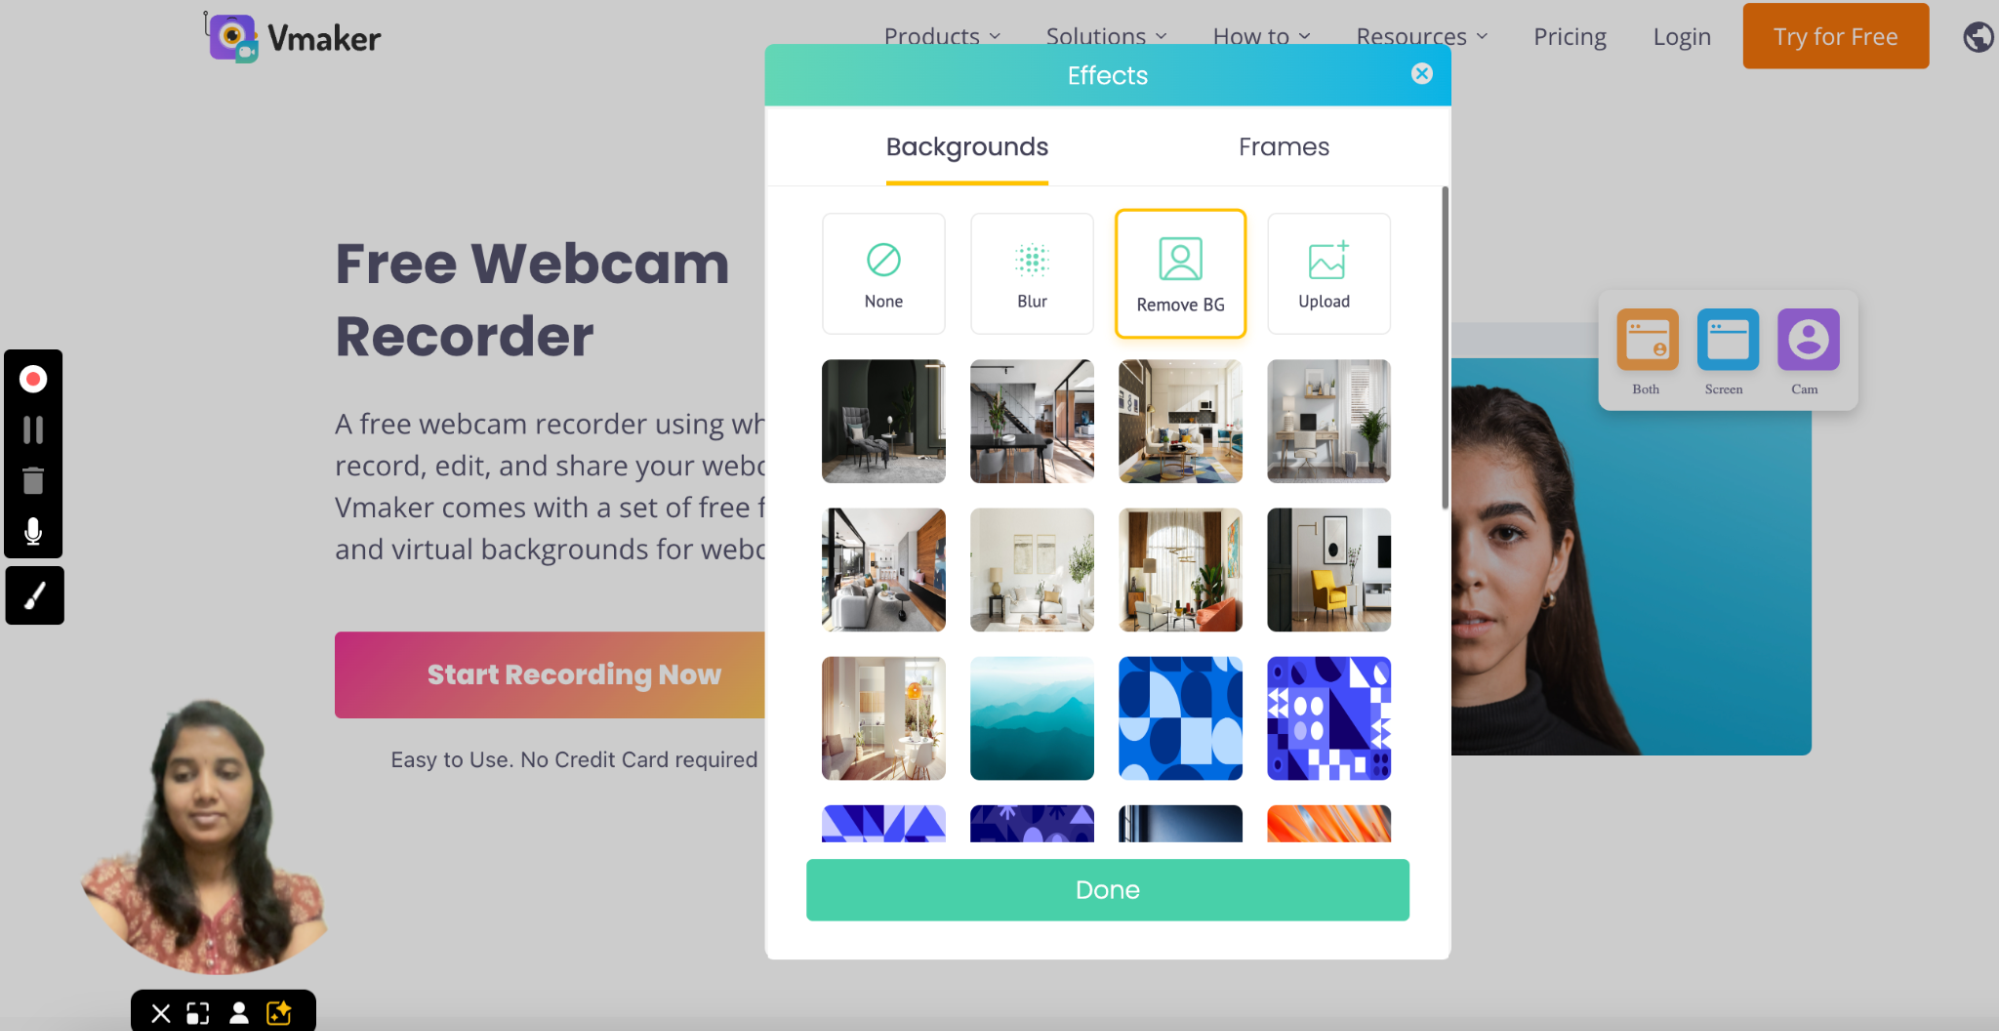
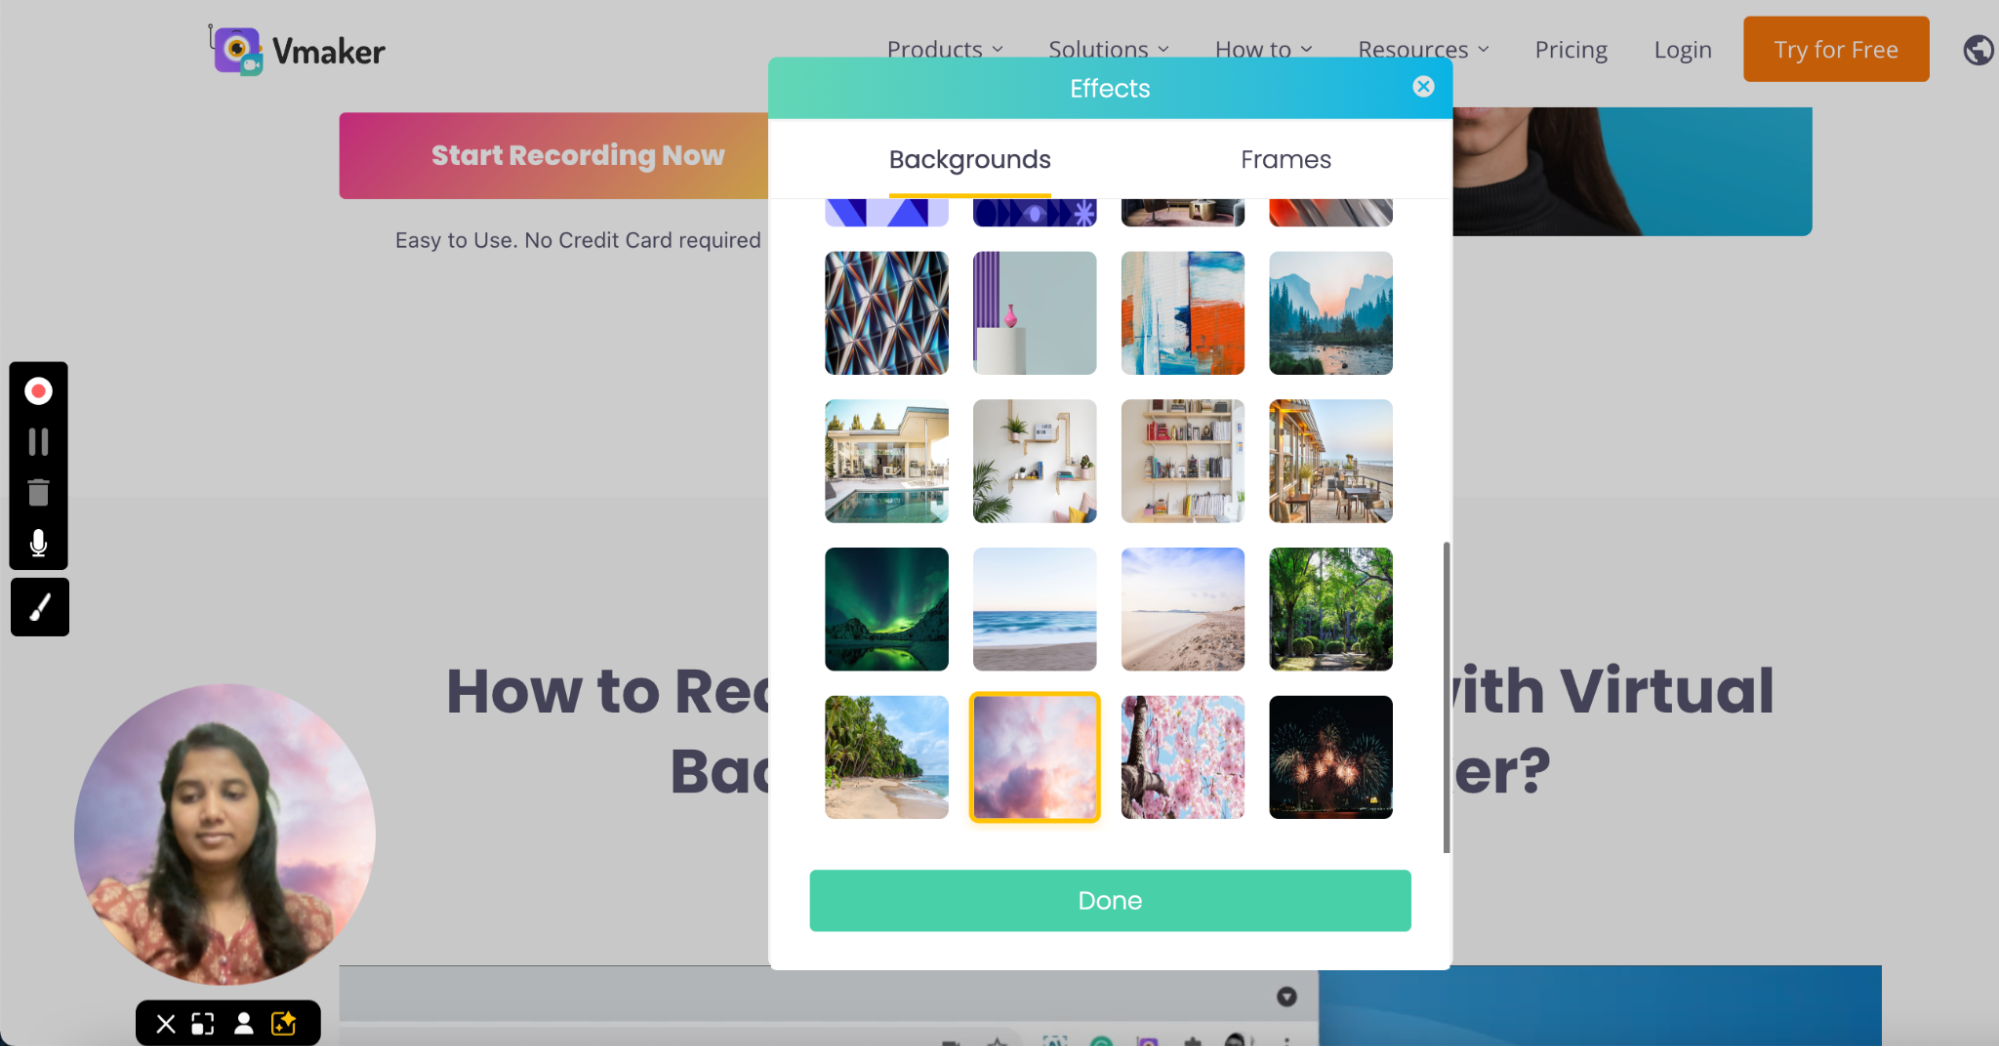
- As soon as you click on the virtual background icon, a pop-up box with the following options will appear.
- Now, you can select anyone one of the virtual background images available.
- To remove your webcam background completely, select the 'Remove Background' option.
- To blur your webcam background, select the 'Blur' option.
- To add your own image from your device, click on the upload option, and select the image you'd like to add as your webcam background.
- Now that you've changed your webcam background successfully, you can start recording your video.
- Just click on the Start Recording option in the pop-up box, and the recording will start.
- Once you're done with the recording, you can stop the recording by clicking on the red dock icon on the left corner of your screen.
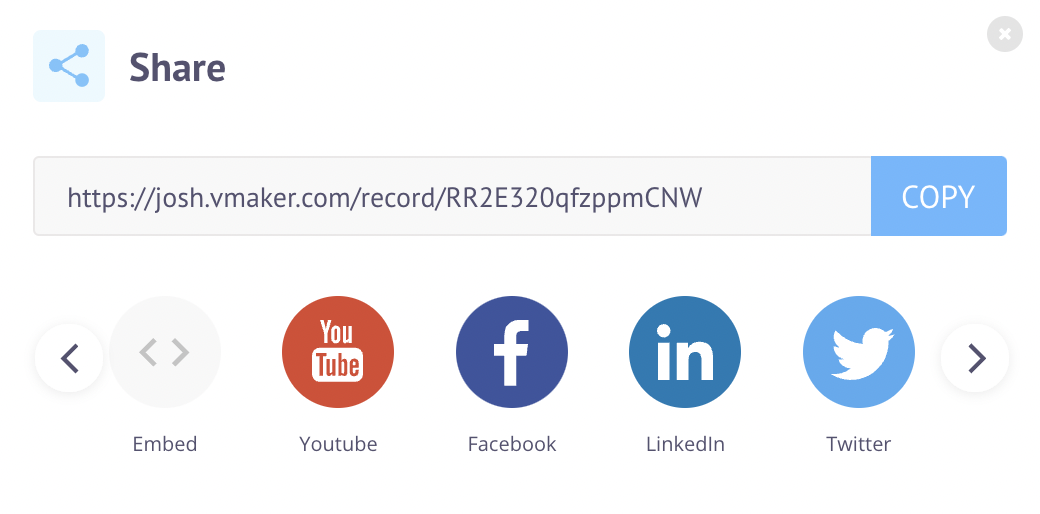
- Now, you can share the video with others on social media platforms like Facebook, Twitter, LinkedIn, YouTube, etc.
Step 5: Record & Share

That's it. You're done!
Now, you can easily turn your webcam on, and have fun experimenting with different virtual backgrounds every day.
Bonus Tip: You can edit your recording using the Vmaker AI video editor for free.

7 Reasons Why You Shouldn't Miss Adding a Virtual Background To Your Videos
Here's a list of the top 7 reasons why you shouldn’t miss adding a virtual background to your videos.
1. It Builds Brand Recognition
Adding your brand image to your webinars, live streams, and tutorials helps people identify your brand easily.
With a clearly designed brand background, you can easily present your brand's message to your audience. By adding your brand colours, logo, and motto to your virtual background image, you can easily register your brand in people's memory. Occasionally, you can also add a few of your premium services to the image.
Tip: Make sure to create a logo with special tools or hire a designer to help you out with all of these tasks.
2. It Covers Up Your Messy Personal Space
We all know how hard it is to record videos while working remotely. Setting up a proper home office space isn't easy. It involves a lot of time and energy. This is where a virtual background set-up comes to the rescue.
You can simply start recording your video by enabling the virtual background feature. You don't have to worry about how your room looks anymore!
3. It Helps Maintain Professionalism
We all have adapted to different working styles post the pandemic. We've started to work in cafés, hotels, beaches, and so many other locations. However, it's still important to maintain a professional image while we record meetings, webinars, and podcasts.
With a virtual background, you'd be able to look professional and presentable. You can even take a casual photo of your office layout and add that image as the virtual background for your videos. When you record videos using a screen recording software like Vmaker, you'd be able to add your own images as the virtual background for your videos.
4. It Creates a Unique Presence Through Customization
When you're able to add your own brand image as your virtual background, you have the liberty to personalize your background to your own preferences. Instead of just sticking to your brand's logo and colour codes, you can try adding relevant product images, gifs, brand messages, etc. These images and gifs can also be funny or promotional.
5. It Provides Privacy
When you have a virtual background feature, you needn't worry about your kids or family interrupting your space.
The virtual background feature will help you filter out unnecessary movements in your background and allow you to record your videos peacefully without any disturbances.
6. It Helps Maintain Uniformity
Employers can also make use of the virtual background feature.
They can easily add a professional touch to their online meetings by requesting all their employees to use the same brand image as their virtual backgrounds. This, not only maintains uniformity but also helps employees stay focused during the conversations.
Bonus: Tips & Tricks to Make The Best Use of Virtual Background Feature
Have are some additional tips to help you make the best use of the virtual background feature.
1. Take Care of Your Lighting
It's very important to have the right amount of lighting while creating your videos. Make sure you choose a place that is well-lit.
Avoid sitting in front of windows as it blocks the natural lighting and makes the videos darker.
Additionally, you can also use external lights to give that extra lighting to your room.
2. Avoid Unnecessary Movements
Whenever your webcam senses a movement, it will affect your virtual background and create an odd halo effect on the image.
So, avoid unnecessary movements while recording a video with a virtual background. To reduce the number of unnecessary movements, you should make sure you place your laptop in a fixed place.
3. Use the Right Resolution
Using the right resolution is also crucial. Take a note of the screen ratio of your teleconferencing software and create virtual backgrounds for that particular resolution.
The quality of your image shouldn't be compromised either. When your pixel quality is too low, your background image will become granular and look unprofessional.
And, when you save the image, try saving the file in an RGB.jpg file format. This file format provides the best quality of images.
4. Use a Good Quality Webcam
We all know that most of the built-in webcams in laptops aren't good enough. To record videos of decent quality, your webcam should at least capture a resolution of 720p or higher. So, check whether your webcam captures videos at the right resolution.
But, if you're someone who records videos regularly, you can go ahead and purchase a 1080p webcam. It's becoming more common and affordable these days.
Now that you've thoroughly understood why it's important to change your video background and know how to make the best use of it, you can easily add them to your recordings and start recording your videos at ease!
Recommended Reads
How to Record Gameplay on PS4 with Webcam and Voice Narration
The Ultimate Guide to Webcam Recording Software
Tips and Tricks for more professional-looking videos using Screen & Webcam recording tool
10 Best Free Webcam Software for Windows 7, 8, 10 & 11
How to use an iPhone as a webcam on a Mac - macOS Ventura
How to Record Screen and Yourself on Windows

