Contents
How to turn your Google Slides into a video
How to add subtitles to your slide presentation video
How to Turn Google Slides into Videos with Audio and CC
Want to turn a flat Google Slides deck into a video presentation people actually watch?
You are in the right place.
This post shows you how to turn your Google Slides into a video presentation with voice-over, music, and subtitles. If you are working with a PowerPoint deck instead, try Vmaker's PPT to video tool for a one-click conversion.
Let's get into it.
How to turn your Google Slides into a video
We will use Vmaker, a simple screen recorder. It records your screen and webcam at the same time, so you can record your slides with your voice-over, save it as MP4, and upload it to YouTube.
Here is the step-by-step.
Step 1: Sign up and launch Vmaker
Sign up for Vmaker and download it. Vmaker is available for Windows, Mac, iOS (beta), and Chrome. Pick the version that fits your device.
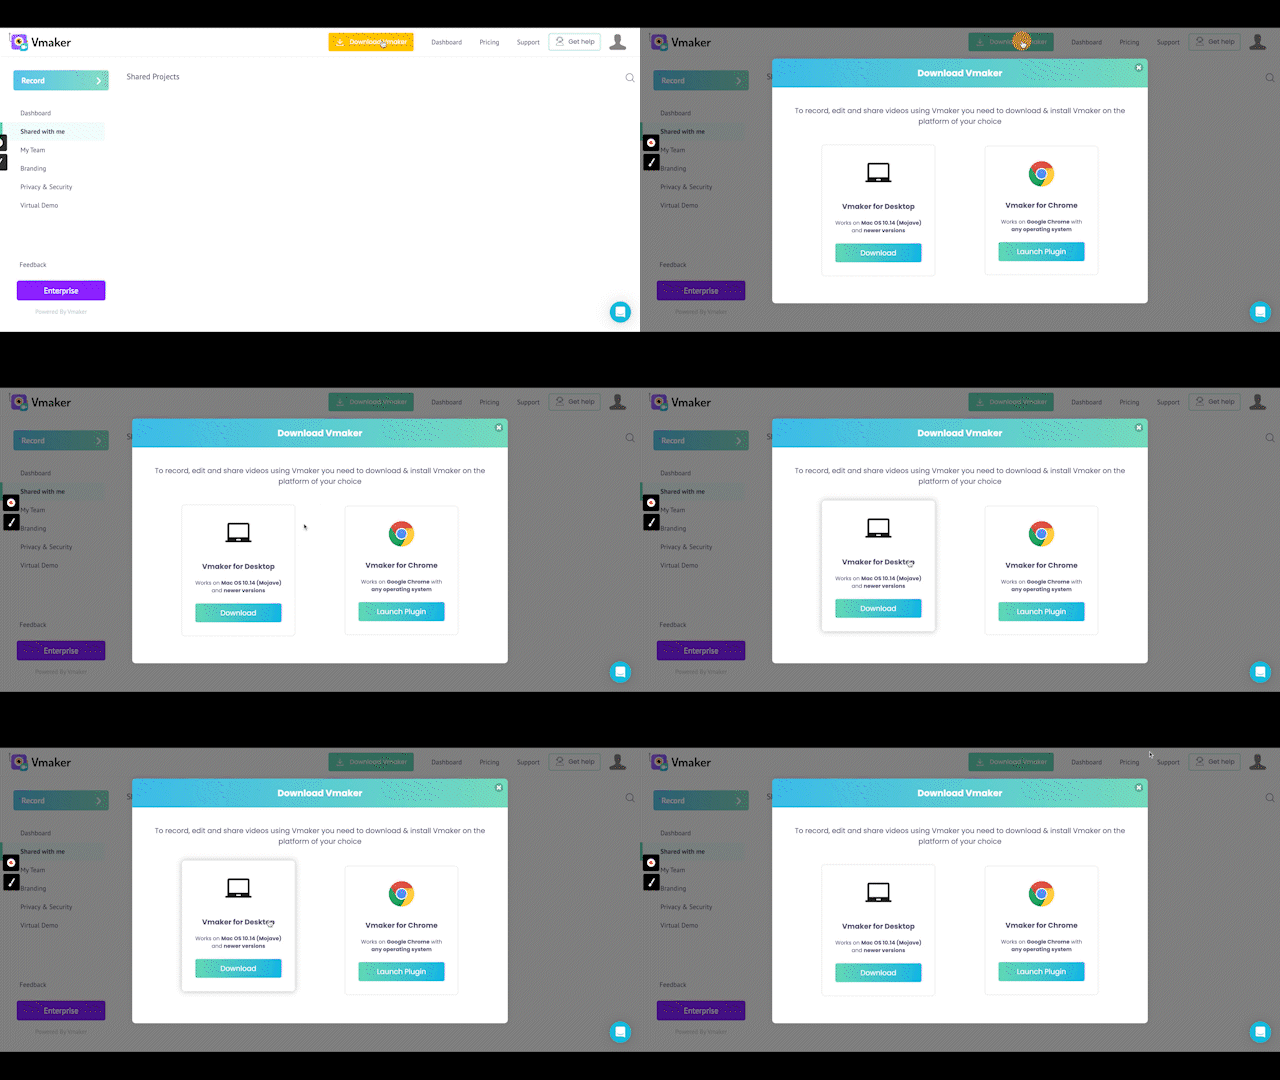
Open the app once it is installed. You will see this pop-up.
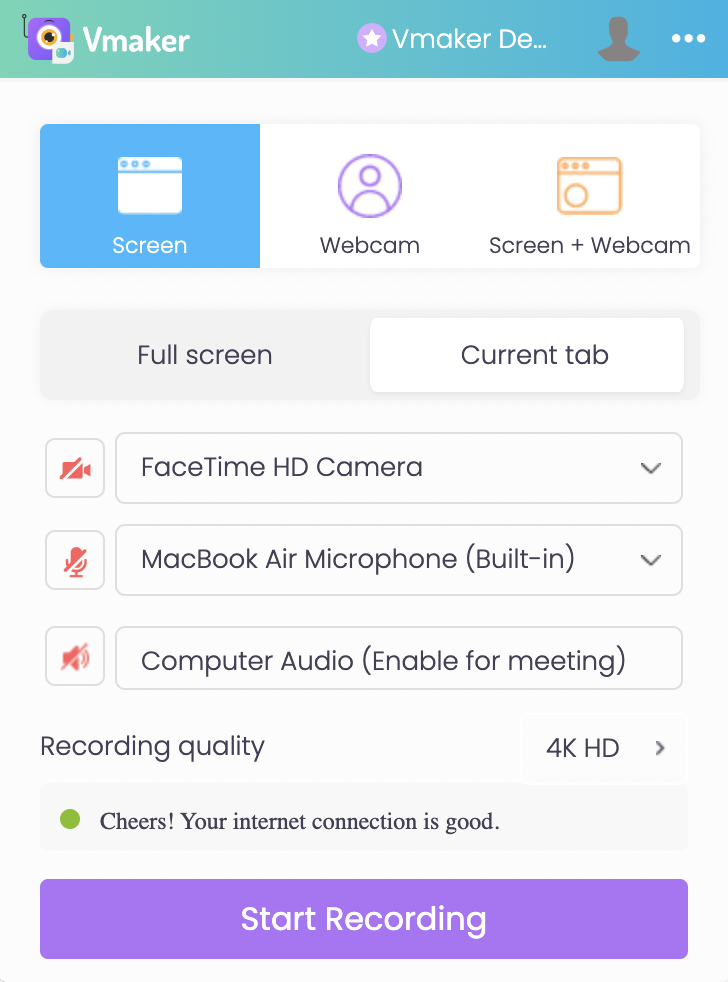
Pick your recording mode, quality, and audio inputs.
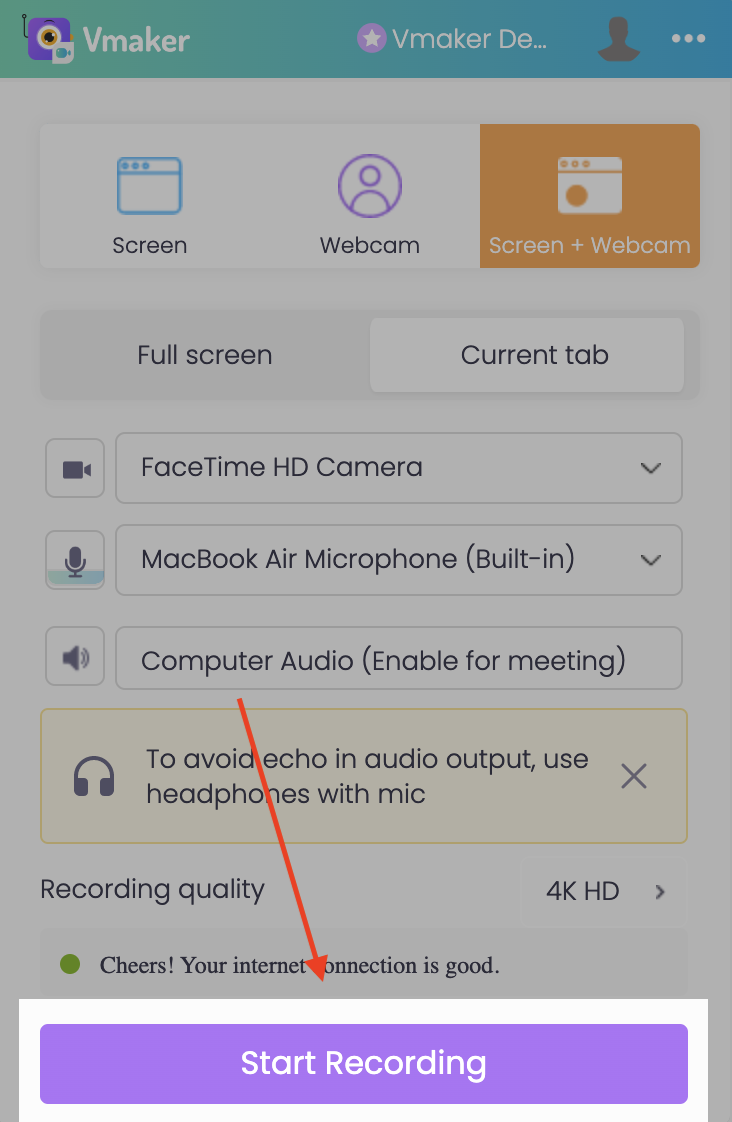
Tip: A talking head makes the video feel personal. Pick the screen + webcam mode.
Click Start Recording when you are ready. A countdown starts.
Step 2: Record your slides in slideshow mode
Open your slide deck and run it as a slideshow while you talk.
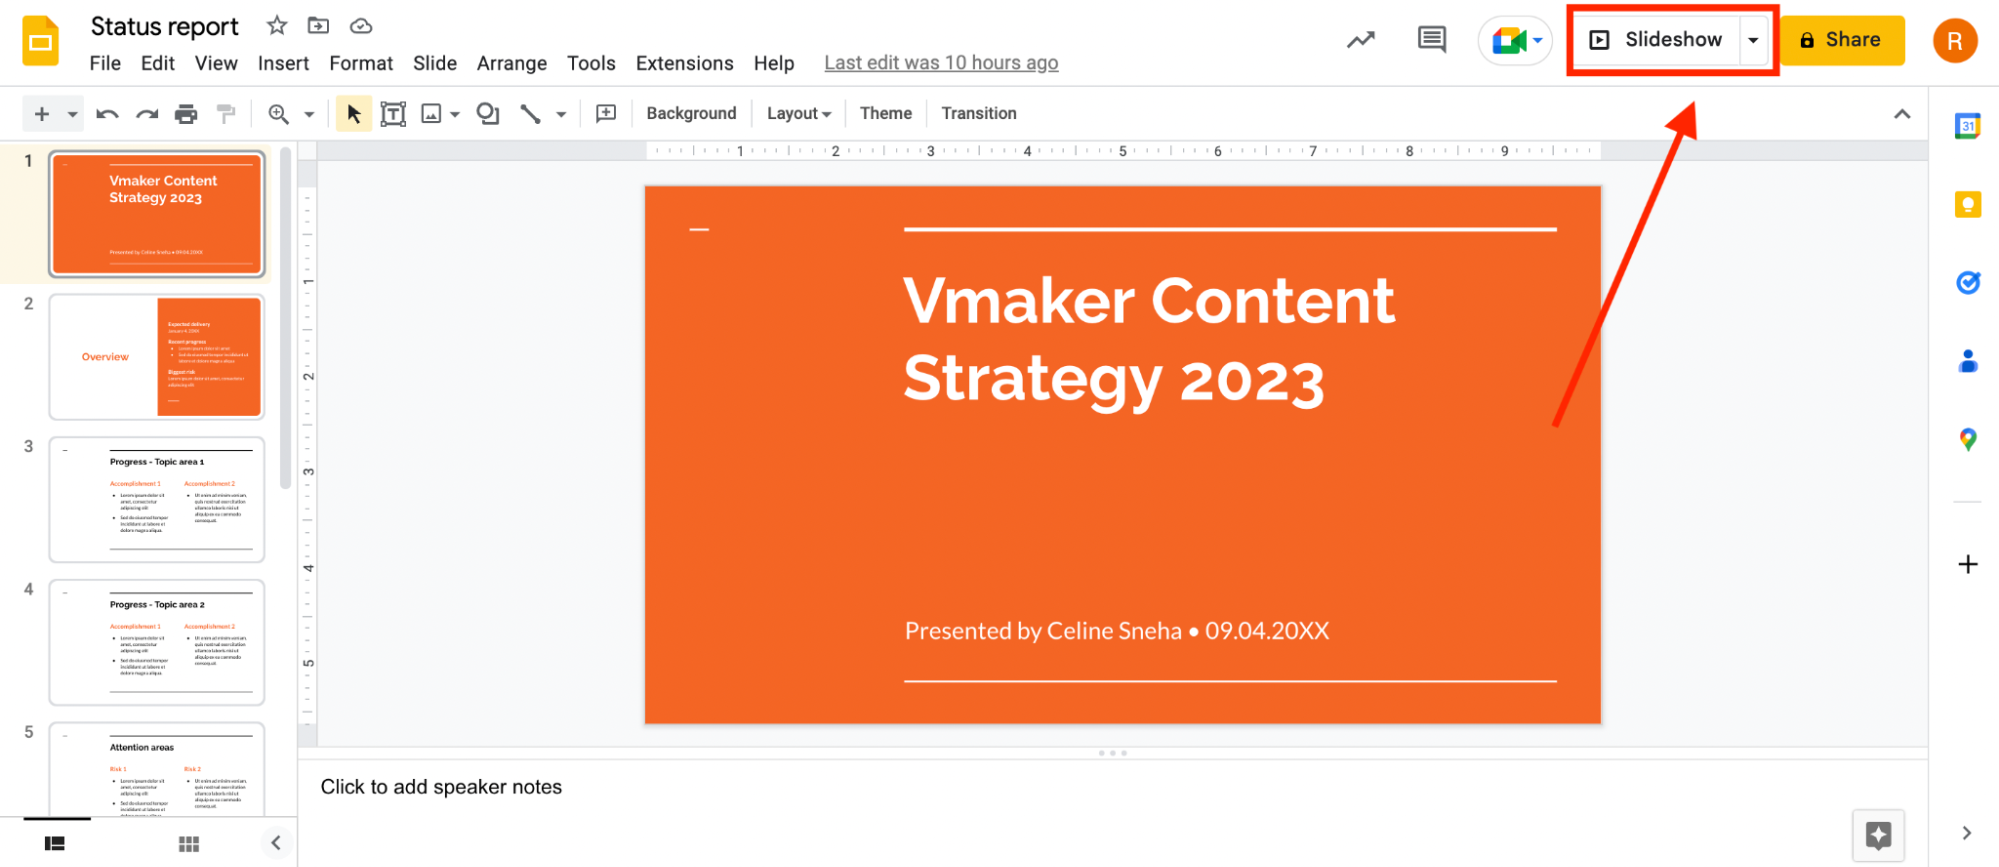
For Google Slides, click Slideshow in the top right.
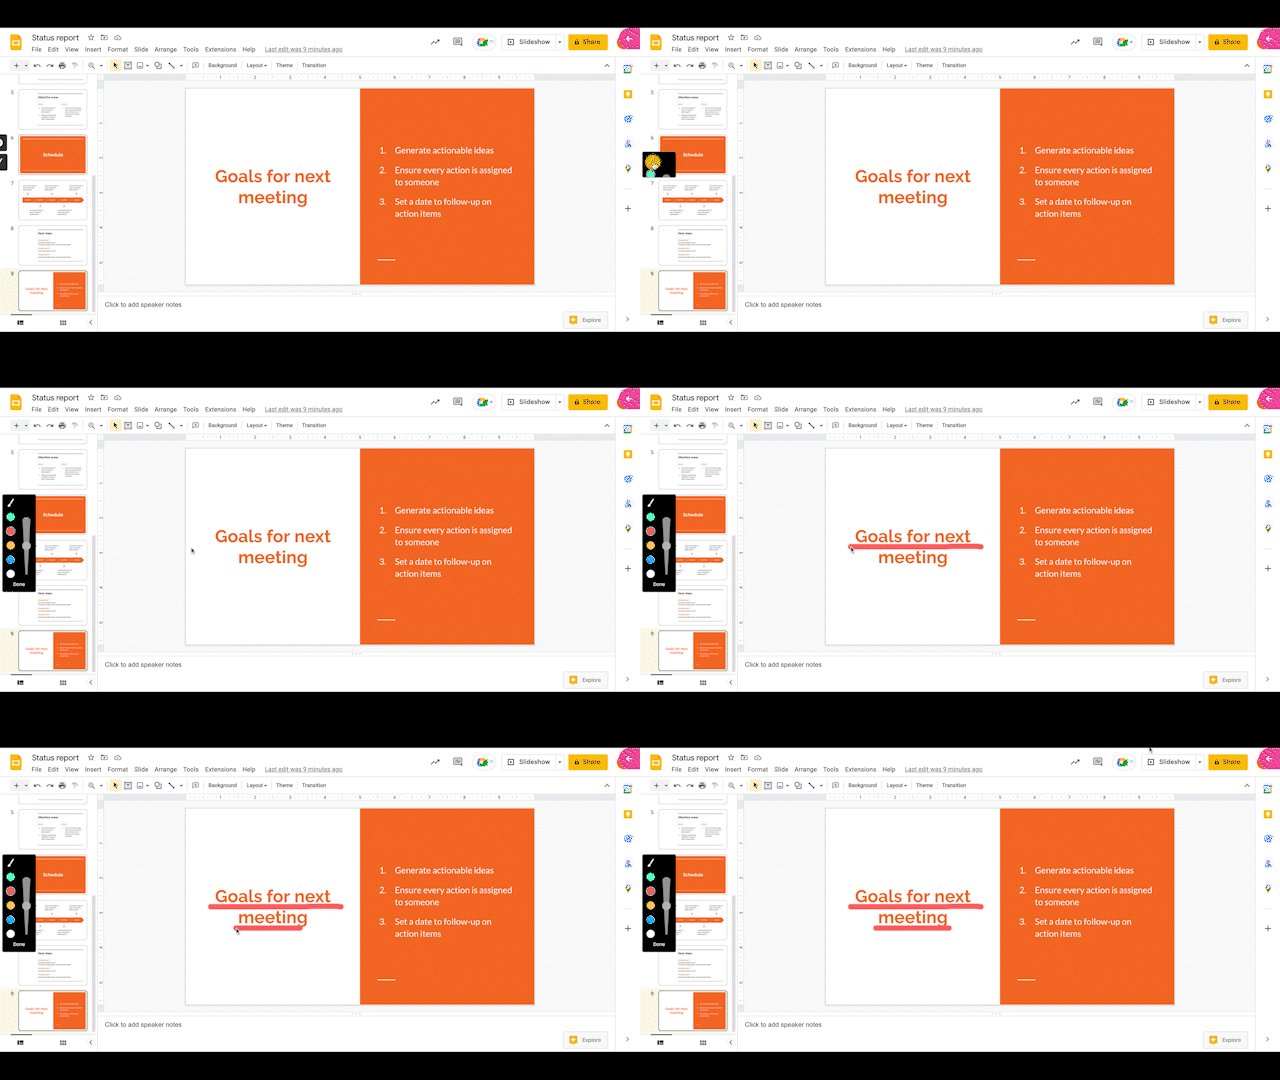
Use the screen annotation tools to point things out as you talk. Click the brush icon on the left and pick a colour.
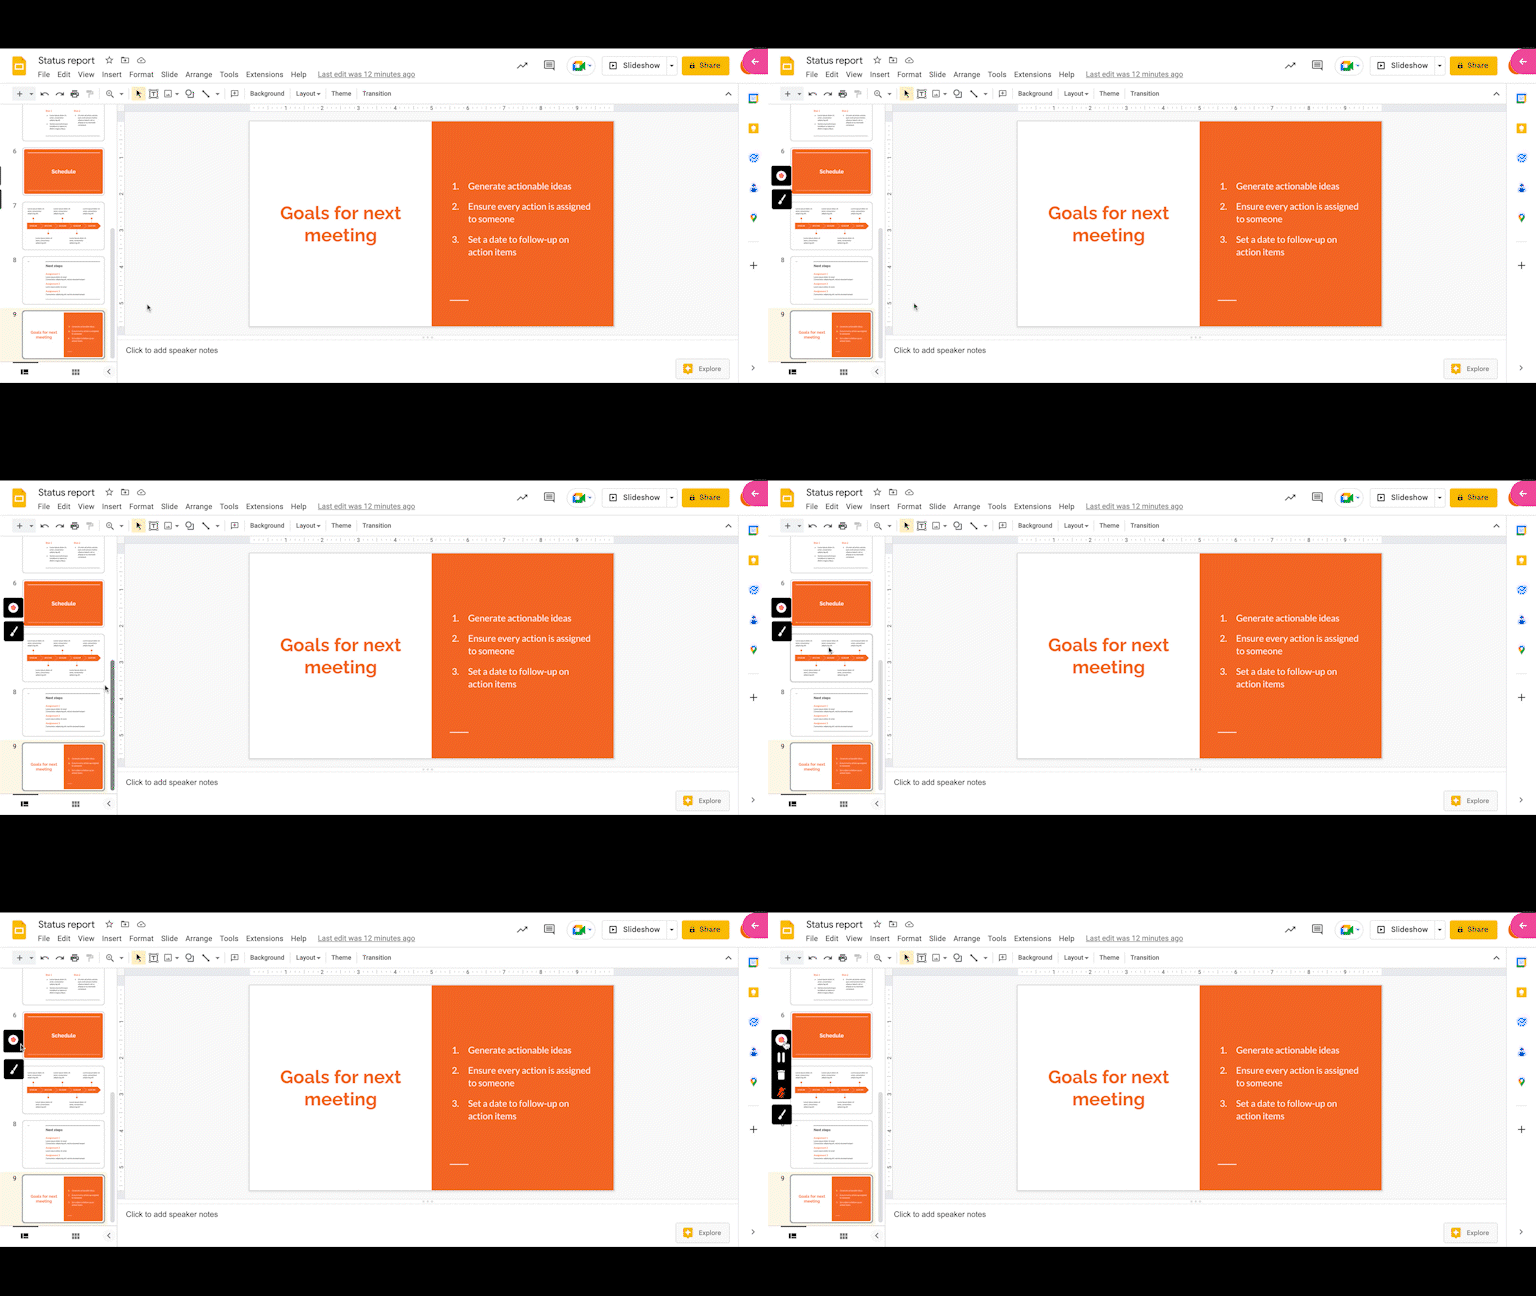
When you are done, click the red dock button at the left edge of your screen to stop. Your recording saves to your dashboard.
Step 3: Edit the video and add music
Click Edit on the player page.
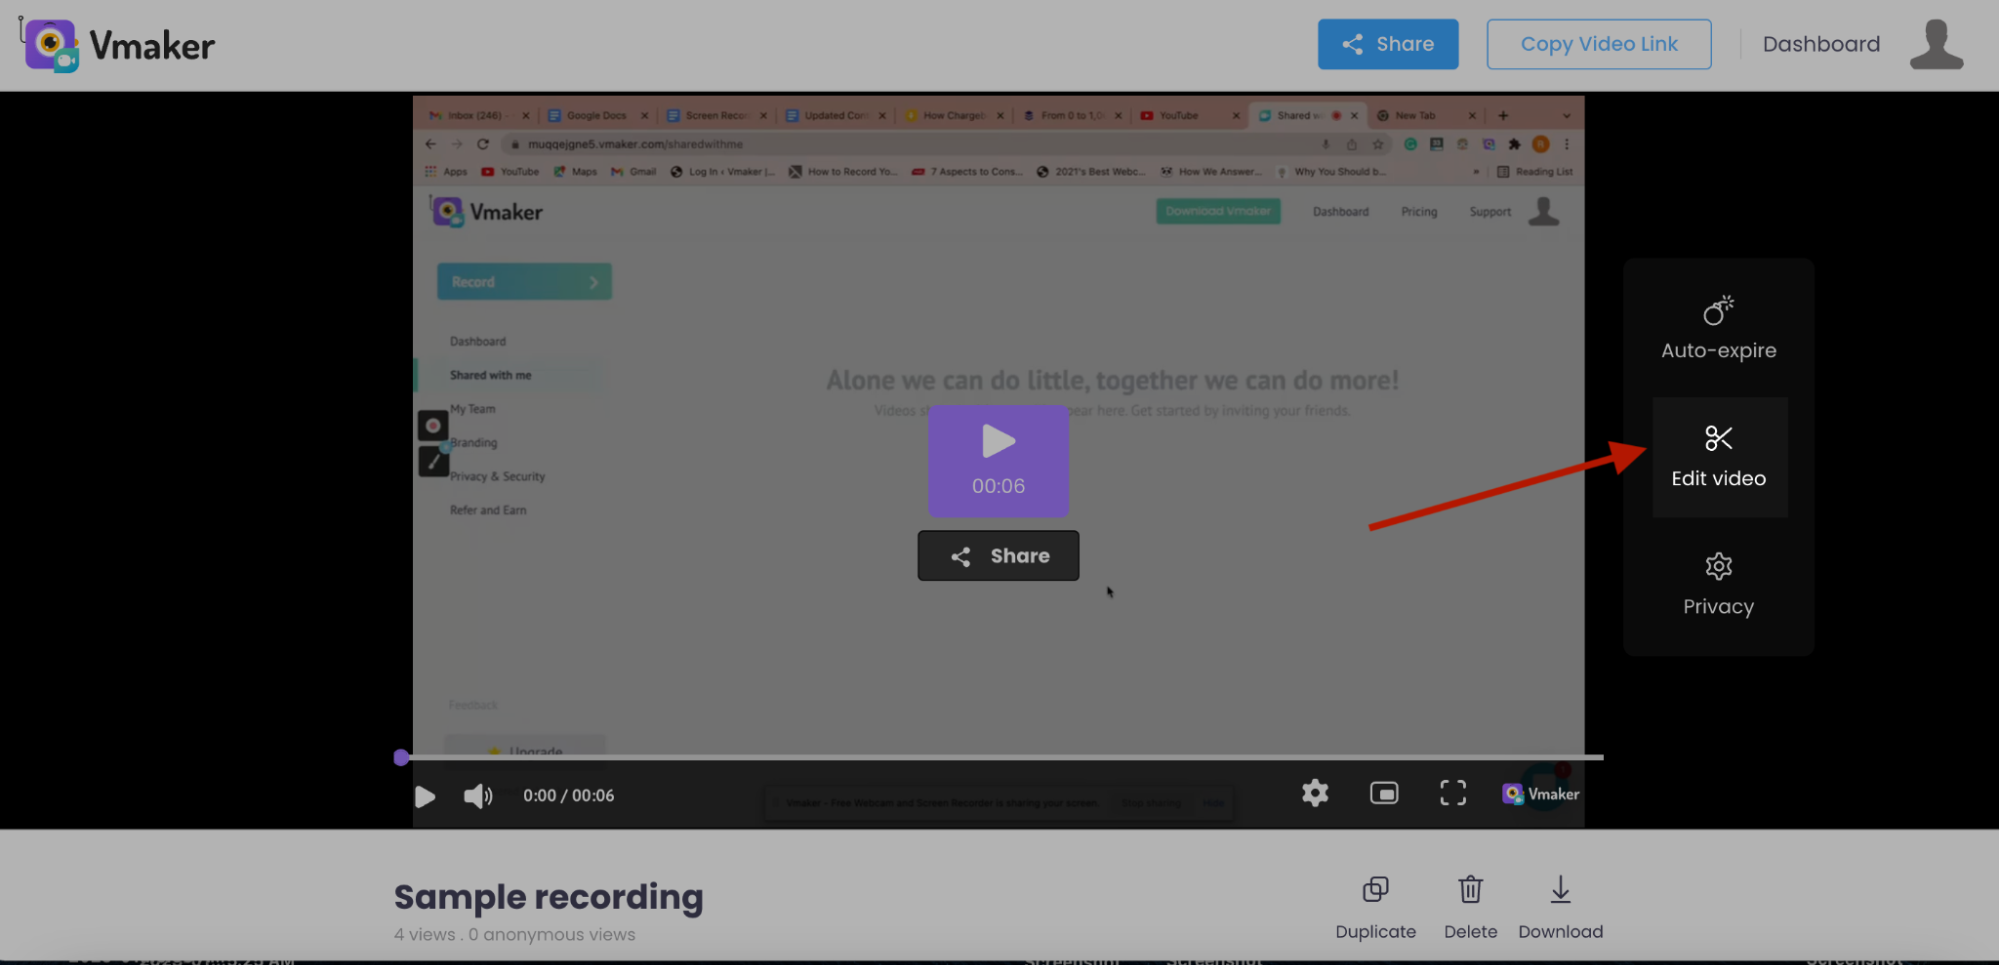
The Vmaker YouTube video editor opens. You can also upload extra clips and stitch them in.
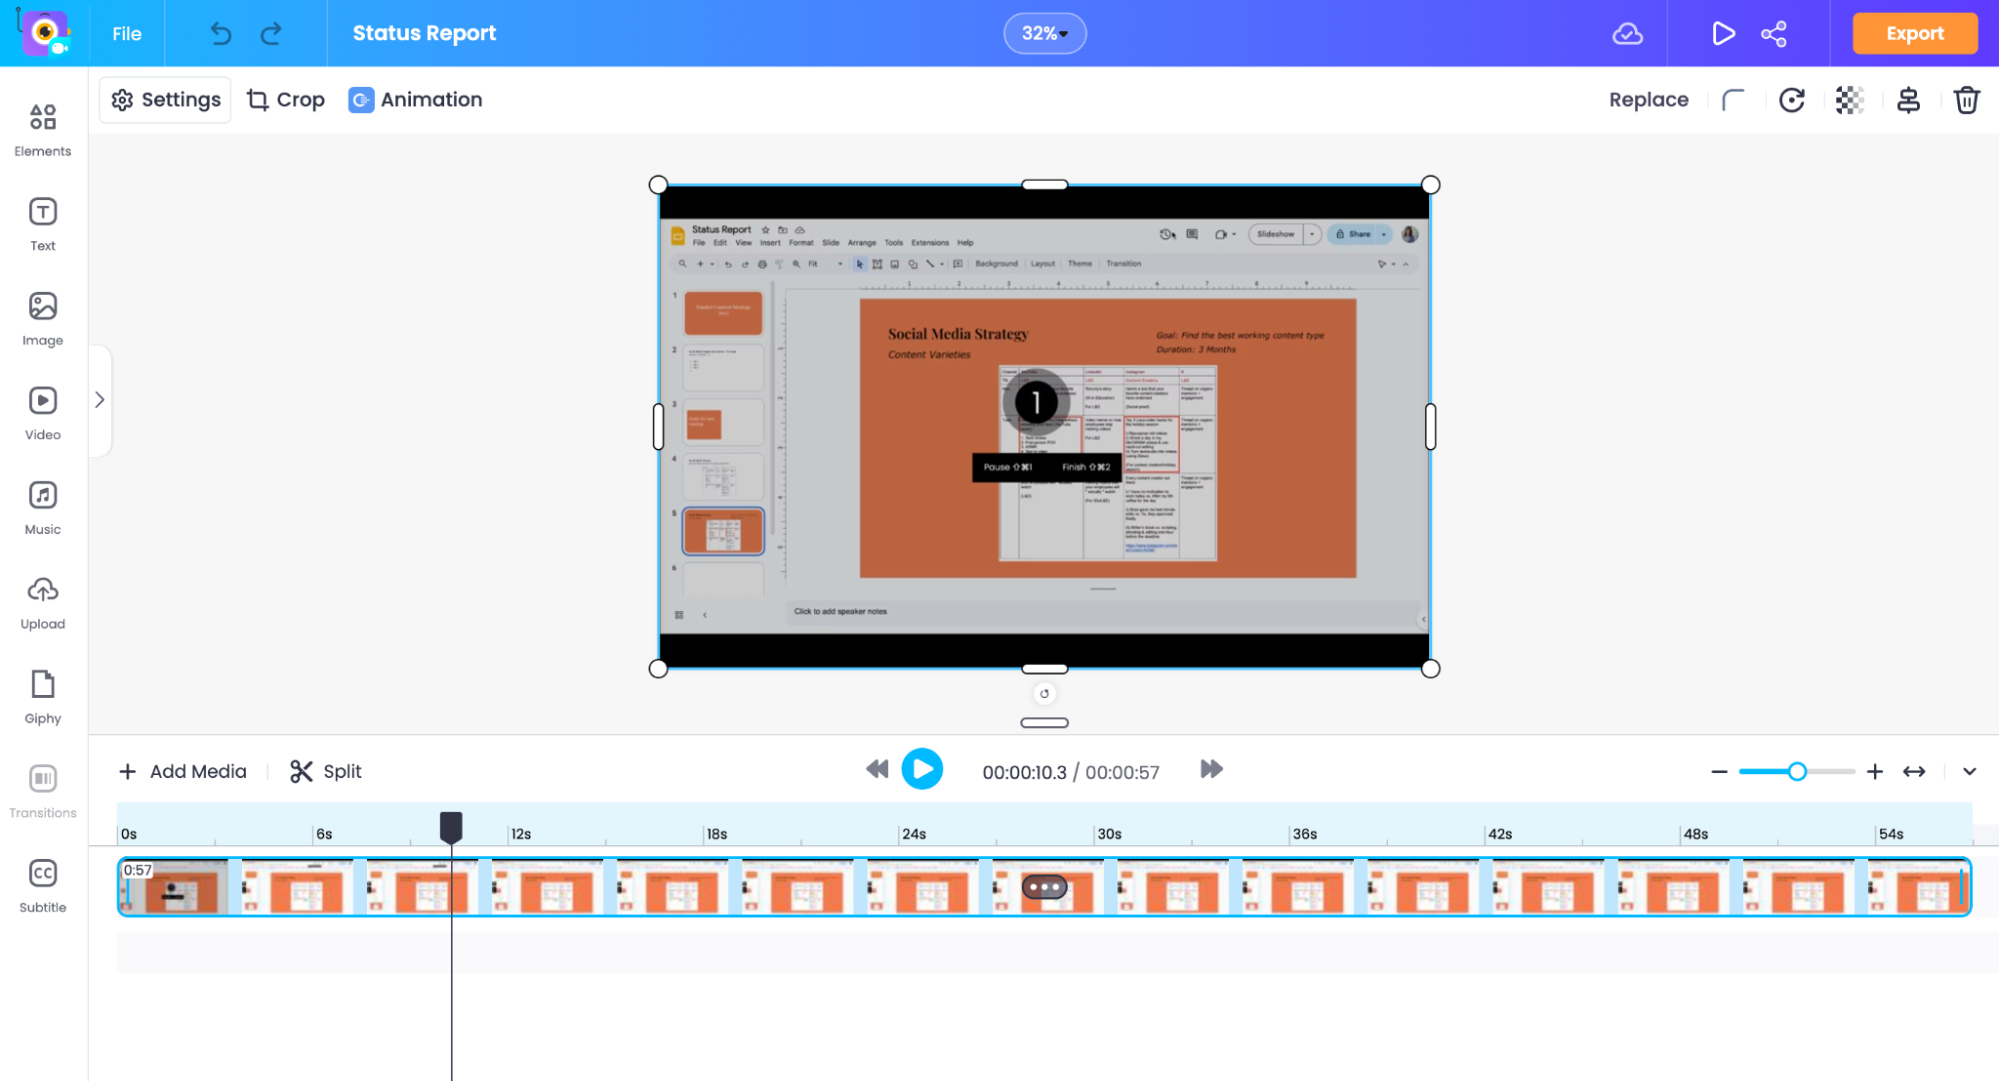
How to add subtitles to your slide presentation video
Step 4: Add subtitles
From the editing canvas you can trim, add music, drop in text, and more.
To add subtitles, click Subtitles at the bottom left of the canvas. Then click Auto-Generate. Vmaker AI will generate subtitles in minutes.
Vmaker AI also drops filler words for cleaner captions. If you want to tweak any line, edit it in the subtitle text box on the left sidebar.
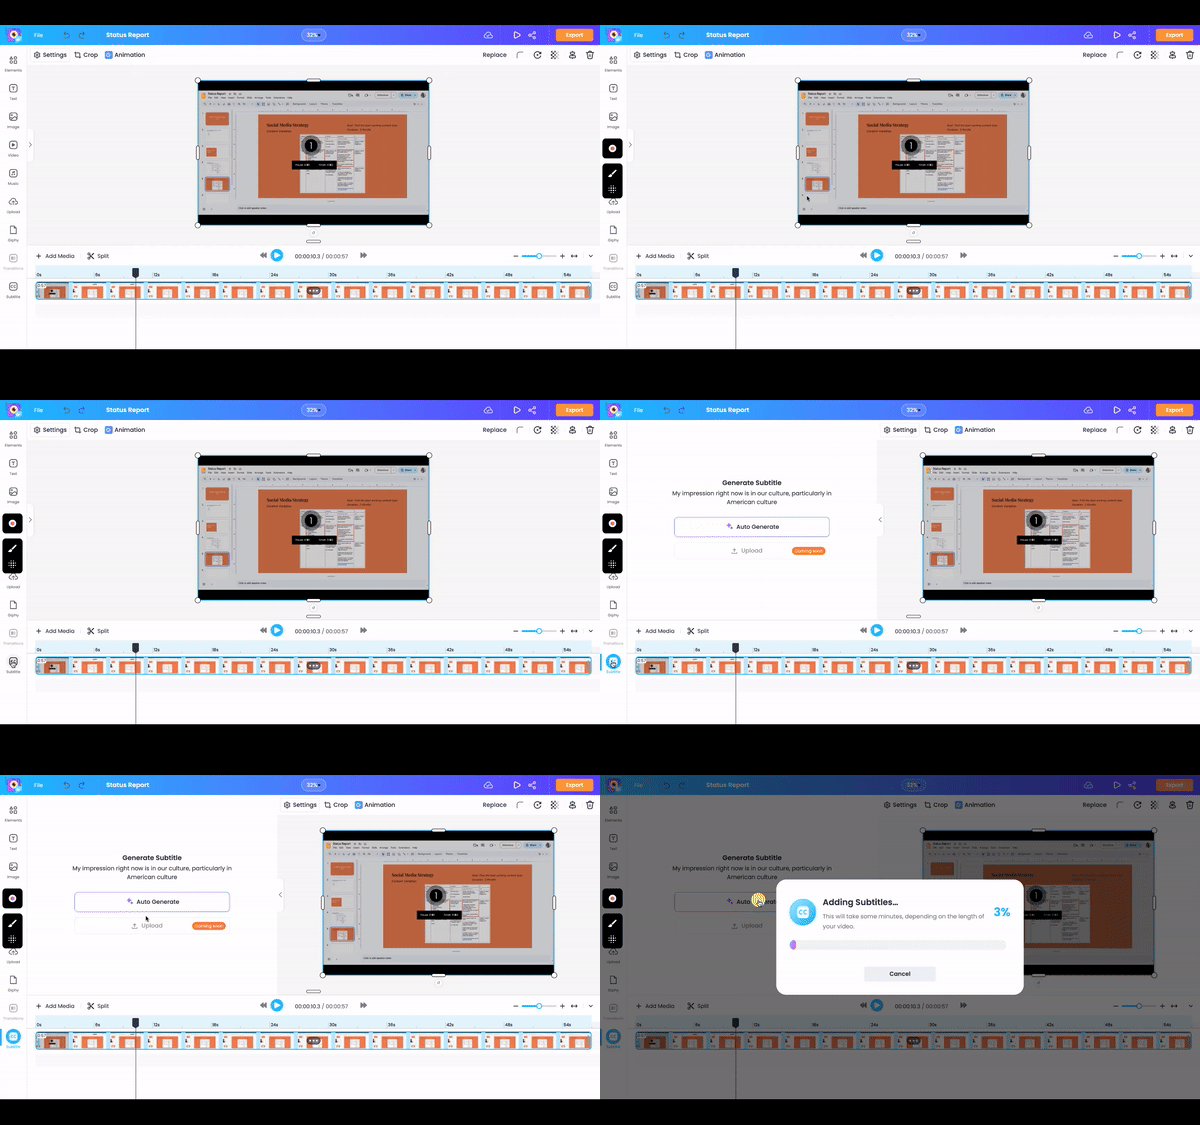
Step 5: Style and download
Subtitles look good. Branded subtitles look great.
Click Subtitle Styles at the top and pick a preset.
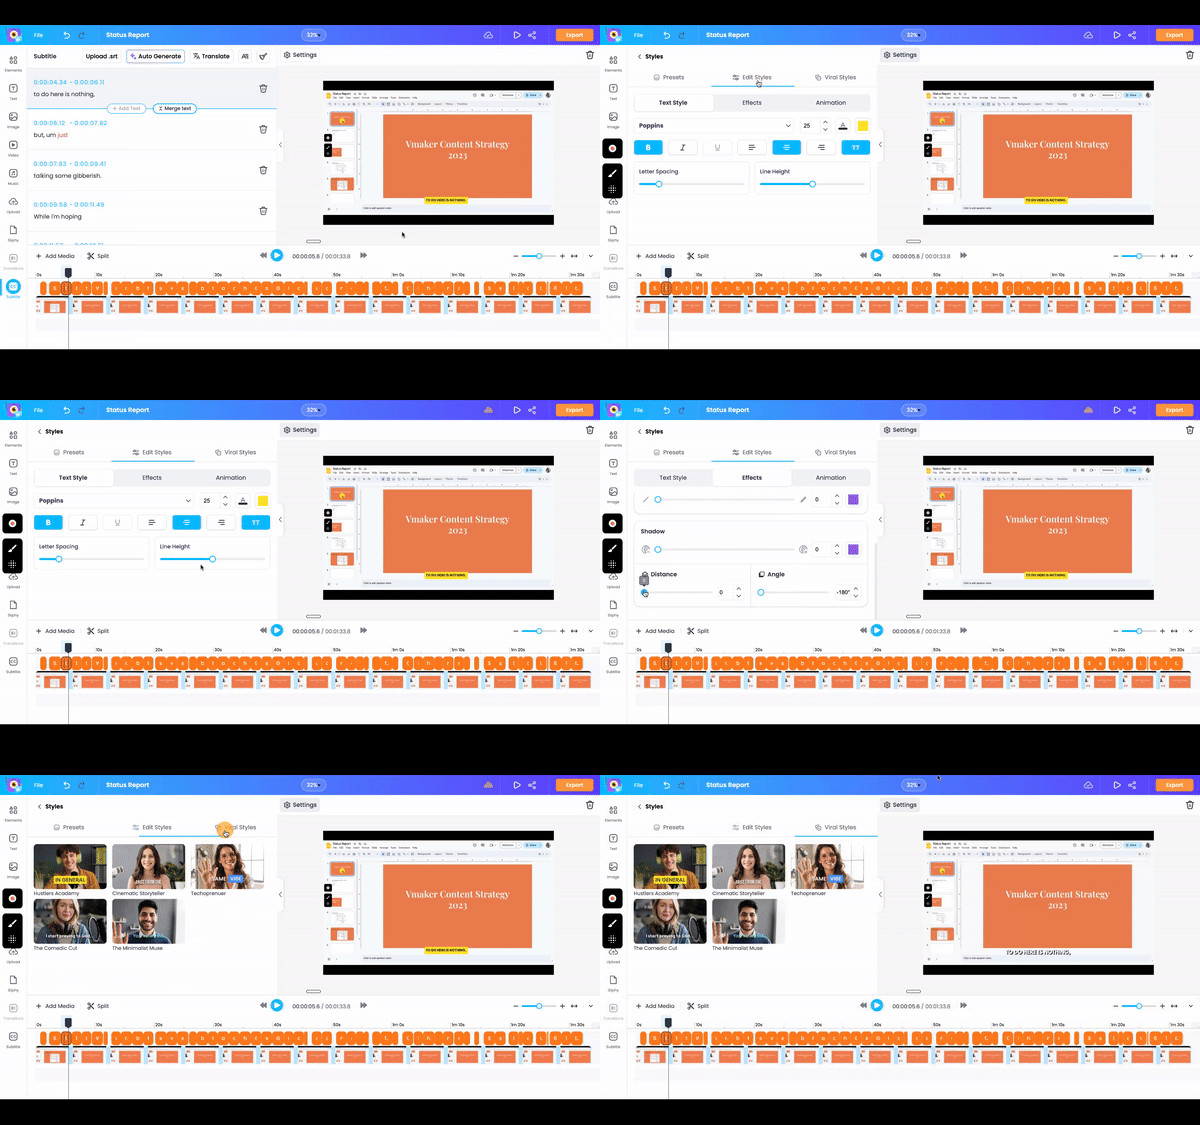
Want to build your own? Click Edit Styles. Three sub-menus let you change the text style, effects, and animation.
The best part is the Viral Styles library. These are the subtitle styles your favourite creators use on social. Click any style to apply it, or build one from scratch.
Once you are happy, click Export at the top right of the canvas.
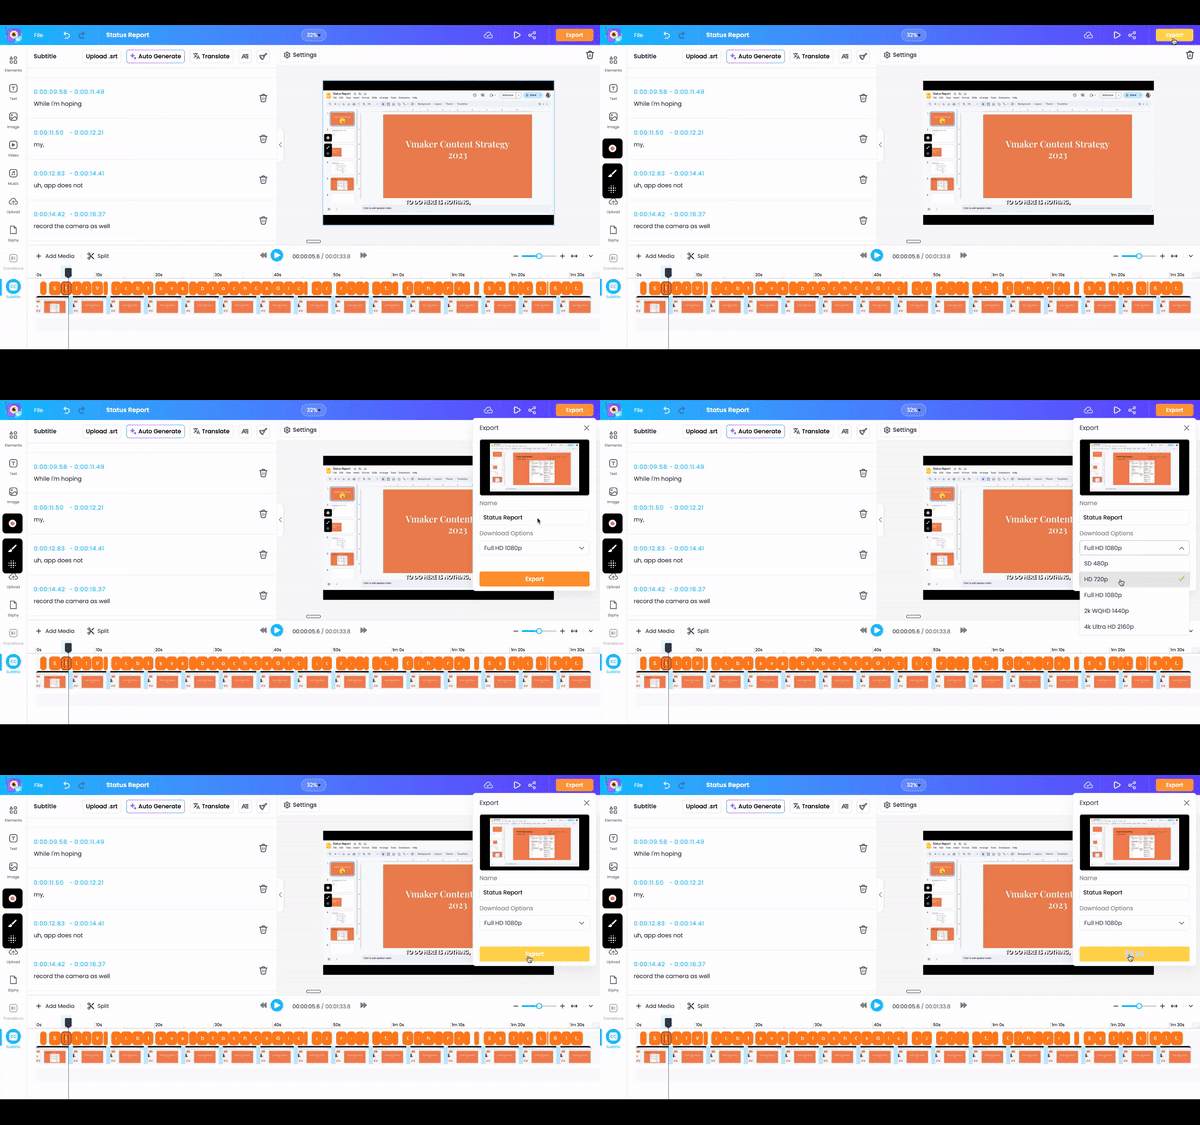
Pick the export quality you want. The options depend on your plan. See the full list on the pricing page.
That's it. A flat slide deck just turned into a polished video.
Recommended Reads
3 Easy Ways to Do a Voice-over on Google Slides
How to Add Audio to PowerPoint Presentations
Video Presentations 101: The Ultimate Guide
How to Add Subtitles to Zoom Meetings