Contents
1. How to do a voiceover on Google Slides using a screen recorder
2. How to do a voiceover on Google Slides using Movavi Screen Recorder
3. How to do a voiceover on Google Slides using a voice recorder
4. How to do a voiceover on Google Slides using text-to-speech translation software
Bonus: Tips to help you get started
How to Do a Voiceover on Google Slides: (4 Easy Ways)
Once you learn how to add voiceovers to your Google Slides presentations, you'll find it to be a valuable skill.
In today's post, we'll guide you through three different methods for incorporating voiceovers into your Google Slides.
- How to add a voiceover on Google Slides using a voice recorder.
- How to add a voiceover on Google Slides using a screen recorder.
- How to add a voiceover to Google Slides using text-to-speech translation software.

1. How to do a voiceover on Google Slides using a screen recorder
The second method is one of the easiest among the three.
It allows you to add voice narrations to your Google Slides presentations with a webcam overlay. Once you record yourself presenting, you can freely share it with others.
Numerous screen recording software options are available online. Choose one that best fits your requirements.
When you use a screen recorder for your voiceovers, you can enhance your recording with screen annotations. Additionally, as most screen recording software includes a video editor, you can easily edit unnecessary portions of your voiceovers in one go.
If you don’t have the time to record your voice for slides using a microphone, AI-powered text-to-speech tools can help you quickly generate clear and professional audio from your script. These tools also allow you to synthesize separate audio files for each slide, making it easy to manage and customize your presentation narration.
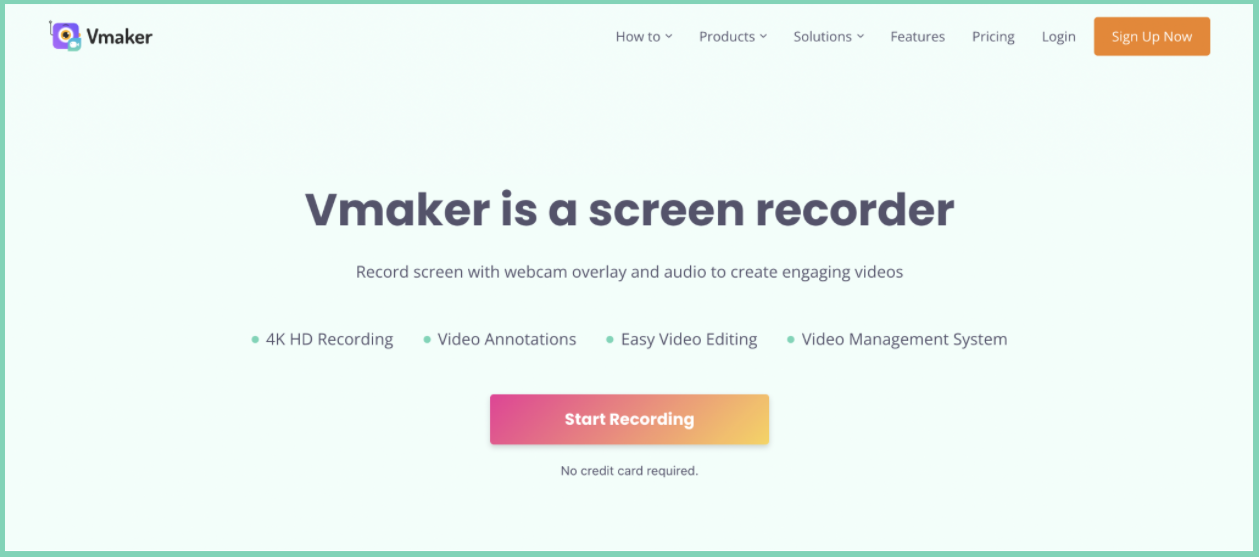
Note: We guide you through this process using Vmaker as it's easy to use and comes with many impressive features.
Step 1: Sign up for Vmaker
Visit Vmaker's official page to create an account. The screen recording software is available as a Chrome plugin, Mac, and Windows application.
The chrome extension can be added to your chrome browser from the 'Chrome Web Store', while the Mac application can be downloaded from Vmaker's homepage.
Note: The Chrome plugin can be pinned to your browser for easy access to the screen recording software.
Step 2: Start recording the voiceover
Before you begin recording your voiceover, it's advisable to conduct a few test runs to ensure optimal performance during the actual recording. To do this, log in to your Vmaker account and click on 'Start Recording'.
When you're ready for the actual recording, open the Google Slides presentation that requires a voiceover and initiate the recording process.
To commence the voiceover recording, click on the Vmaker icon in your browser and select 'Start Recording'.
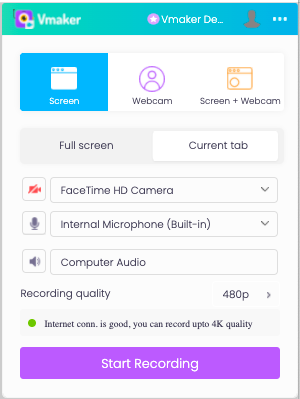
You can also customize the features according to your preferences.
Step 3: Edit & share
After recording your voiceovers, initiate the editing process by clicking on the 'Edit' button.
You'll be directed to Vmaker's AI video editor, to converts your Raw videos into Wow videos in just minutes and edit out any unnecessary portions of your recording.
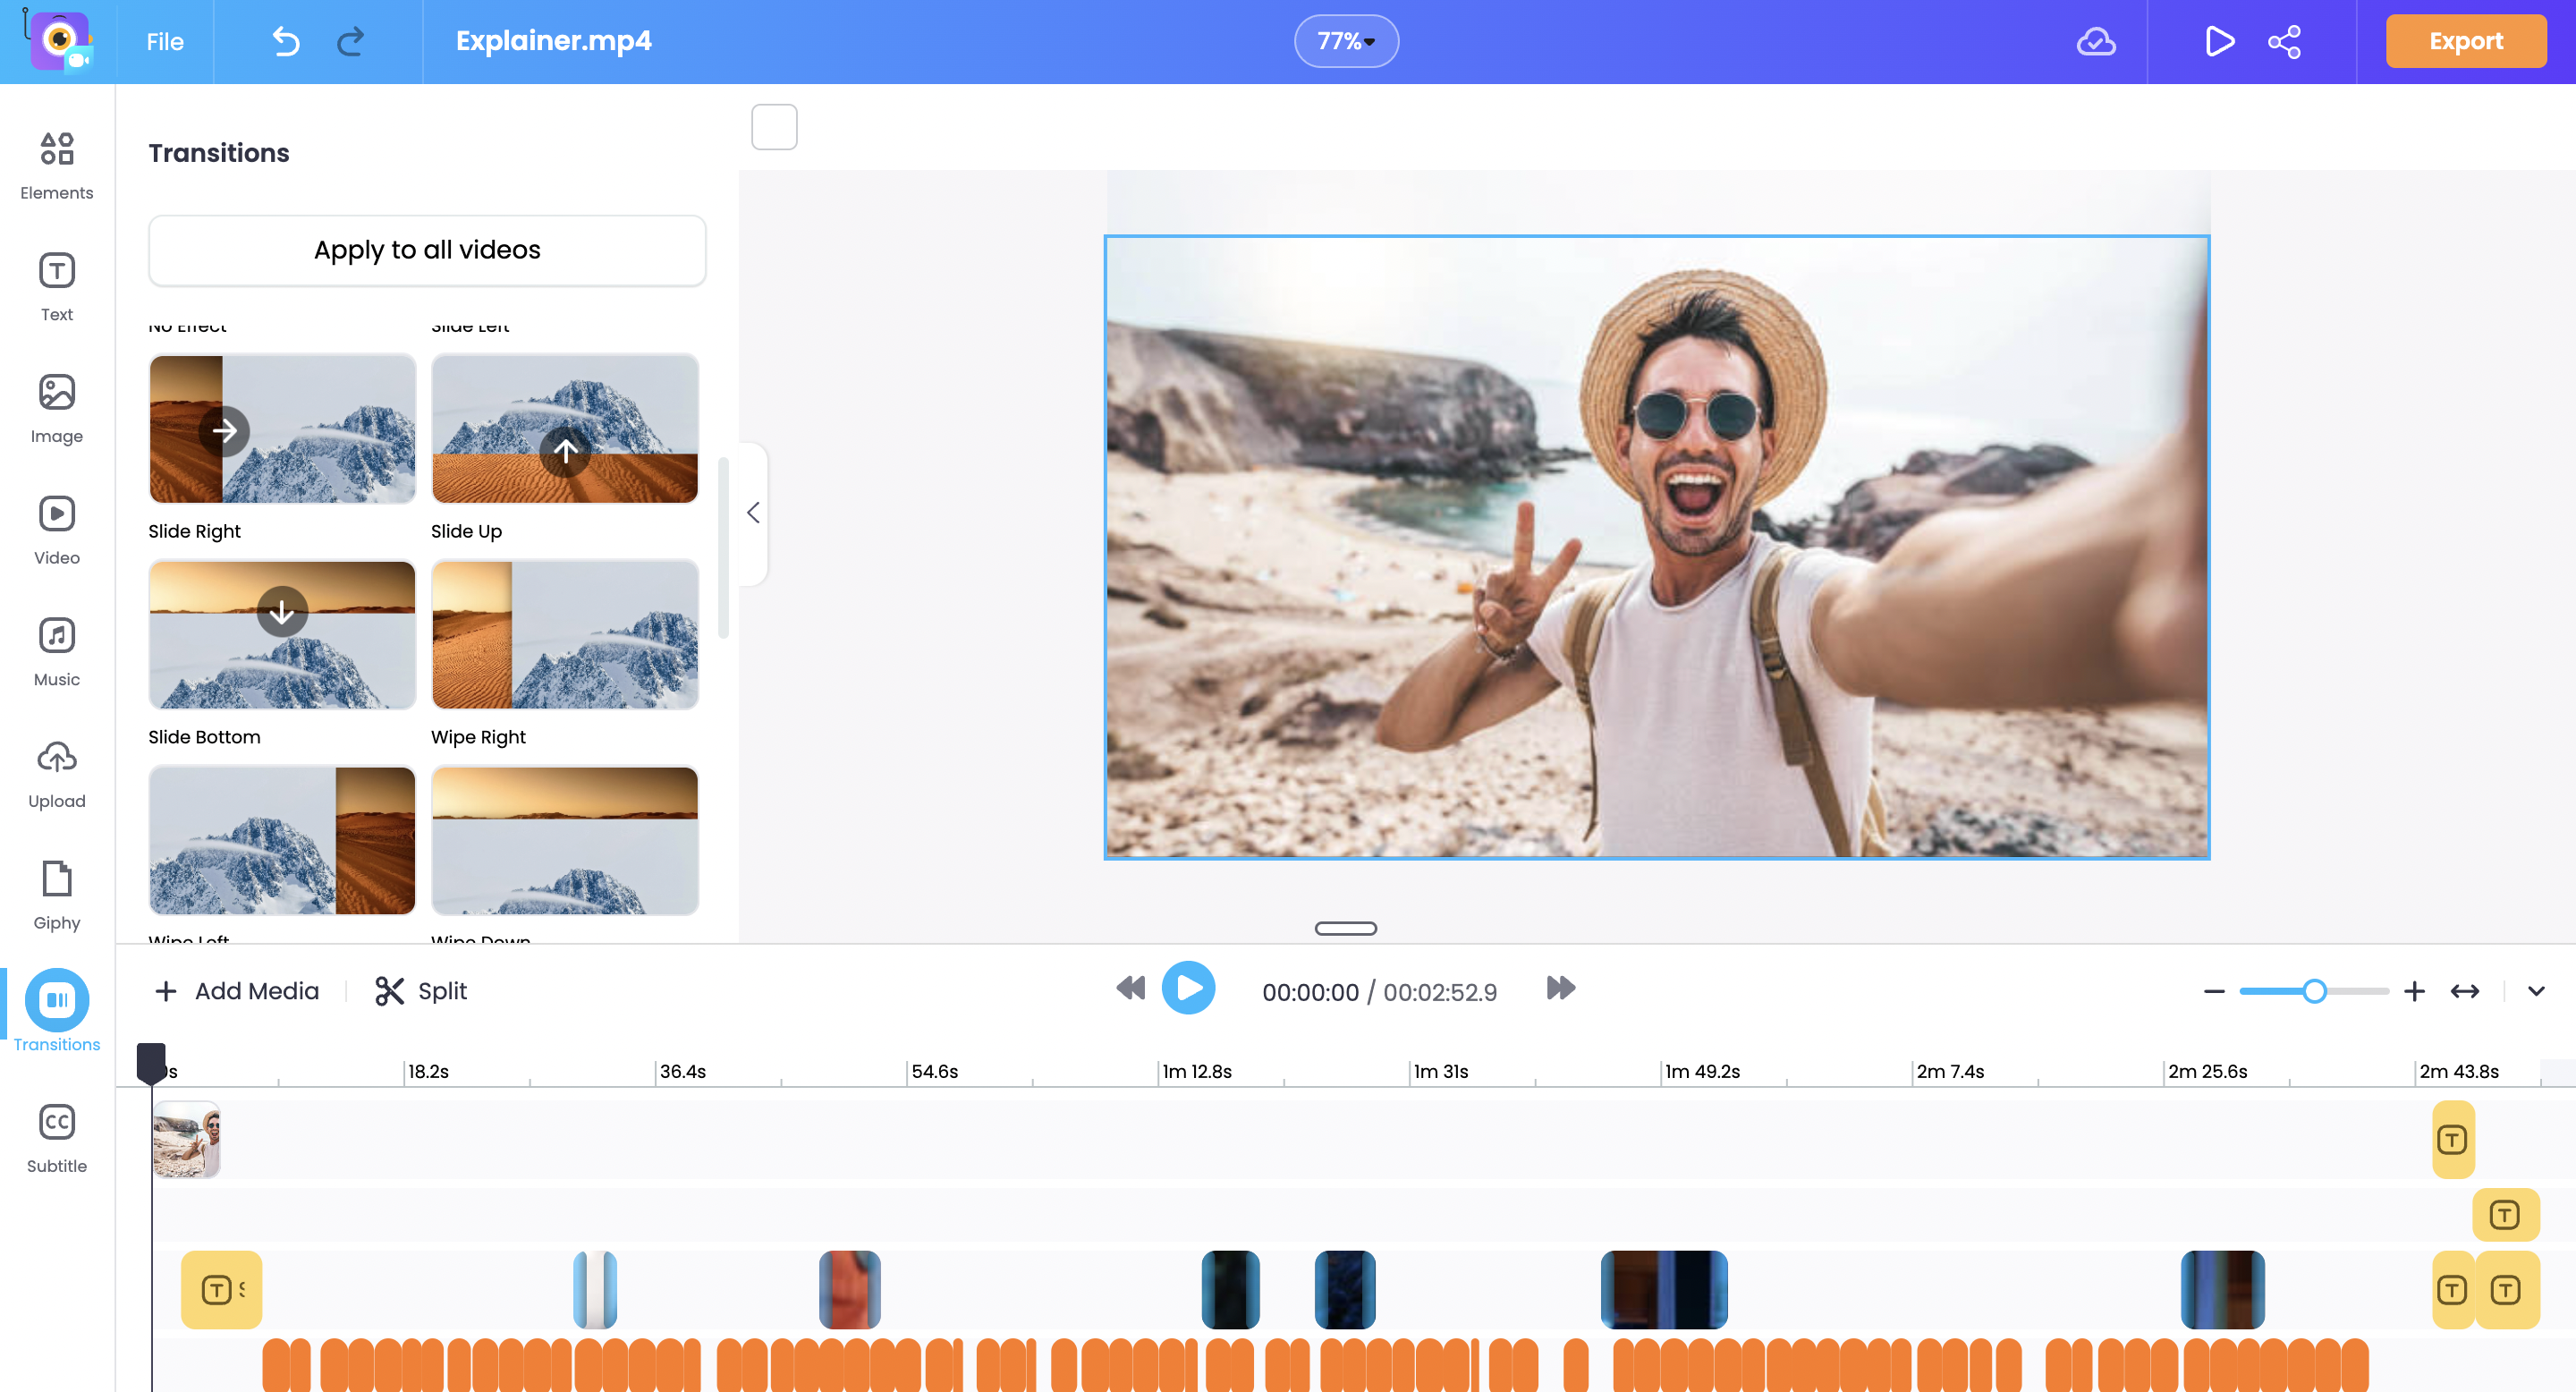
You can also add subtitles to your video using Vmaker AI's subtitle generator.
As soon as you finish editing, you can export the recorded video file in your desired format and share it with anyone.
Vmaker also allows its users to upload their videos to social media platforms like Facebook, YouTube, and Instagram. Content creators can easily share their videos in a matter of seconds.
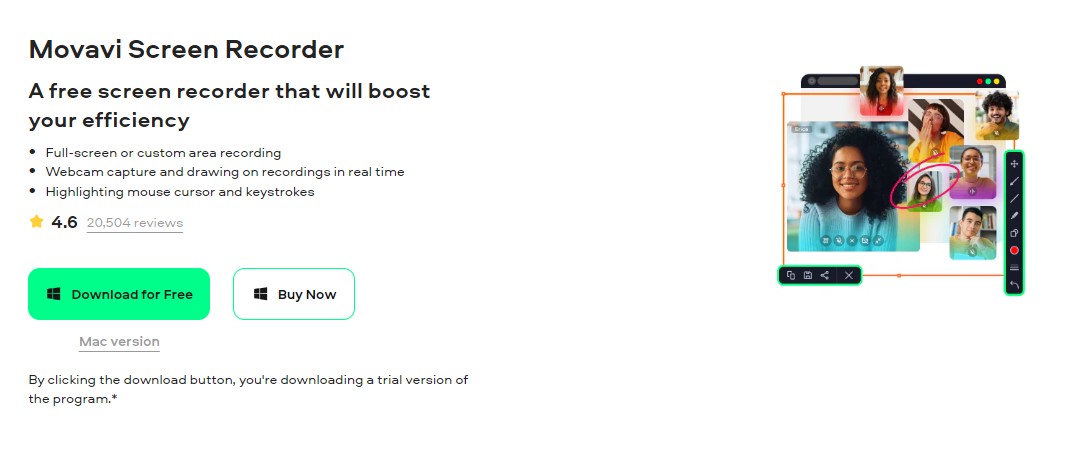
2. How to do a voiceover on Google Slides using Movavi Screen Recorder
In case you liked the second method, here's another useful software option to create voiceovers using a screen recorder.
Movavi Screen Recorder allows you to simultaneously record your voiceover, the screen, webcam, and internal audio as you present your Google Slides presentation. It's also available for both Mac and Windows users.
Step 1: Install Movavi Screen Recorder
Head over to Movavi's official website and download the free screen recorder version. Don't miss the OS choice before downloading.
Then, follow the steps to install it on your computer.
Step 2: Run the recorder and customize your settings
Open the desktop screen recorder. Click the cogwheel icon on the toolbar to enter 'Preferences' and customize your settings.
For example, you can choose the frame rate, audio quality, color effects, and shortcuts for your recordings.
Step 3: Record your voiceover
Once all settings are in place, open your Google Slides presentation. Select the 'Screen recording' option in the program (the video camera icon) and click on the browser tab you need.
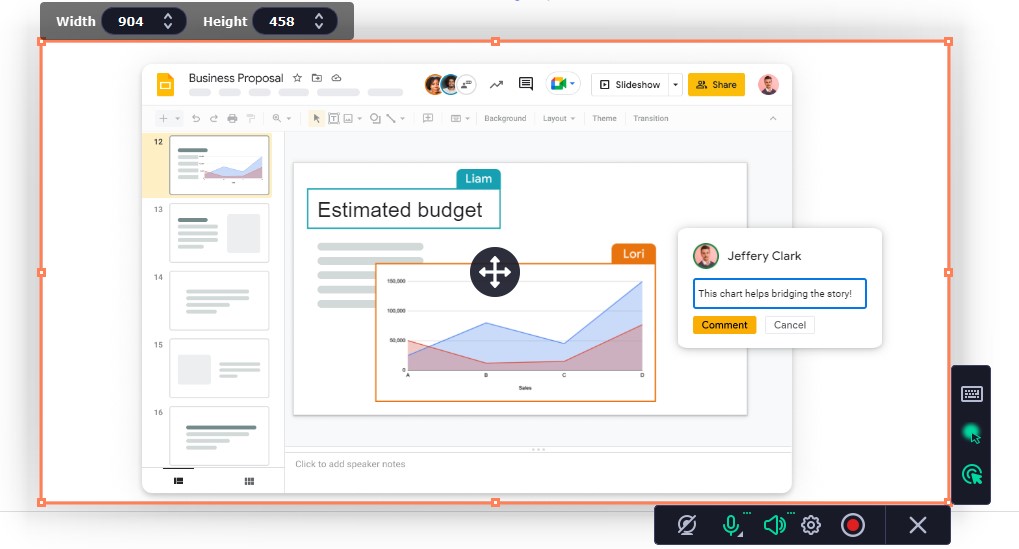
Hit the recording button and start presenting your slides while recording with sound.
You can pause or stop the recording at any time by clicking on the appropriate button or using the hotkeys.
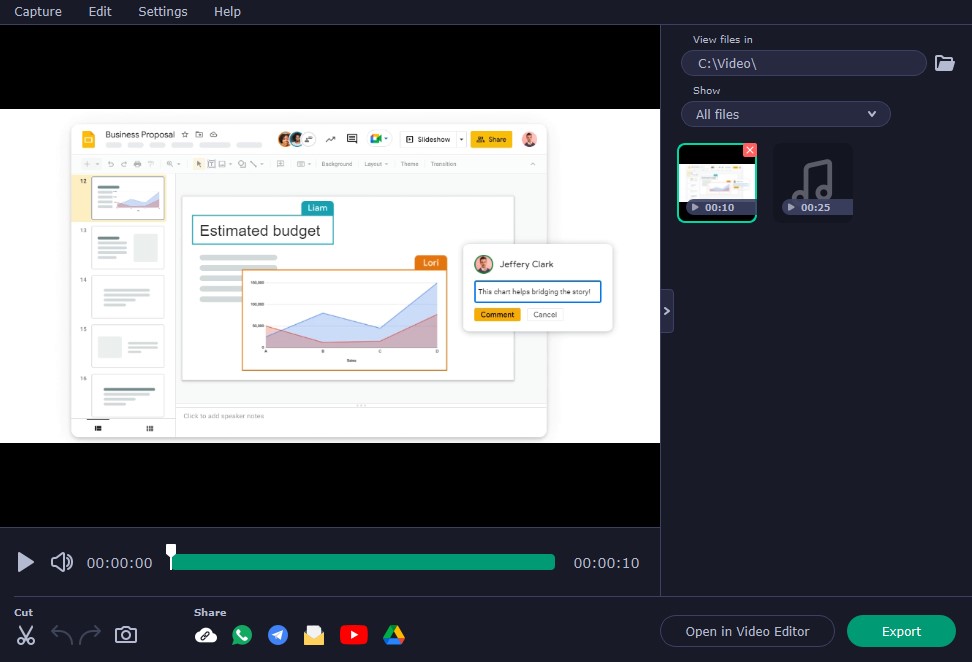
Step 4: Edit and save
After recording your voiceover, you can trim it using the built-in editor.
Export to Google Drive and YouTube or save the file in your preferred format.
3. How to do a voiceover on Google Slides using a voice recorder
In this method, you can record the audio narration separately and add it to your Google Slides presentation.
As Google Slides doesn't come with a built-in audio recorder, you'd need the help of an external audio/video recording software to record your voiceovers.
There are many voice recorders available online, such as Rev, Audacity, 123Apps, GarageBand, and Vocaroo. You can choose any of these voice recording tools to get started.
Step 1: Record your voiceovers
Once you've selected your voice recording tool, practice with a script and record a few demo sessions to perfect your narration. When ready, record your voiceover and download it in either MP3 or WAV format. Since Google Slides supports only these two formats, ensure your audio files are saved accordingly.
Step 2: Upload it to Google Drive
Now, upload the recorded audio file to your Google Drive.
Log in to your Google Drive account, click 'New,' and choose 'File Upload.
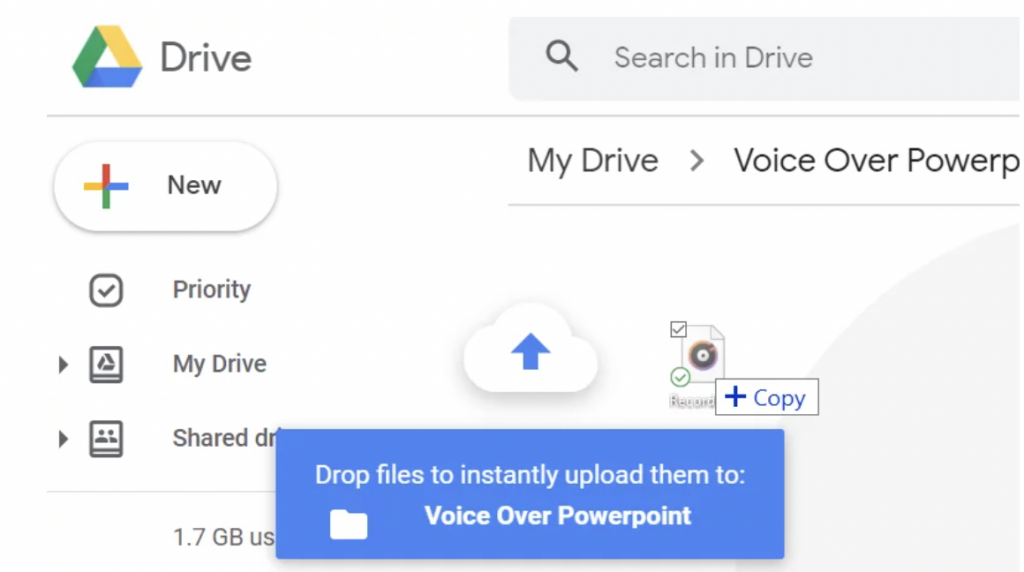
The file has now been uploaded to your Google Drive.
Step 3: Make the audio file accessible to everyone
Before attaching the audio file to your Google Slides presentation, you need to ensure it is accessible to everyone.
To do this, right-click on your audio file, select 'Share,' and click 'Change to anyone with the link' so that anyone on the internet can access the file.

Once you've finished, click on 'Done.'
Step 4: Attach the audio file to Google Slides
You can now easily attach the audio file to your Google Slides presentation. Open the Google slide that needs a voiceover.
Click on the 'Insert' option and choose 'Audio'.
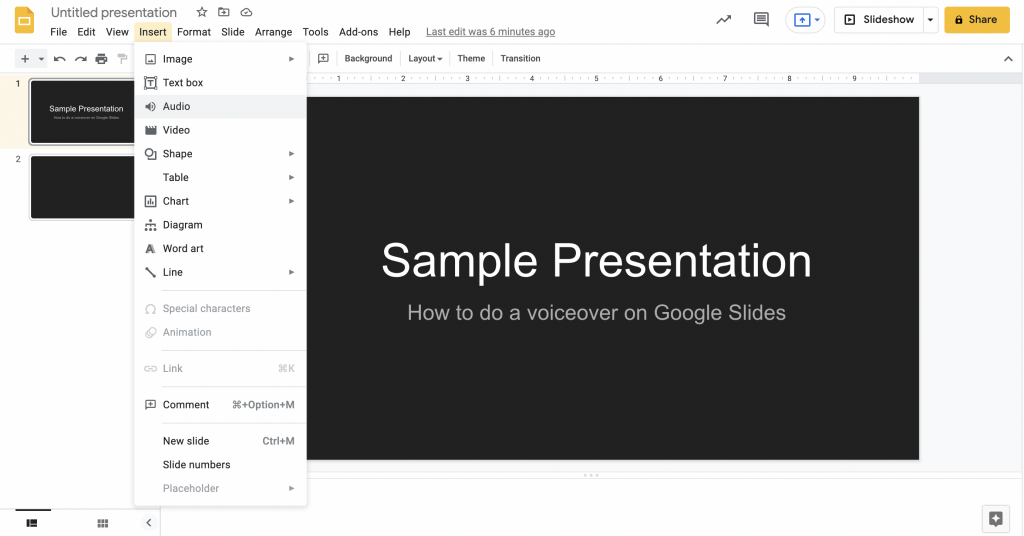
Choose the audio file you'd like to add and click on the 'Select' button.
Once you insert your voiceovers into your Google slide presentation, a speaker icon appears on your slide. Clicking on it will play the audio.
You can also drag the speaker icon and place it anywhere else.
Step 5: Configure settings & watch a preview
With Google Slides, you can customize your audio narrations.
Select the speaker icon and click on the 'Format' option from the toolbar's 'Format' menu. A pop-up box will appear, allowing you to customize your preferences.
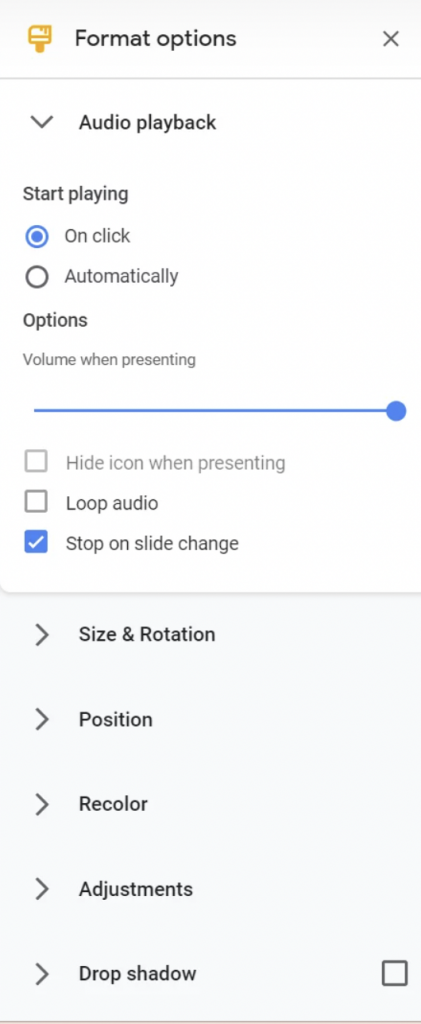
Here are some important formatting options available on Google Slides:
- Play automatically: Enable the 'start playing automatically' radio button if you want the audio to play automatically when you open the slide.
- Play on-click: Enable the 'start playing on click' radio button if you want the audio to play only when you click on the speaker icon.
- Loop audio: Enable the 'loop audio' checkbox if you want the audio narration to play on a loop.
- Stop on slide change: Enable the 'stop on slide change' checkbox if you want the audio to stop when you navigate to the next slide.
4. How to do a voiceover on Google Slides using text-to-speech translation software
This method can be very helpful if you can't create your own voiceovers due to time constraints. It allows you to generate voiceovers using text to speech translation software and attach them to Google Slides and additionally on other types of content, such as animated flipbooks.
These voiceover software applications are supported by artificial intelligence and have the ability to produce realistic voiceovers from text. This means you can convert a voiceover script into a professional voiceover in just a matter of seconds. Additionally, you can adjust the tone, pitch, and breath of your voiceovers according to your preferences. This helps people save a lot of time and money.
There are many text-to-speech translation software options available online. Some of the most popular ones include PopPop AI, Animaker's Voice, Speechelo, Logic, Studio One, etc. You can choose any of these software options that best fit your requirements.
Note: We will guide you through this example using Animaker's Voice software.
Now, let's learn how to do a voiceover on Google Slides using text-to-speech software.
Step 1: Sign up for Animaker
Head over to Animaker's official page and sign up.
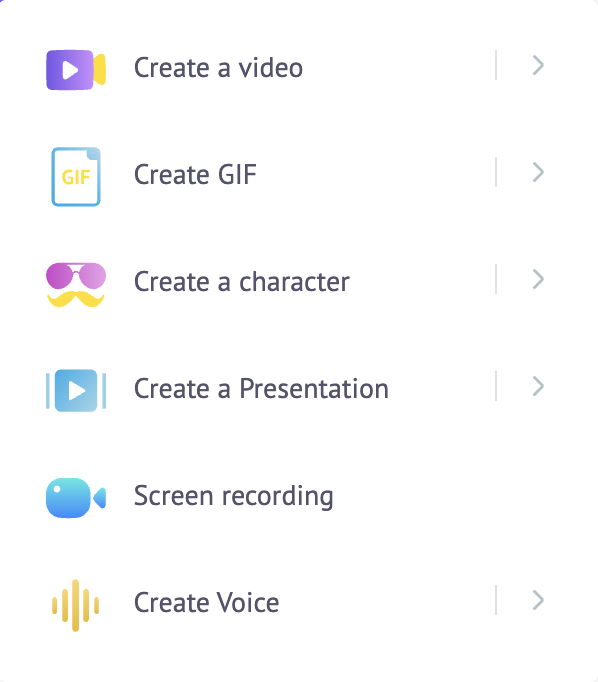
Once signed up, you'll be directed to the Animaker dashboard. To create voiceovers, click on the 'Create' button and select 'Create Voice' under the 'Create Project' section.
Step 2: Type in the text & customize your preferences
Now, you'll be directed to the Animaker voiceover suite. Here is where you can add the text that needs to be converted into voiceovers.
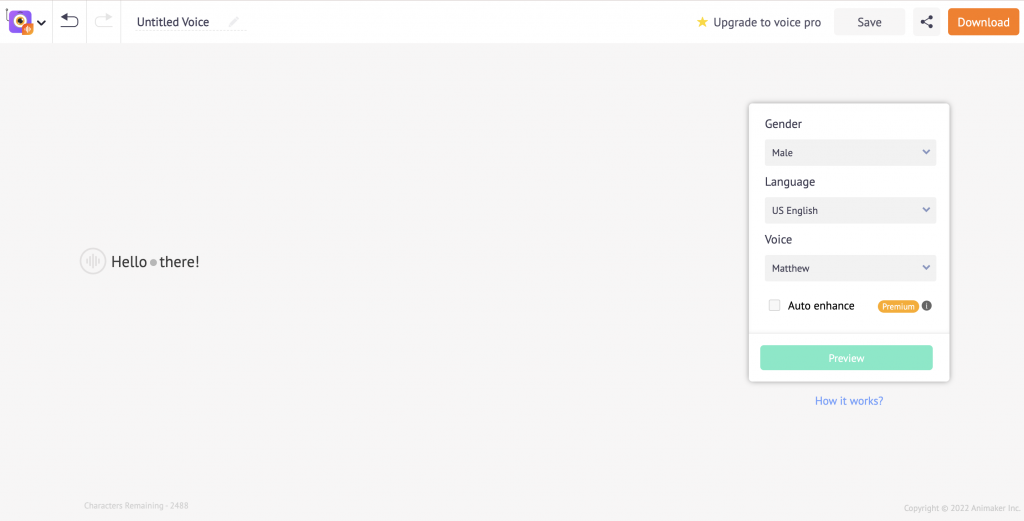
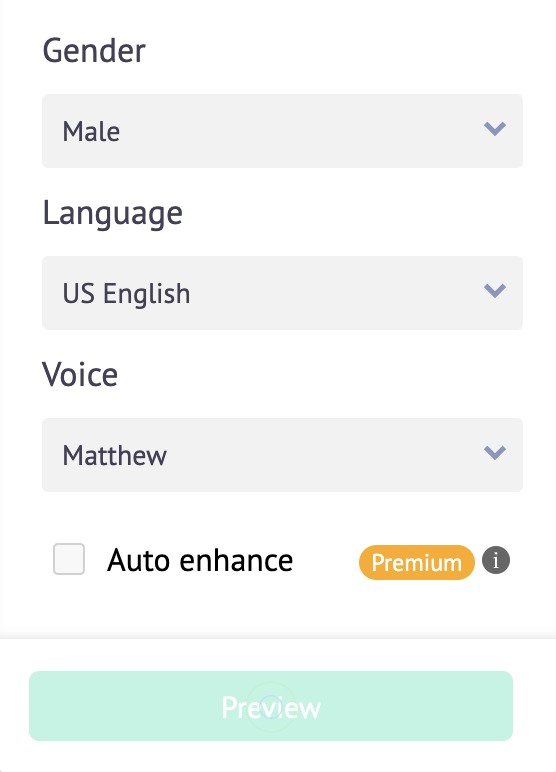
Once you've entered the text, customize your preferences by selecting your gender, language, and voice type.
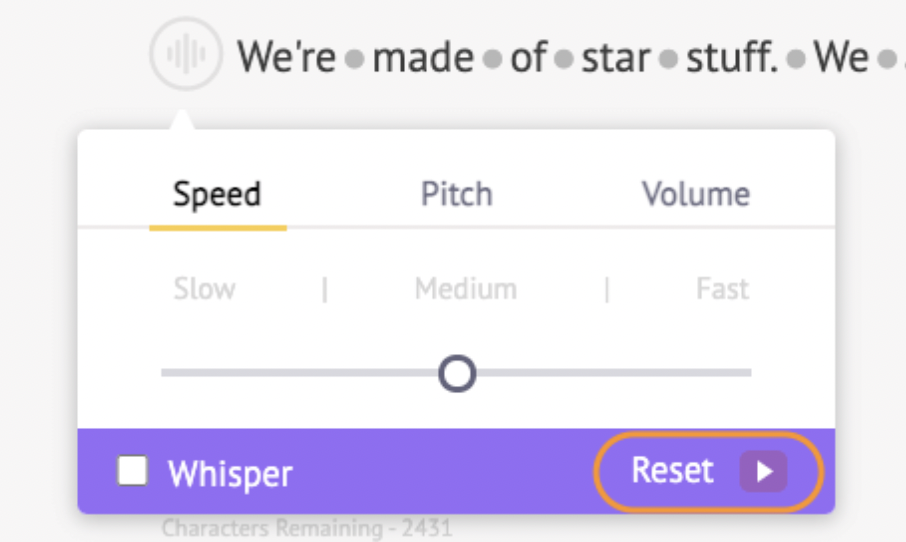
Additionally, you can change the pitch, speed, and volume of the voiceover by clicking on the button shown below.
To create a break effect or pause between two words, click on the dot between them and adjust the breaks.
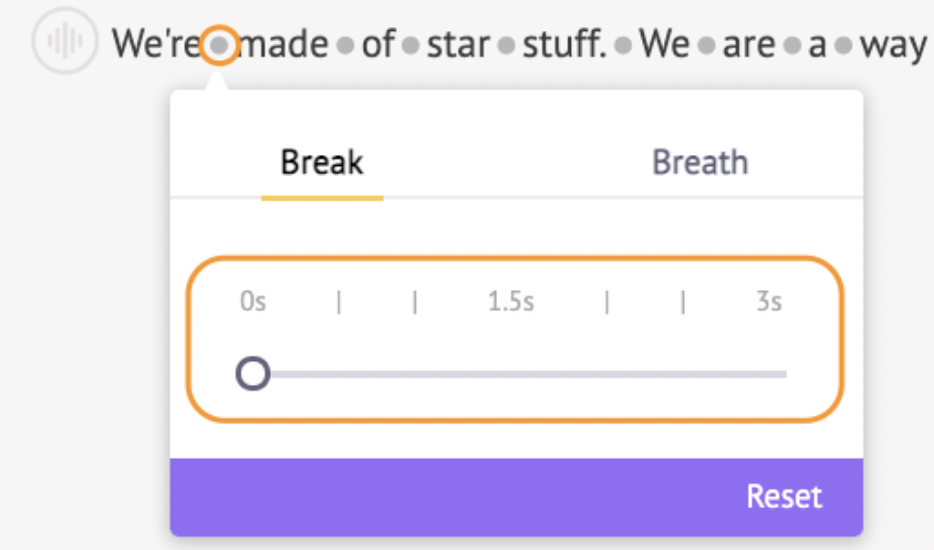
There's also a 'Reset' button that allows you to undo recent changes.
Step 3: Preview & make changes if necessary
After entering the text and customizing the preferences, click 'Preview' to check if the audio sounds good. If further adjustments are needed, continue tweaking the break and breath effects until you achieve the desired results.
Step 4: Share/download the recording
Once the voiceover is ready, you can download the audio to your computer or share it with others.
Step 5: Upload to Google Drive & attach the audio file to Google Slides
Easily attach the downloaded audio file to your Google Slides presentation. To do this, follow the steps discussed in the first method. Upload the downloaded file to Google Drive and insert it into your Google Slide presentation from your drive.
Upload your downloaded file to Google Drive and insert it into your digital presentation from your drive.
Bonus: Tips to help you get started
Here are a few tips to help you get started with your recording process.
i) Use a pop-up filter
Many individuals recording voiceovers and other videos use a pop-up filter to block unnecessary background noises and eliminate popping sounds that can occur when speaking quickly.
If you're using a screen recording software like Vmaker for your voiceovers, you can achieve professional results without the need for additional filters. Vmaker comes with a noise control feature that effectively blocks unnecessary background noises, ensuring a smooth recording experience.
However, if you opt for the other two methods to record your voiceovers, investing in a good pop-up filter may enhance your recording quality.
ii) Select a quiet place
It's important to stay focused during the recording, so choose a quiet location with minimal disturbances. Inform your family members in advance and turn off your mobile notifications.
iii) Watch your posture
Good posture provides proper breath support, aiding you in delivering your speech with a clear and strong tone. It's advisable to stand while recording your voiceovers. If you prefer sitting, ensure that you find a comfortable spot where you can sit straight.
iv) Warm up your voice
Conducting a few test runs before the actual recording will help you discover the right combination of pace, projection, and volume for the voiceover. This preparation will reduce the need for multiple retakes.
v) Keep a glass of water close by
It's always advisable to have water or warm tea nearby to keep your vocal cords hydrated. However, stay away from coffee, dairy products, and carbonated beverages.
Now that you've learned how to do a voiceover on Google Slides using three simple methods and know what mistakes to avoid, go ahead and start recording your voiceovers like a pro!