How to record Twitch stream
- Gamers who stream while playing would like to record and highlight their game
- Gameplay commentary
- Game review
- Browser Game
- PC Games
- Viewers who want to record their favorite streamers and make a video out of it
Twitch comes with a built-in game recording option, which you can use to record live streams while you play and stream. But there are two limitations:
- Twitch compresses videos to broadcast on all possible bandwidths and devices, which could make the video quality lesser.
- Twitch can mute certain sections in your recording making your important highlights useless
With Vmaker’s Twitch screen recorder, you don’t have to worry about any of those limitations. You can capture everything on your screen with audio in HD quality. Not just that, you can also edit and create gameplay highlights of your recordings with Vmaker’s built-in video editor and share them with ease.
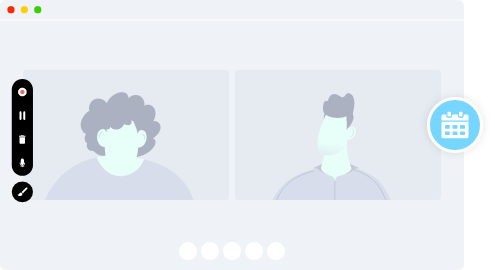
How to record a Twitch stream with audio - step by step guide
The first step towards recording your live stream is to install Vmaker on your system
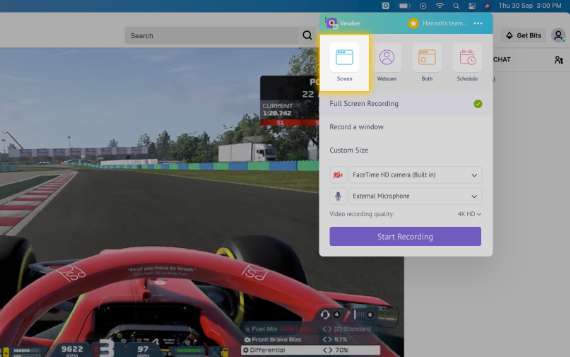
Step 1
Just before you go live, start Vmaker on your system
- Select “Screen” mode to record just your screen
- Select the “Screen + Webcam” if you would like to record with a webcam overlay
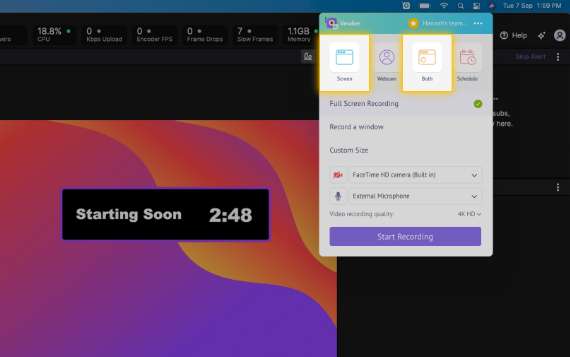
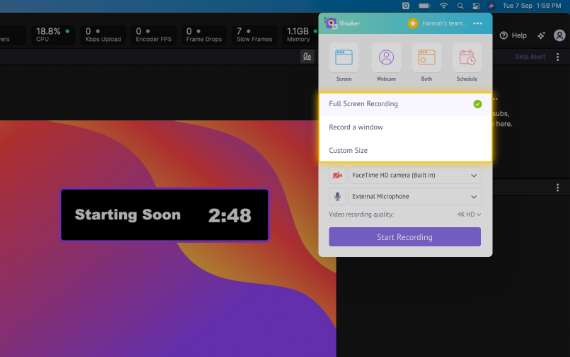
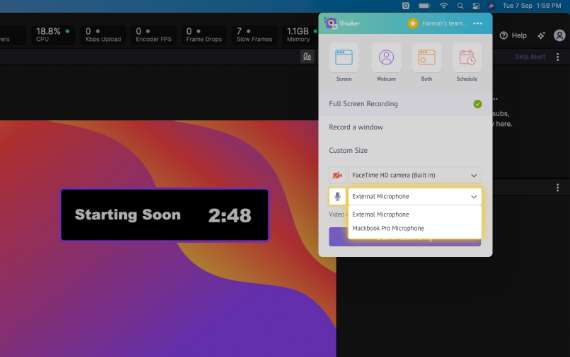
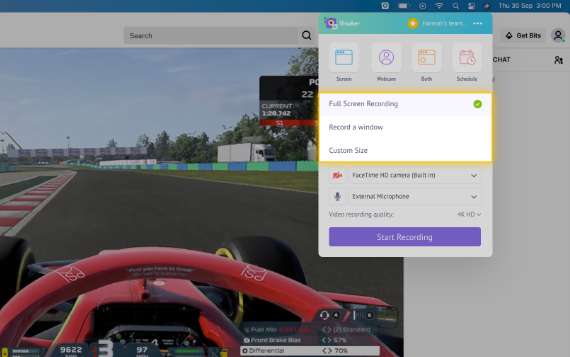
Step 2
There are three options available
- “Full Screen” mode to capture your entire screen
- “Custom Size” mode to capture a particular region
- “Record a Window” mode to record any particular game window
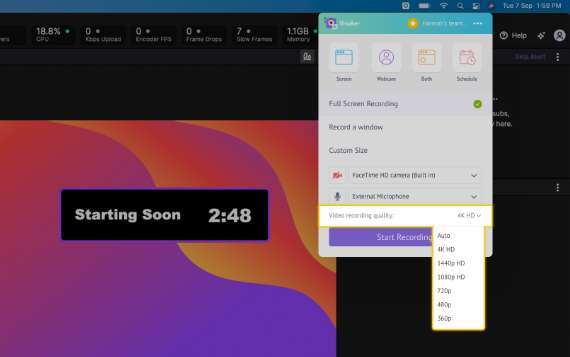
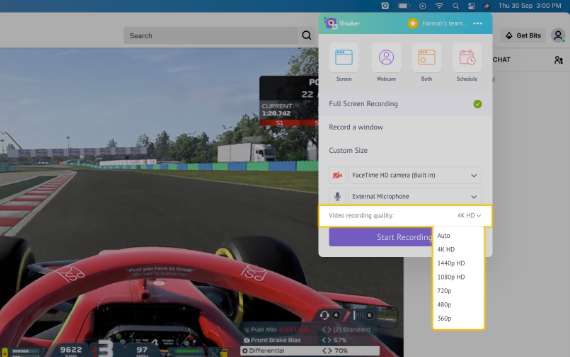
Step 3
Set your recording resolution
Select the recording resolution quality. You can record your gameplays at the highest resolution of 4K HD.
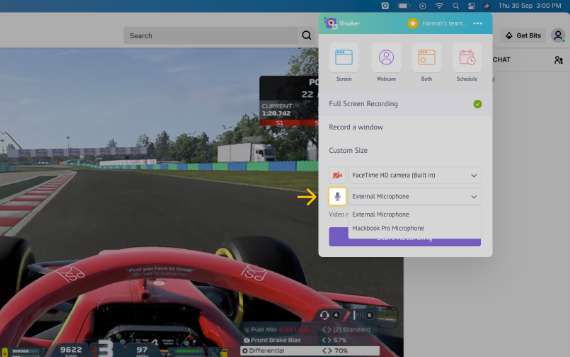
Step 4
Select the audio source of your choice
You can either use your system microphone or an external microphone to record your voice.
Tip: Use headphones for better audio quality
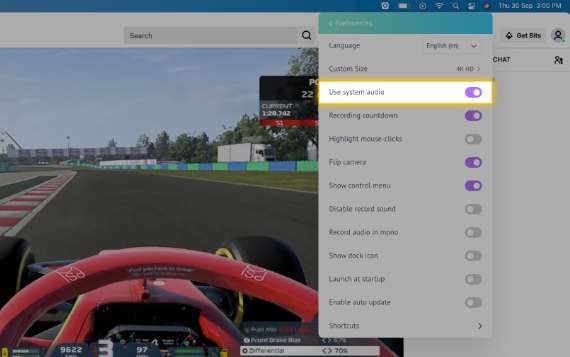
Step 5
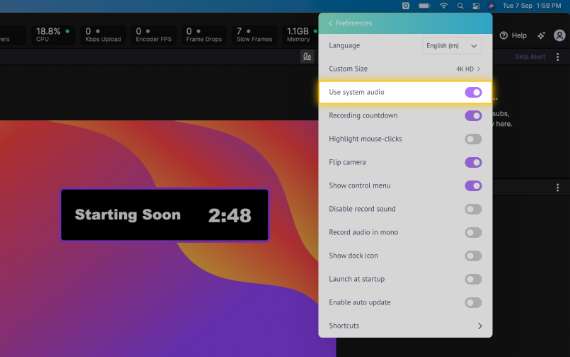
Enable your system audio
Click on the Preferences under options and enable the “System Audio” to capture the gameplay music.
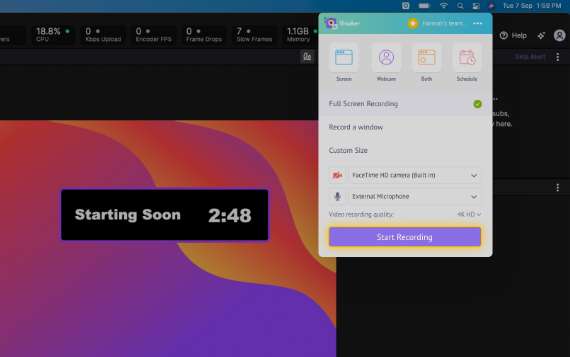
Step 6
Click on “Start Recording”
Click the “Start Recording” button and start your live stream.
Step 7
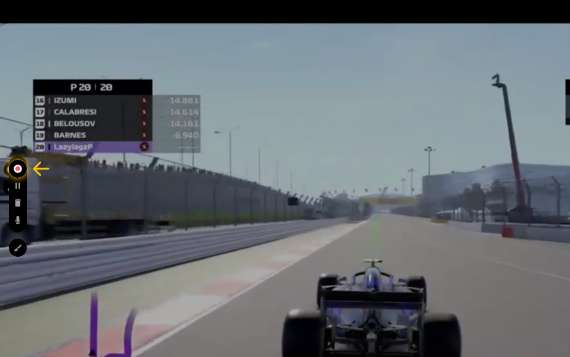
To stop recording click on the red icon or the dock button
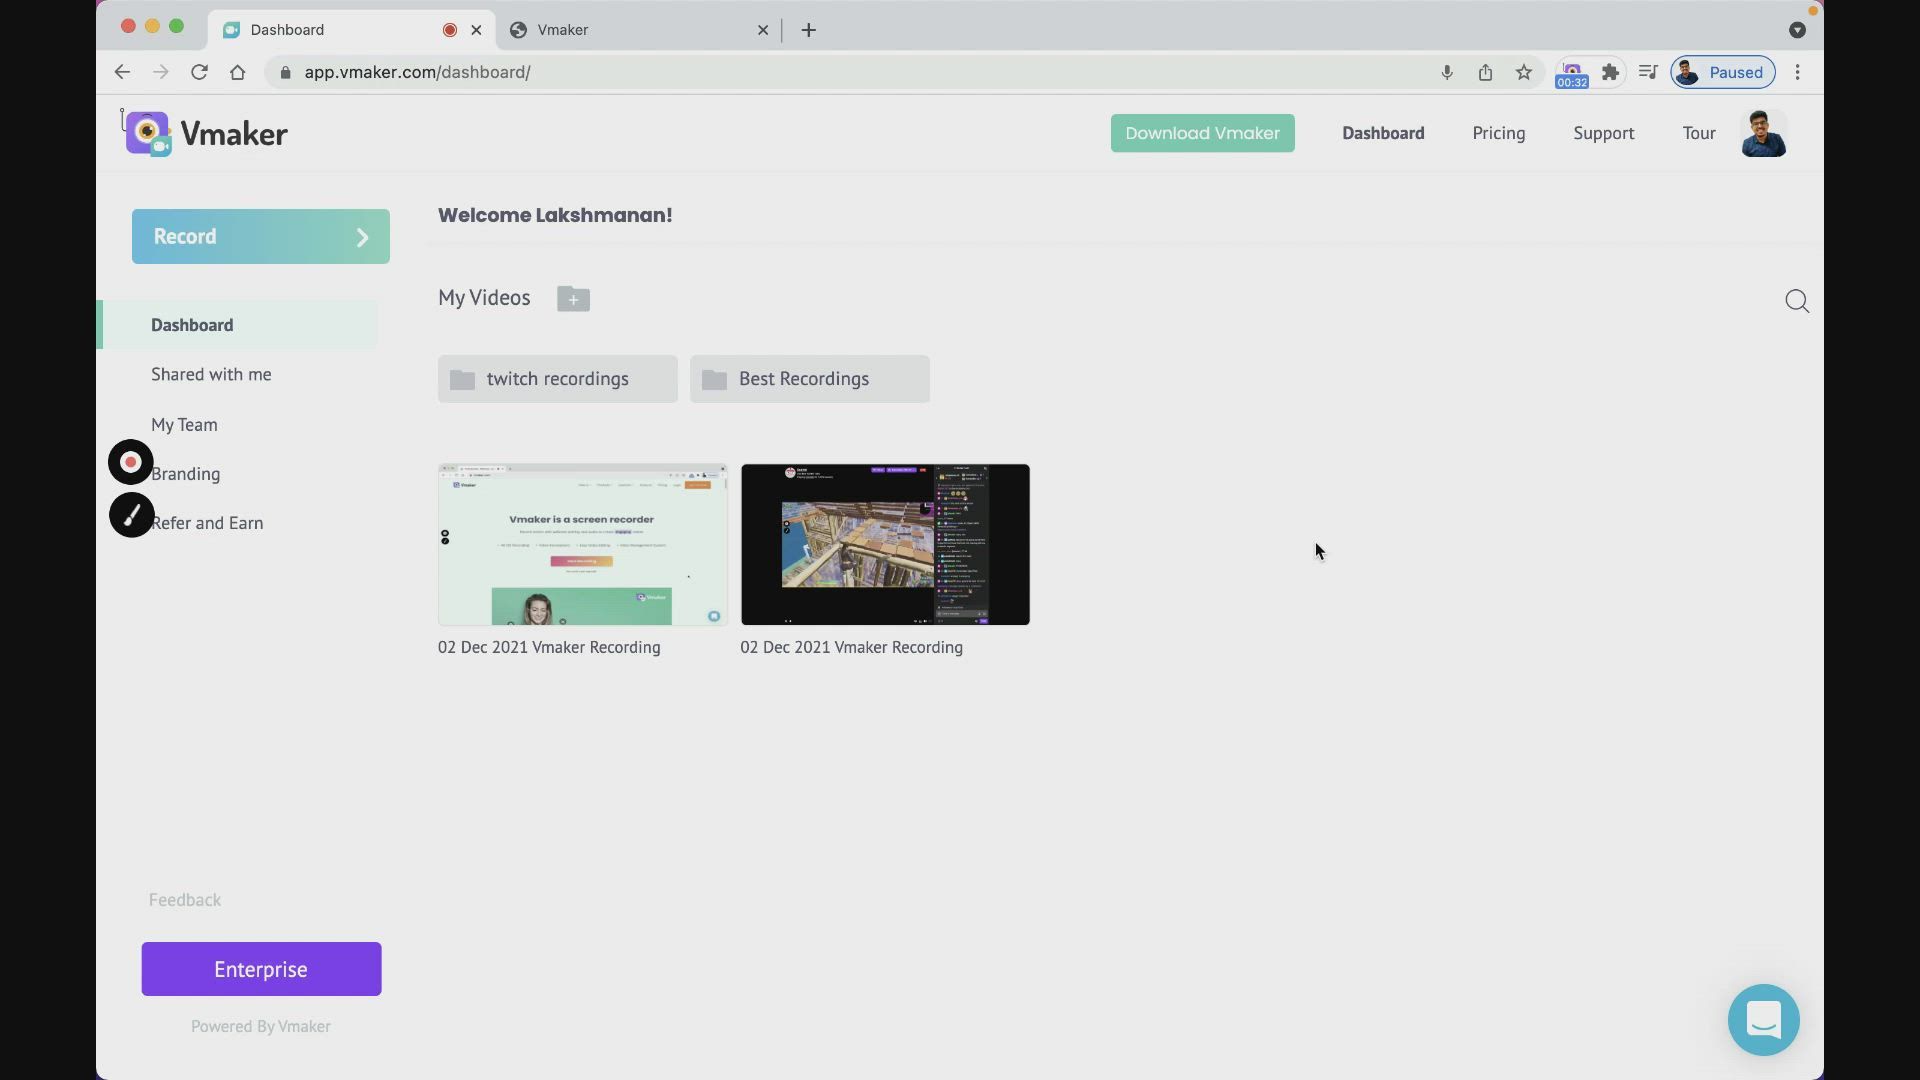
Once you finish recording your recorded stream will be automatically uploaded to your private cloud account.

Step 8
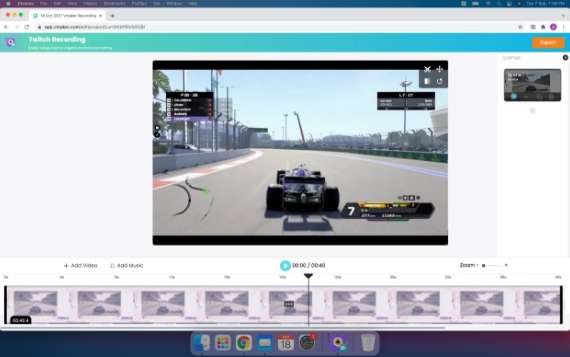
Edit and create highlights from your recording
With Vmaker’s built-in video editor, you can trim your videos, add intros, subtitles, transition, music, and more, and create a compelling video.
Step 9
Download and share your recordings
Render your videos in 4K resolution and share your videos to your favorite social networks from Vmaker.

Step 1
Go to the Twitch live stream you want to record and start Vmaker
Select “Screen” mode to record only your screen.
Step 2
Set the recording area
There are three options available:
- Full-screen recording: You can record your fullscreen
- Record a window: You can choose a particular window and record
- Custom size: You can choose a particular region on your screen to record
Step 3
Turn on/off your microphone
If you wish to record your system audio alone then you can turn off your microphone.
Step 4
Enable system audio
To record your system audio, click on Preferences under the options menu and enable “System Audio”.
Step 5
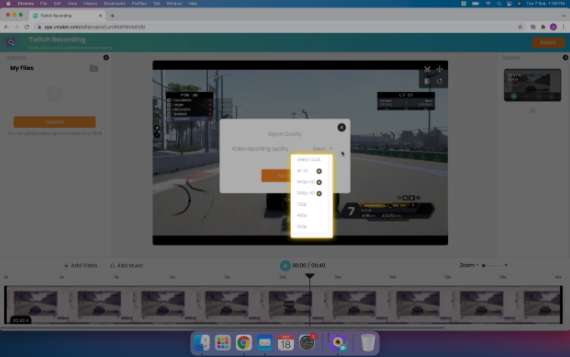
Set the resolution of your video for better clarity
You can set the resolution of your video from 360p to 4K HD resolution according to your needs. Select the highest resolution to record your video with better clarity.
Step 6
Click on “Start Recording”
Click the “Start Recording” button and play the live stream that you want to rec.
Tip: Record multiple live streams in a single session for as long as you want, and use the built-in video editor to edit them

Step 7
To stop recording click on the red icon or the dock button
Once you finish recording your video will be automatically uploaded to your private cloud account.
Step 8
Edit your Twitch videos with the built-in video editor
Trim your videos, add intros, subtitles, transition, music, and more, and create a compelling video.

Step 9
Download and share videos with ease
Render your videos in 4K resolution, download, and share your videos to your favorite social networks from Vmaker.
Create a gaming review video
Just play the game recording on your device and use “Screen + Webcam” mode to create a review video with a webcam overlay.
Pro tip: Use frames and virtual backgrounds to jazz up your video
Start recording your Twitch videos with Vmaker’s free Twitch screen recorder
Free for lifetime. No credit card required.
Features that make Vmaker the best Twitch recording software
-
Unlimited Recording Limit
![Unlimited Recording Limit]()
With Vmaker’s free Twitch screen recorder, you can record unlimited number of live streams at HD quality for free for lifetime. There is no watermarks added.
-
![Unlimited Recording Limit]()

-
Crystal Clear Recording
![Crystal Clear Recording]()
Vmaker lets you record gameplays at the highest clarity of 4K HD resolution, ensuring that your videos are crystal clear.
-
![Crystal Clear Recording]()
-
Built-in Video Editor
![Built-in Video Editor]()
Vmaker comes with a built-in powerful video editor that allows you to trim and create highlight videos from your recordings. Additionally, you can create intros, add music, transitions, text, subtitles, and more.
-
![Built-in Video Editor]()
-
Easy Storage and Sharing
![Easy Storage and Sharing]()
You don’t have to worry about your storage space while recording with Vmaker. All your videos will be stored in your private cloud account. And from there you can easily download and share your videos.
-
![Easy Storage and Sharing]()

Now record unlimited number of videos with Vmaker’s free Twitch screen recorder
No credit card required.
Frequently Asked Questions
To download your twitch stream go to your Dashboard> Select the Video> Click on the Download button on the player page.
It’s pretty easy. Since Vmaker comes with a YouTube integration you can directly upload your Twitch videos from the Vmaker player page itself. Here’s how you do it: go to your Dashboard> Select the Video> Click on Share button>Select YouTube.
Here’s a detailed tutorial video on editing videos with
Vmaker’s video editor.
https://www.youtube.com/watch?v=jG6HtDnjYyc