How to record Skype calls?
Skype, by default, has a screen recording option, but you would require a paid account and the host's permission to record a call. And, also, there is a limitation that puts a cap on your recording storage duration by 30 days.
With Vmaker's free Skype video recorder, you don't have to worry about any of the above-stated issues. You can simply record, edit, and share your meeting recordings with ease.
Check out the video below to learn how to record Skype calls without permission using Vmaker in a few simple steps.What devices does Vmaker support?
Record Skype calls with Vmaker’s Skype Video Recorder
Easy to Use. No credit card required.
How to record Skype Meetings with audio - step-by-step guide
Follow the steps below once you download and install Vmaker’s free Skype Meeting recorder on your system
Step 1
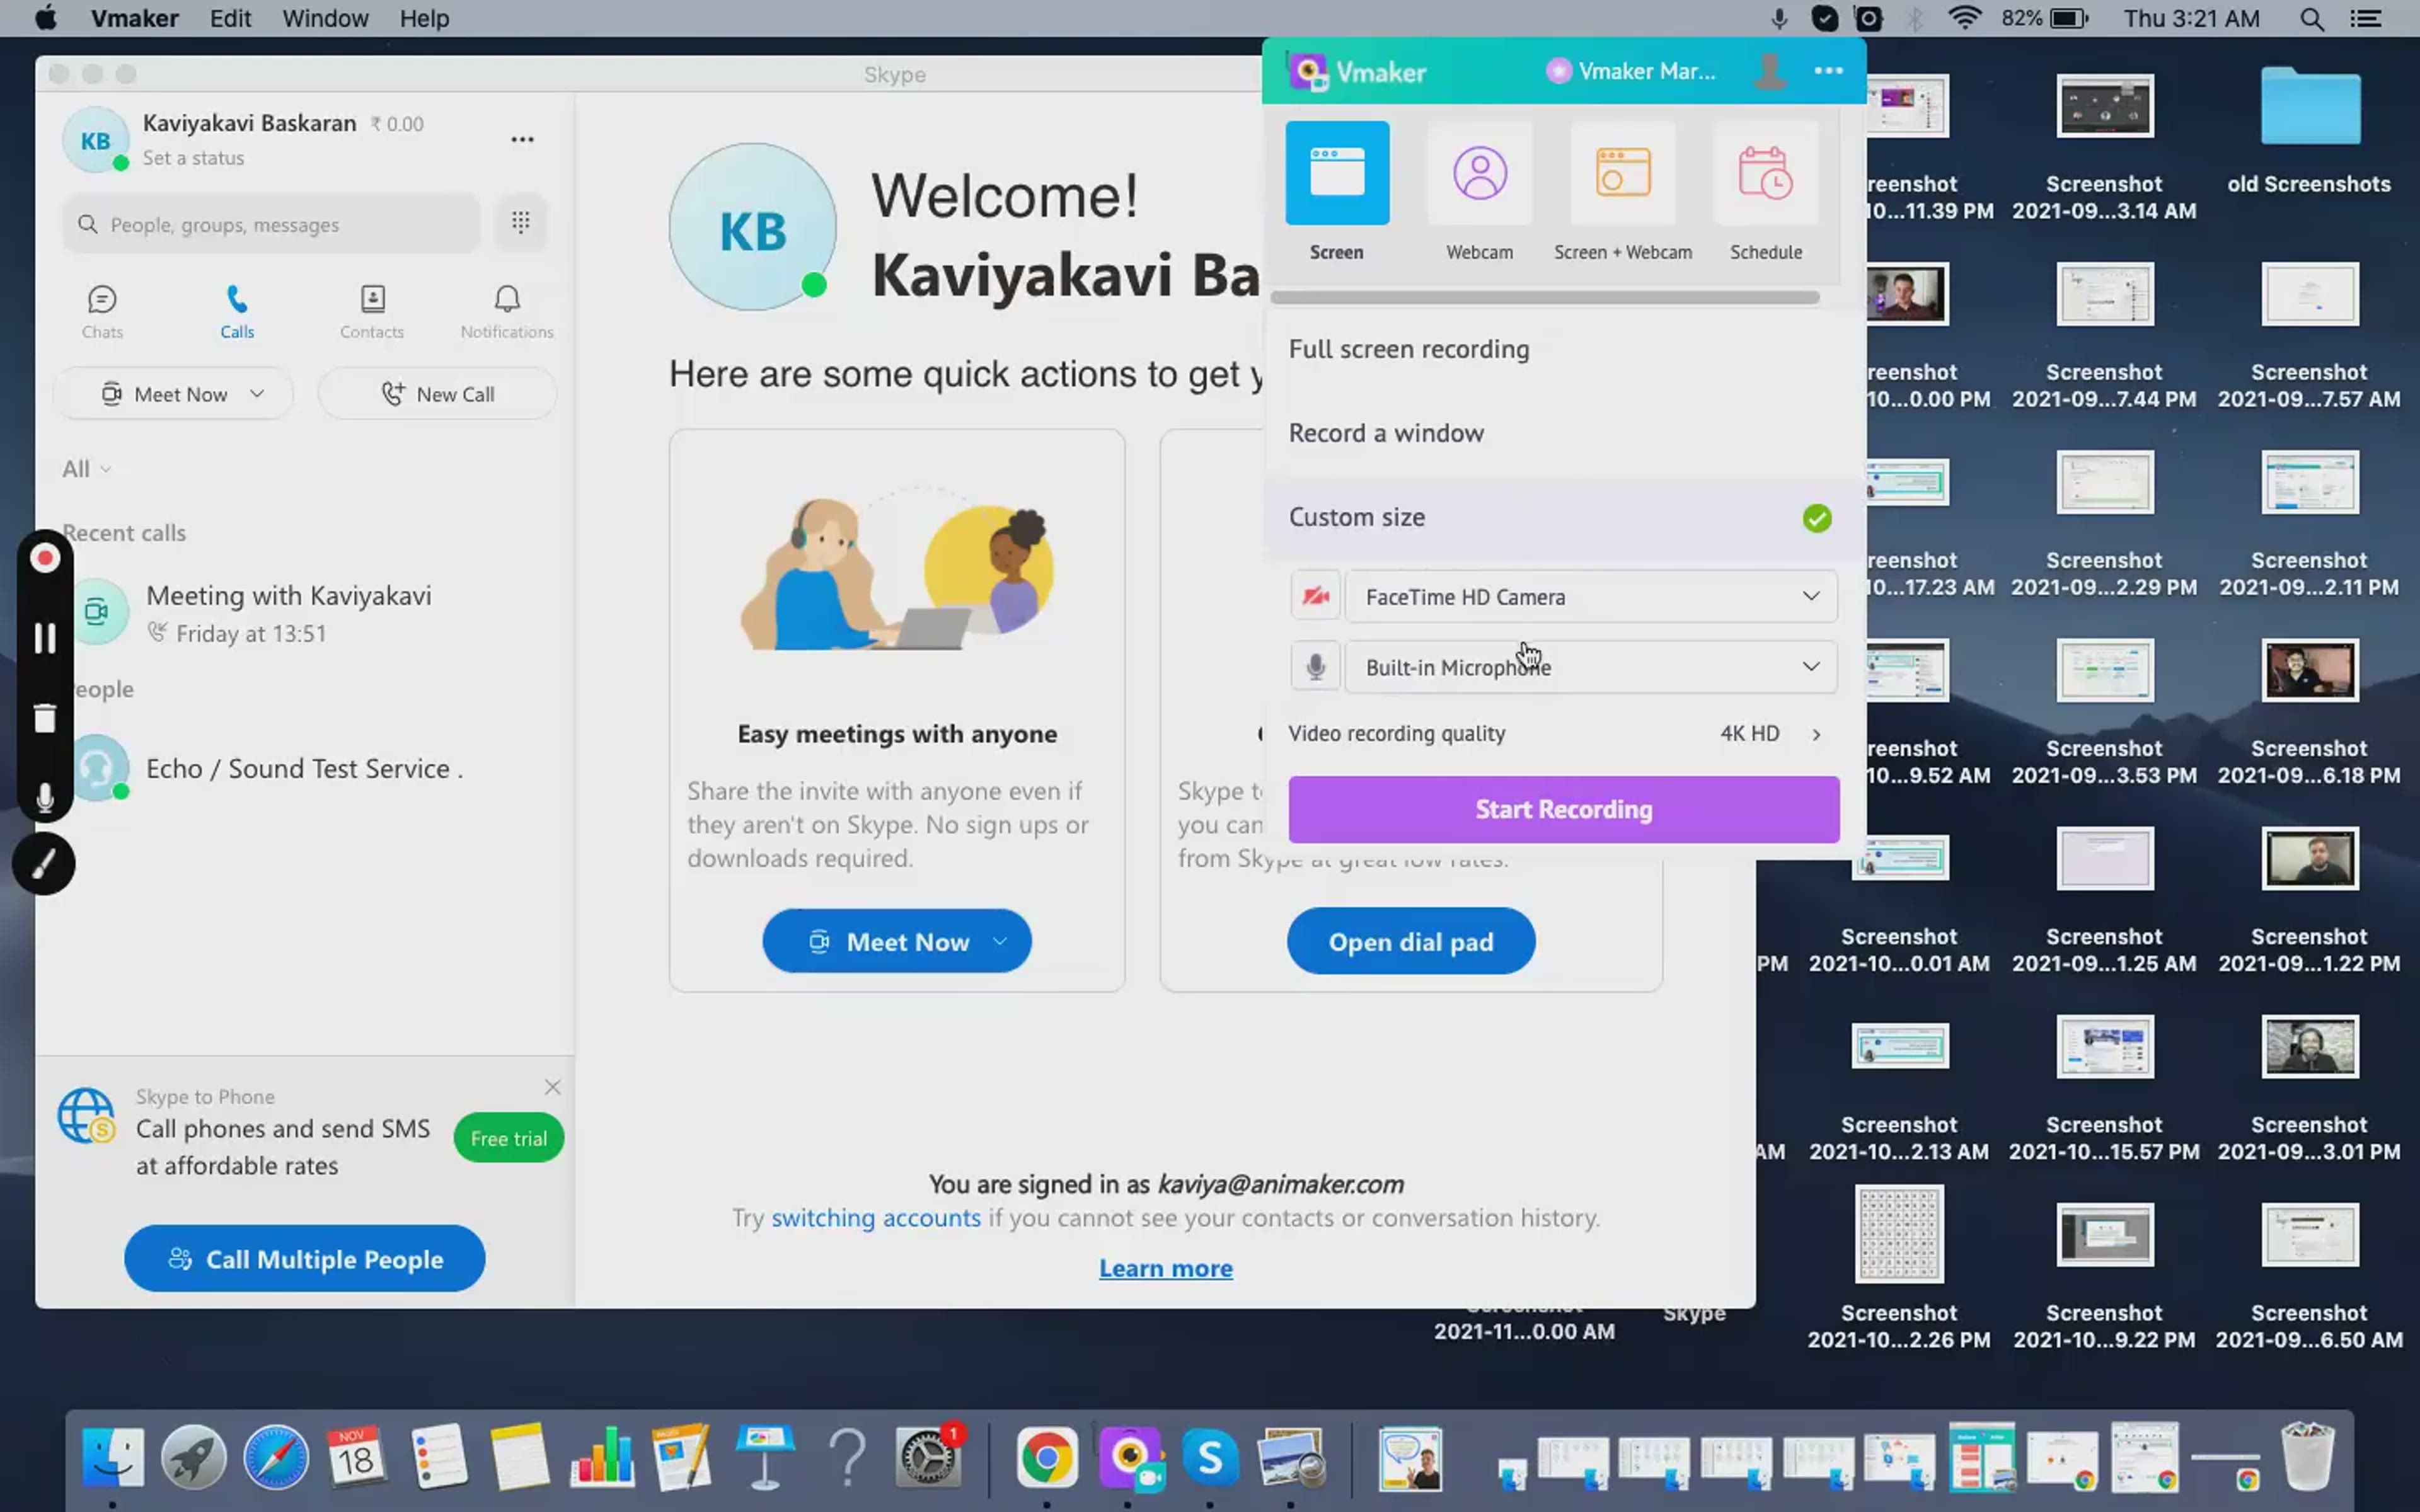
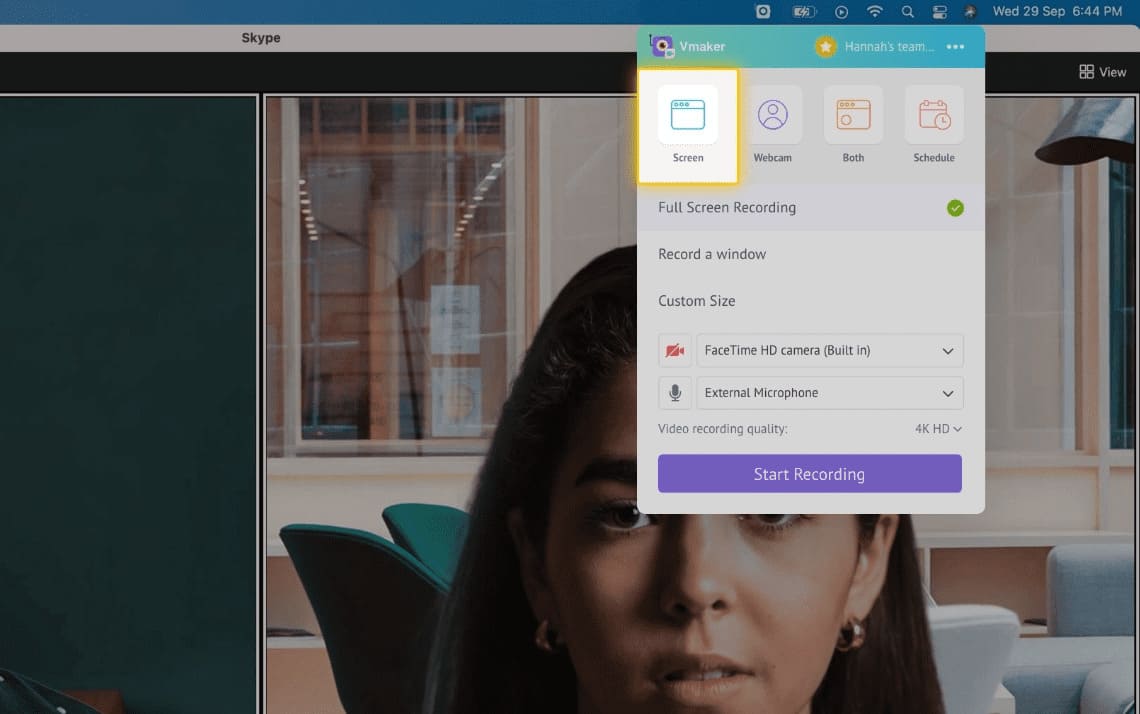
Join your Skype call and start Vmaker on your system
Choose the “Record Screen” mode to record your meeting.
Step 2
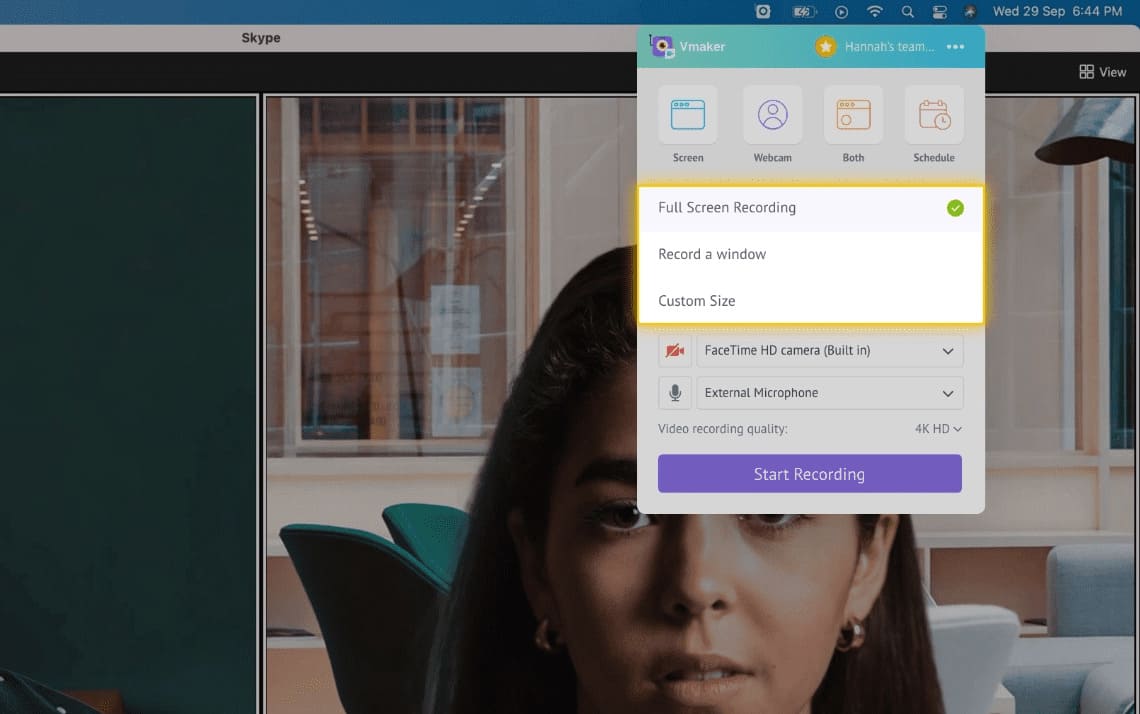
Select the screen mode
There are three options available here:
- Full-screen recording: You can record your fullscreen
- Record a window: You can choose a particular window and record
- Custom size: You can choose a particular region on your screen to record
Step 3
Select the audio source of your choice
You can use your system microphone or an external microphone to record your audio.
Tip: Use headphones for a better audio quality

Step 4
Enable system audio
To record your system audio, click on Preferences under the options menu and enable “System Audio”.

Step 5
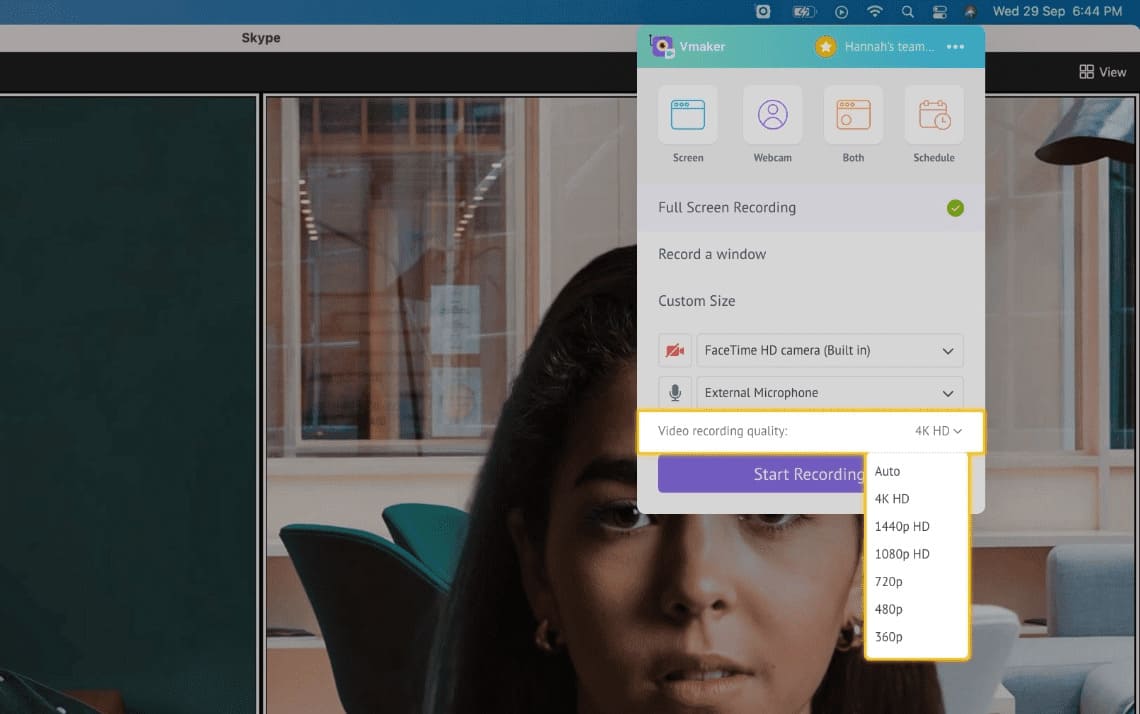
Set the recording resolution
Select the recording resolution quality. You can record your meetings at the highest resolution of 4K HD.
Step 6
Click the “Start Recording” button to start your recording
Now you can sit back and let Vmaker record the meeting.

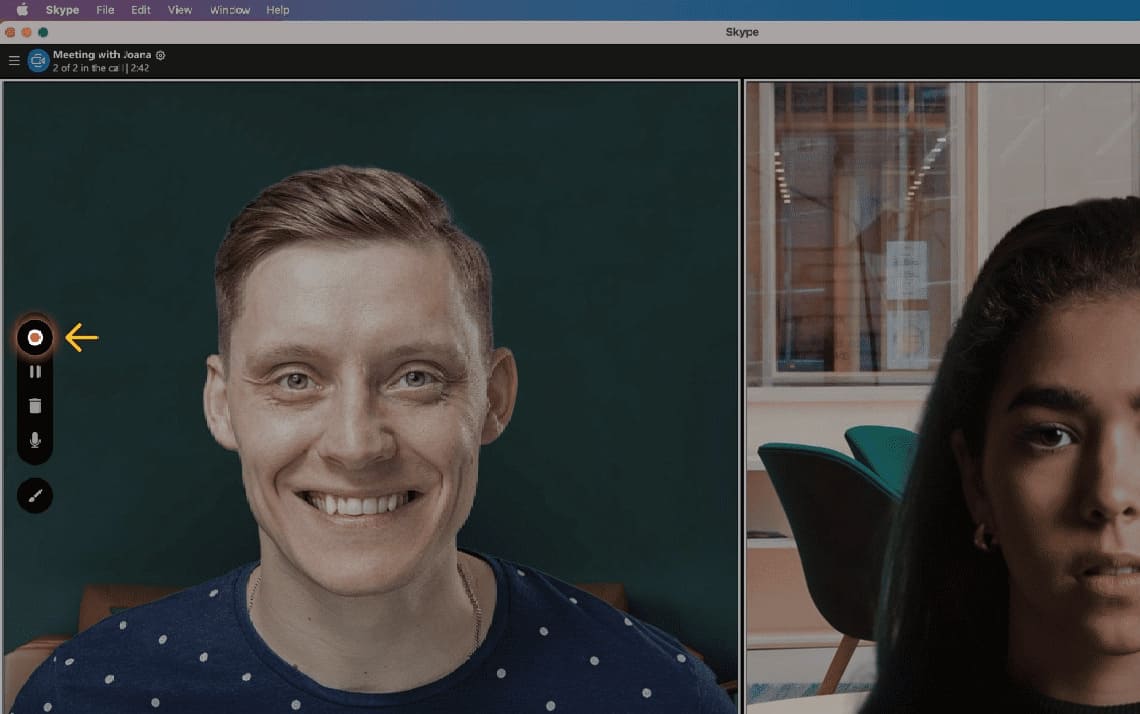
Step 7
To stop recording, click on the red icon or the dock button
Once you finish recording, your video will be automatically uploaded to your private cloud account form where you can edit and share your recorded videos.
Record Skype meetings for free with Vmaker’s free Skype video recorder
Free for lifetime. No credit card required.
Why should you choose Vmaker to record Skype calls?
-
Record unlimited meetings without permission
![Record unlimited meetings without permission]()
Record an unlimited number of Skype video calls for free. There are no watermarks added and you don’t have to get the host’s permission to record your meetings.
-
![Record unlimited meetings without permission]()

-
Record Skype calls with audio and video
![Record Skype calls with audio and video]()
You can record both audio and video of your Skype meetings. You can capture everything, be it a presentation or whiteboard notes or screen sharing, that is on your screen.
-
![Record Skype calls with audio and video]()

-
Schedule your recording
![Schedule your recording]()
You can now schedule your Skype recording beforehand by setting a time, and Vmaker will automatically record your Skype call once you join in the session.
-
![Schedule your recording]()

-
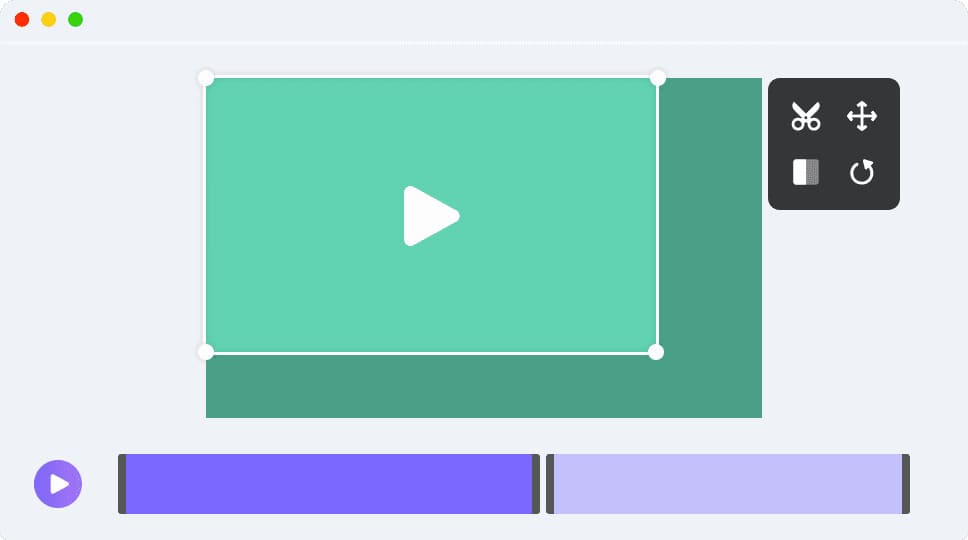
Edit and share your recordings
![Edit and share your recordings]()
Once you finish your recording, your video will get uploaded to your private cloud account, and from there, you can easily edit and share your recordings.
-
![Edit and share your recordings]()
Start recording your Skype calls with Vmaker’s Skype video recorder
Free for lifetime. No credit card required.
Frequently Asked Questions
Yes. Vmaker mac recorder supports macOS 10.14(Mojave), macOS 10.15(Catalina), and macOS 11.1(Big Sur).
Vmaker supports both Mac and Windows devices. For Mac, you can use Vmaker’s Screen Recorder for Mac, and for Windows, you can use Vmaker’s Windows Screen Recorder or Vmaker Chrome Extension.
The steps are exactly the same for Macbook Air too. Vmaker works the same in all versions and versions of macOS.
To download the Skype recording go to the Vmaker Dashboard>Click on the recording>Click on the Download button, and your video will be downloaded.
To share your recorded meeting go to the Dashboard>Click on the recording>Click on the Share button, and from here you will get a sharable link to share your recording. You can also share your recording directly to your social channels from Vamker.
Install Vmaker or use Vmaker’s Chrome Extension on your computer or laptop. Go to Dashboard, Click on the recording.
Download Vmaker’s skype video recorder in your system and install it. Go to Dashboard, Click on the recording.
Yes. You can edit your Skype recordings with Vmaker’s free built-in video editor. You trim, rotate, flip and do much more with your.
You can find your recorded Skype meeting in your private cloud account.
Of course, you can record Skype calls as a participant/ attendee. You don’t even need permission to record the meetings.
Go to your dashboard and click on the video you want to watch, you will be taken to the player page where you can watch your video.
Not necessarily. With Vmaker you can record Skype calls as an attendee without the host’s permission.
We will be soon launching our iOS app which you can use to record Skype meetings on iPhone and iPad.
We will be soon launching our Android app which you can use to record Skype meetings on Android devices.