How to record a PowerPoint presentation with audio and video?
There are two ways to record a PowerPoint presentation with audio and video:
- Add audio to the slides and export it as a video
- Use a screen recorder to record yourself presenting PowerPoint
Between the two methods, recording presentations with a screen recorder is more effective and engaging than the other. Since it is more lively and provides a real-time-like experience, the audience stays focused on your slides.
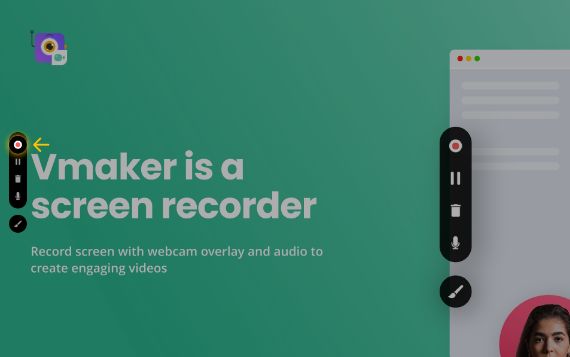
With Vmaker's free screen recorder, it's easy to record your PowerPoint presentation with audio and video in no time. In fact, it's as easy as creating the sides themselves. Let’s see how to record your PowerPoint presentation with audio on Vmaker!
How to record a PowerPoint presentation with audio - step by step guide
Follow the steps below once you download and install Vmaker’s free PowerPoint screen recording software on your system
Step 1
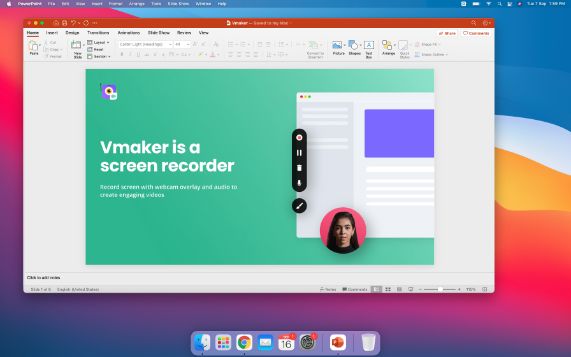
Set up your PowerPoint presentation
Set up your presentation with all the talking points and visuals.
Step 2
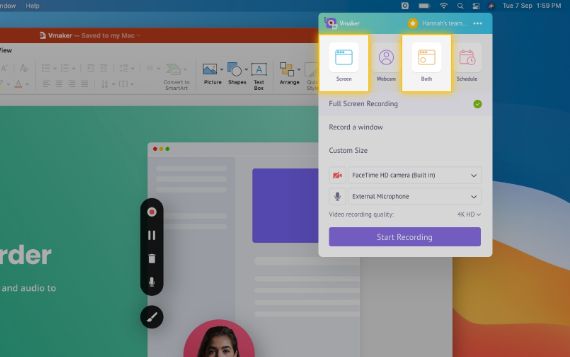
Start Vmaker on your system and choose the recording mode
There are two recording modes available on Vmaker:
- Record Screen: Here you present your slides and record your screen
- Record Screen and Webcam: Here you present and record your PowerPoint presentation along with a webcam overlay
Step 3
Select the full-screen mode
This will enable you to record your entire presentation in the Present mode.

Step 4
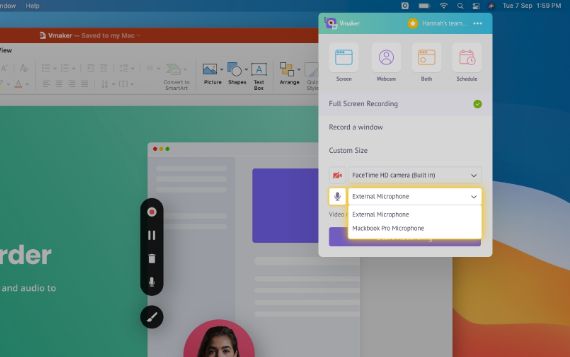
Select the microphone you want to record from
You can use the system microphone or an external microphone to record audio
- Tip - Use headphones for better audio quality
Step 5
Set the resolution of your recording for better clarity
You can set the resolution of your video from 360p to 4K HD resolution based on your needs.
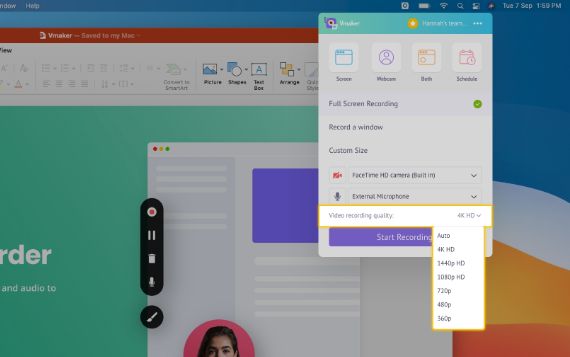
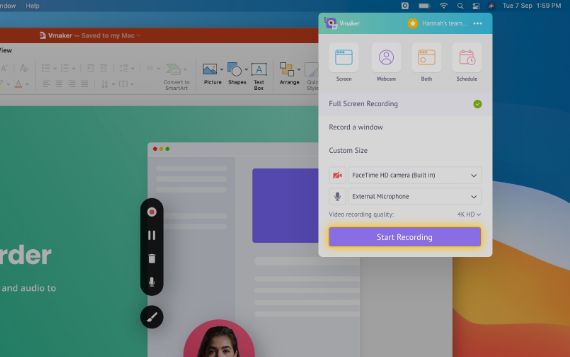
Step 6
Click on “Start Recording”
Click the “Start Recording” button or press the hotkey ⌘^1 to record your presentation.
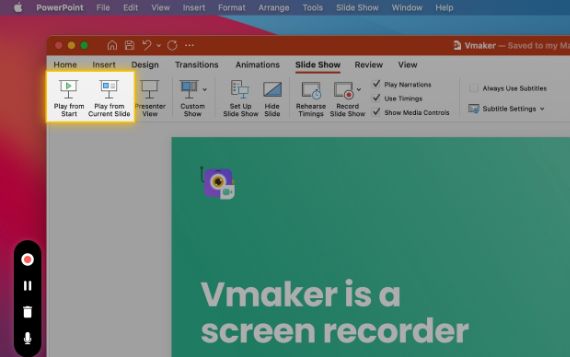
Step 7
Go to your PowerPoint presentation and click on the Present mode
Now you can record your presentation in full-screen mode.
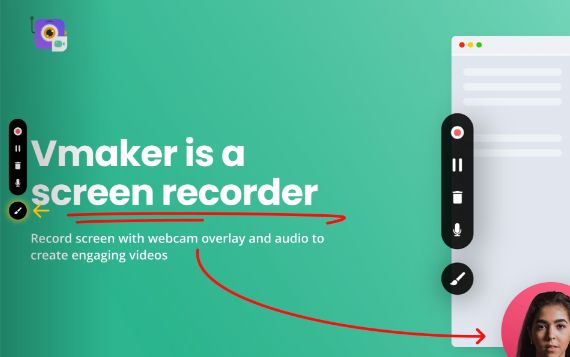
Step 8
To make your recording more compelling use screen annotation features
Use drawing tool and mouse click highlights, while recording.
Step 9
To stop screen recording your PowerPoint presentation, click on the red icon or the dock button
Once you finish recording, your video will be automatically uploaded to your private cloud account form where you can edit and share your recorded presentation.
Create videos from PowerPoint with Vmaker’s free PowerPoint screen recording software
Record PowerPoint Presentation
Free for lifetime. No credit card required.
Why should you choose Vmaker to record PowerPoint presentations?
-
Make unlimited videos using PowerPoint
![Make unlimited videos from PowerPoint]()
Create unlimited narrated PowerPoint presentations along with a webcam overlay for free. There is no limit on the number of videos you create and also there are no watermarks added.
![Make unlimited videos from PowerPoint]()

-
Add narration to your PowerPoint slides
![Add narration to your PowerPoint slides]()
Record your voice by plugging in an external microphone or use your system microphone to record presentation videos with audio. Also, Vmaker comes with a DND mode which makes sure that your recordings are disturbance-free.
-
![Add narration to your PowerPoint slides]()

-
Annotate while recording your presentation
![Annotate while recording your presentation]()
Draw, underline and highlight important information in your presentation while your record. This will help your audience follow and understand the critical information.
-
![Annotate while recording your presentation]()

-
Edit and polish your presentation
![Full stack editing suite]()
Vmaker comes with a free built-in video editor using which you can trim, crop, resize or rotate your videos. This allows you to remove unwanted sections and add precision to your PowerPoint recordings.
-
![Full stack editing suite]()


Start recording your PowerPoint slides with Vmaker’s free presentation recording software
Record PowerPoint Presentation
Free for lifetime. No credit card required.
Frequently Asked Questions
Yes. Vmaker mac recorder supports macOS 10.14(Mojave), macOS 10.15(Catalina), and macOS 11.1(Big Sur)
Vmaker supports both Mac and Windows devices. For Mac, you can use the system app and for Windows, you can use the Chrome plugin.
There are two ways to do it:
- Save and export slides as videos from PowerPoint
- Select File > Export > Create a video
- Select resolution
- Decide if you want timings and narration
- Select the timing for each slide
- Select the video format: WMV or MPEG-4 Video
- Save and export your video
- Using a screen recorder to turn PowerPoint or PPT to video
The steps are exactly the same for Macbook Air too. Vmaker works the same in all versions and versions of macOS.
Once you follow the above gude and finish recording your video, your video will be automatically to your cloud account from there you can directly upload your video to YouTube.
Narrating PowerPoint presentation is easier than it sounds.
- Add all the necessary points in your presentation
- Add all the relevant visuals to the presentation
- Plan ahead on the transition and the amount of time you will be spending on each slide
- Now start recording your presentation with Vmaker while elaborating on the points that you have already mentioned
- Once you are done, stop recording your video and use Vmaker’s built-in video editor to trim out the filler words
- Now add external videos, background music, transitions, and render and export your video
Making a screencast with PowerPoint involves the same steps as mentioned above. To enhance it further you can add subtitles and music to your recorded presentation with Vamker’s built-in video editor.
Before starting your recording, just make sure your microphone is not on mute. If you are also going to record internal audio, go to settings and enable "Enable system audio." Now you can record your presentation with both internal and external audio.
Vmaker is a screen recorder able to record your screen, webcam or both a the same time. To video record while presenting a PowerPoint presentation, you need to follow the below steps.
- Step 1: Signup and install Vmaker Mac Screen Recorder or Vmaker Chrome Extension into your system
- Step 2: Check the preference menu and audio setting
- Step 3: Select the screen you want to record
- Step 4: Click on the “Start Recording” button