Contents
3 Simple Ways to Screen Record on Windows with Audio
1. How to Screen Record on Windows with Audio using Vmaker
2. How to Screen Record on Windows PC with Sound using Xbox Game Bar
3. Record your Screen on Windows PC with Sound using Microsoft PowerPoint
4. How to Screen Record on Windows PC with Sound using Movavi Screen Recorder
How To Record Your Screen on Windows With Audio - 3 Simple Ways
Looking for ways to record your screen on Windows with audio?
You've come to the right place.
In today's post, we'll show you how to record your screen on Windows with audio in 3 simple ways.
Let's get started!
3 Simple Ways to Screen Record on Windows with Audio
When it comes to recording your screen on Windows with audio, you have 3 options. You can:
- Record your screen using a professional screen recorder like Vmaker
- Record your screen using the built-in Windows screen recorder - the Xbox Game Bar
- Record your screen using Microsoft PowerPoint
Without any further ado, let's explore each of these 3 methods in detail.
1. How to Screen Record on Windows with Audio using Vmaker
In this method, you'll learn how to screen record on Windows with internal & mic audio using a user-friendly screen recorder called Vmaker.
Vmaker is a Windows screen recorder that lets you record, edit, and share unlimited number of recordings for free!
Unlike Windows Game Bar, Vmaker doesn't limit your recording duration and allows you to record your videos for unlimited duration.
Now, let's go ahead and see how you can record your screen on Windows with internal and microphone audio.
i) Sign up & download Vmaker's Windows application
Head over to Vmaker's official page and sign up.
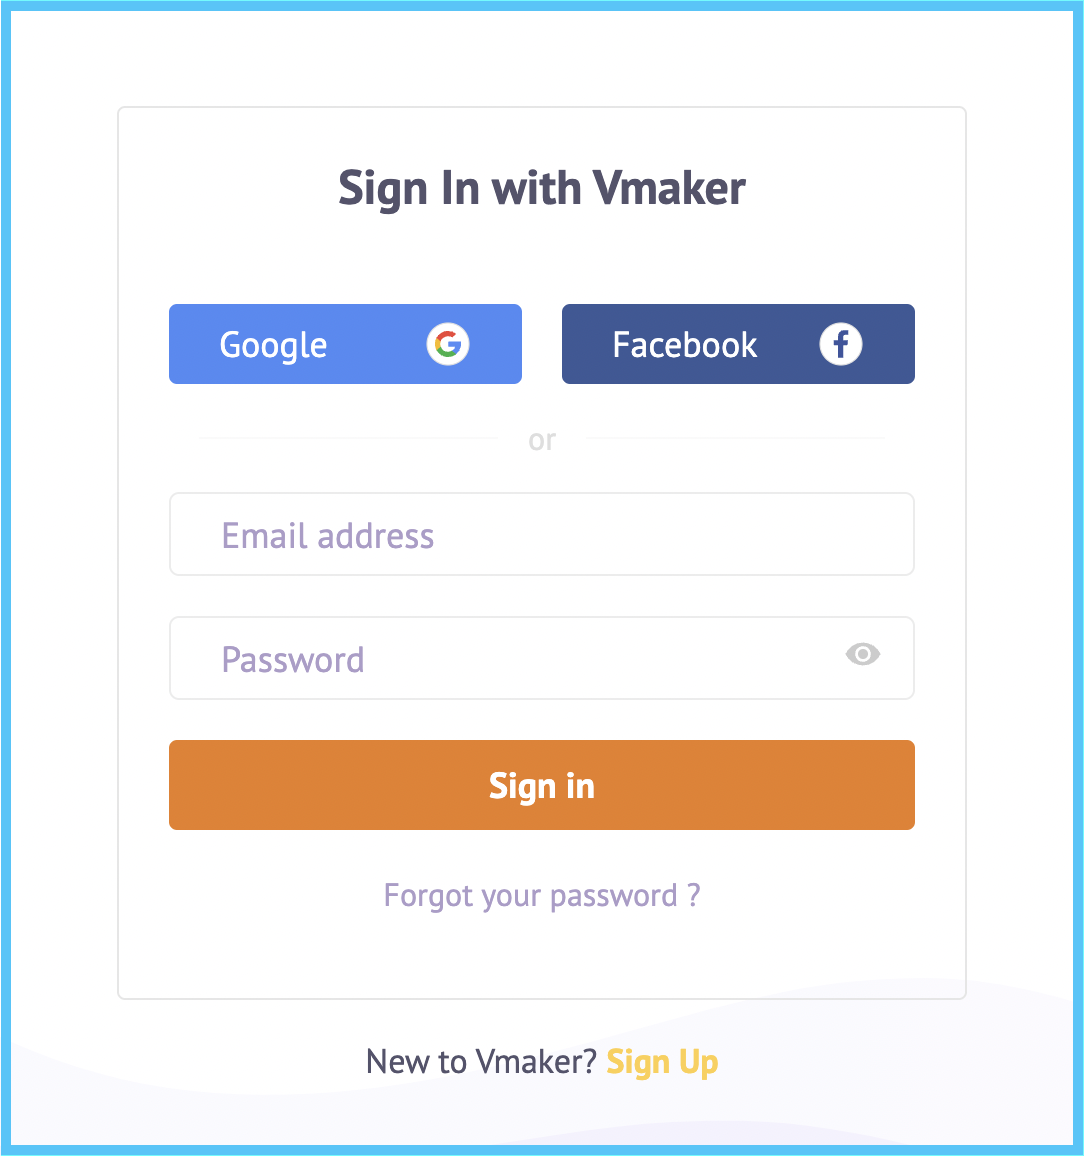
As soon as you sign up, you will be taken to Vmaker's dashboard.

Click on the 'Download' button on the top right corner of the dashboard and download the software to your Windows computer.

ii) Launch the application on your device
Once the download is complete, you can give all the necessary permissions and launch Vmaker on your computer.
iii) Customize your recording preferences
As soon as you've launched the application, you can start customizing your recording preferences according to your personal requirements.
Start by selecting your desired recording mode, recording area, and audio inputs.
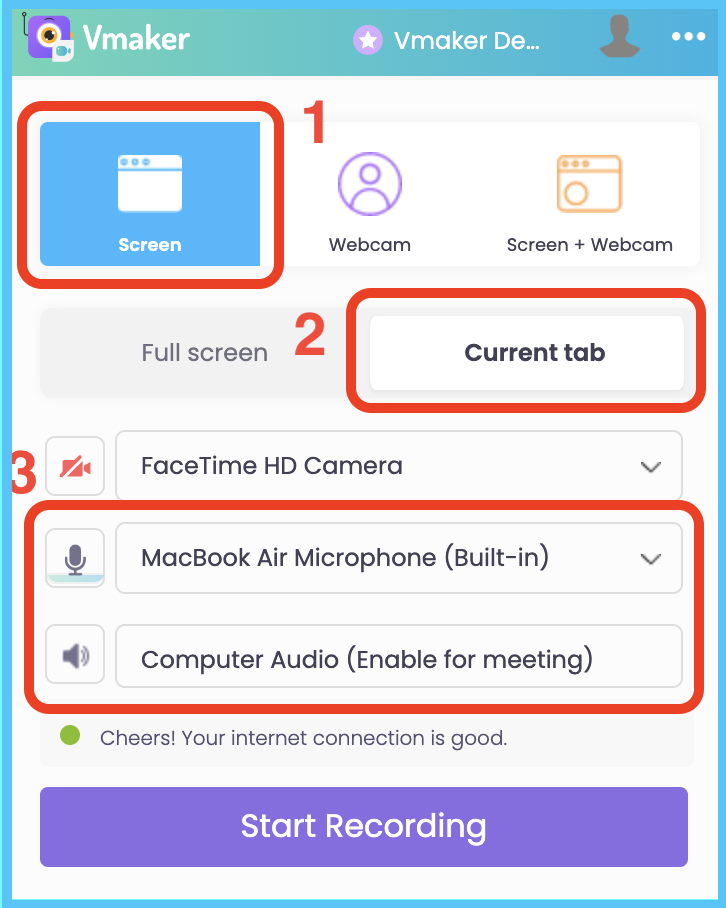
If your requirements are basic, you can proceed with this.
But, if you wish to access advanced features, you can click on the horizontal dot matrix on the top of your pop-up and choose 'Preferences.'

As soon as you click on the preferences, you will be directed to a tab like the one shown below.
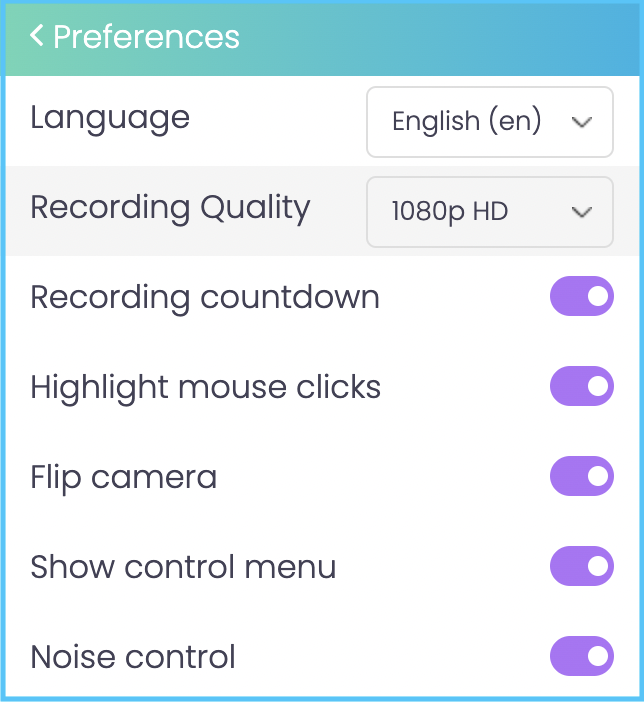
Enable all the features you would like to add to your recording.
iv) Record your screen
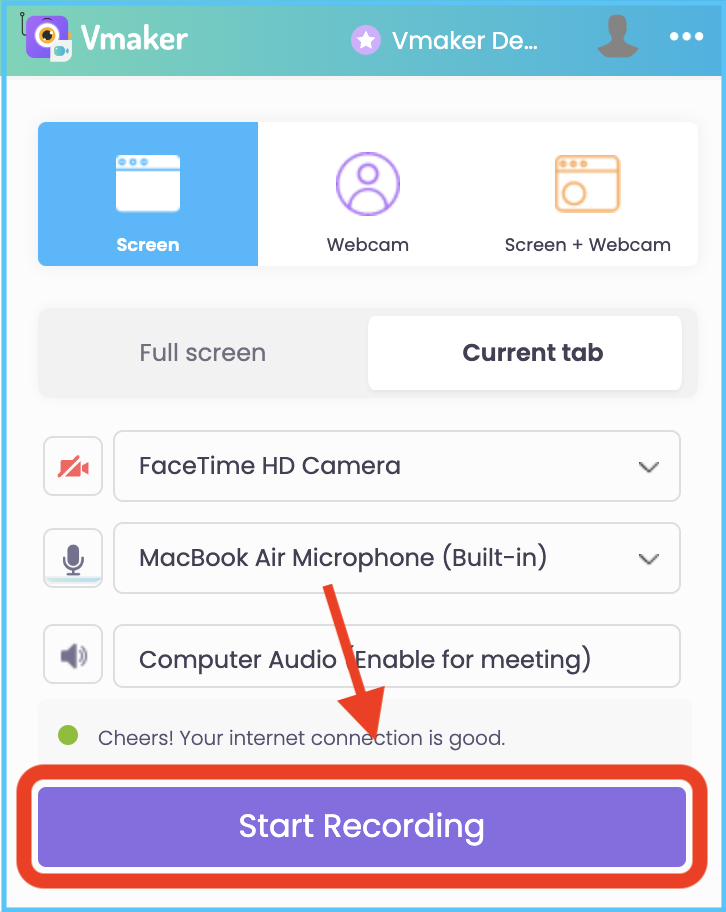
When you're done customizing all your recording preferences, you can proceed to recording your video.
Just click on the 'Start Recording' button when you're ready and the video will start recording.
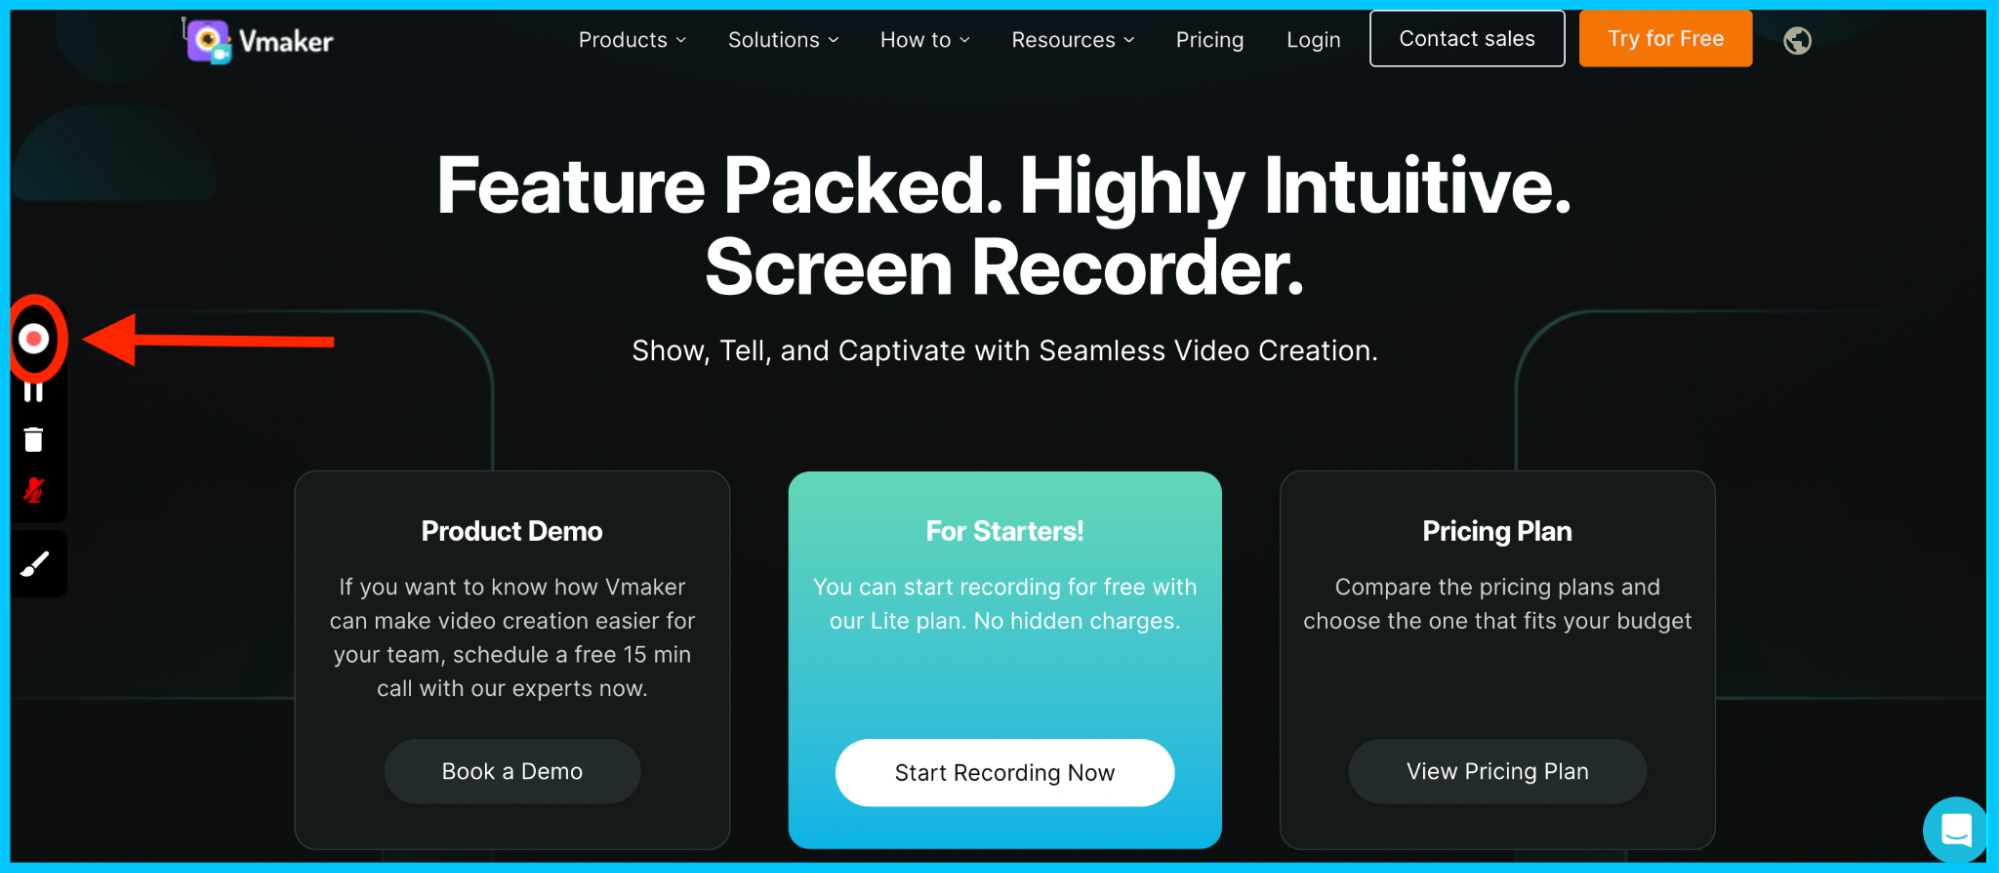
While recording the video, you can make use of Vmaker's drawing tool to highlight important sections of your screen. This will help in conveying your points clearly and keep your viewers engaged throughout the recording.
Just click on the brush icon on the left-hand side of your screen and highlight important sections of your screen while explaining your points.
When you're done, you can stop the recording by clicking on the red dock button on the left-hand side of your screen.
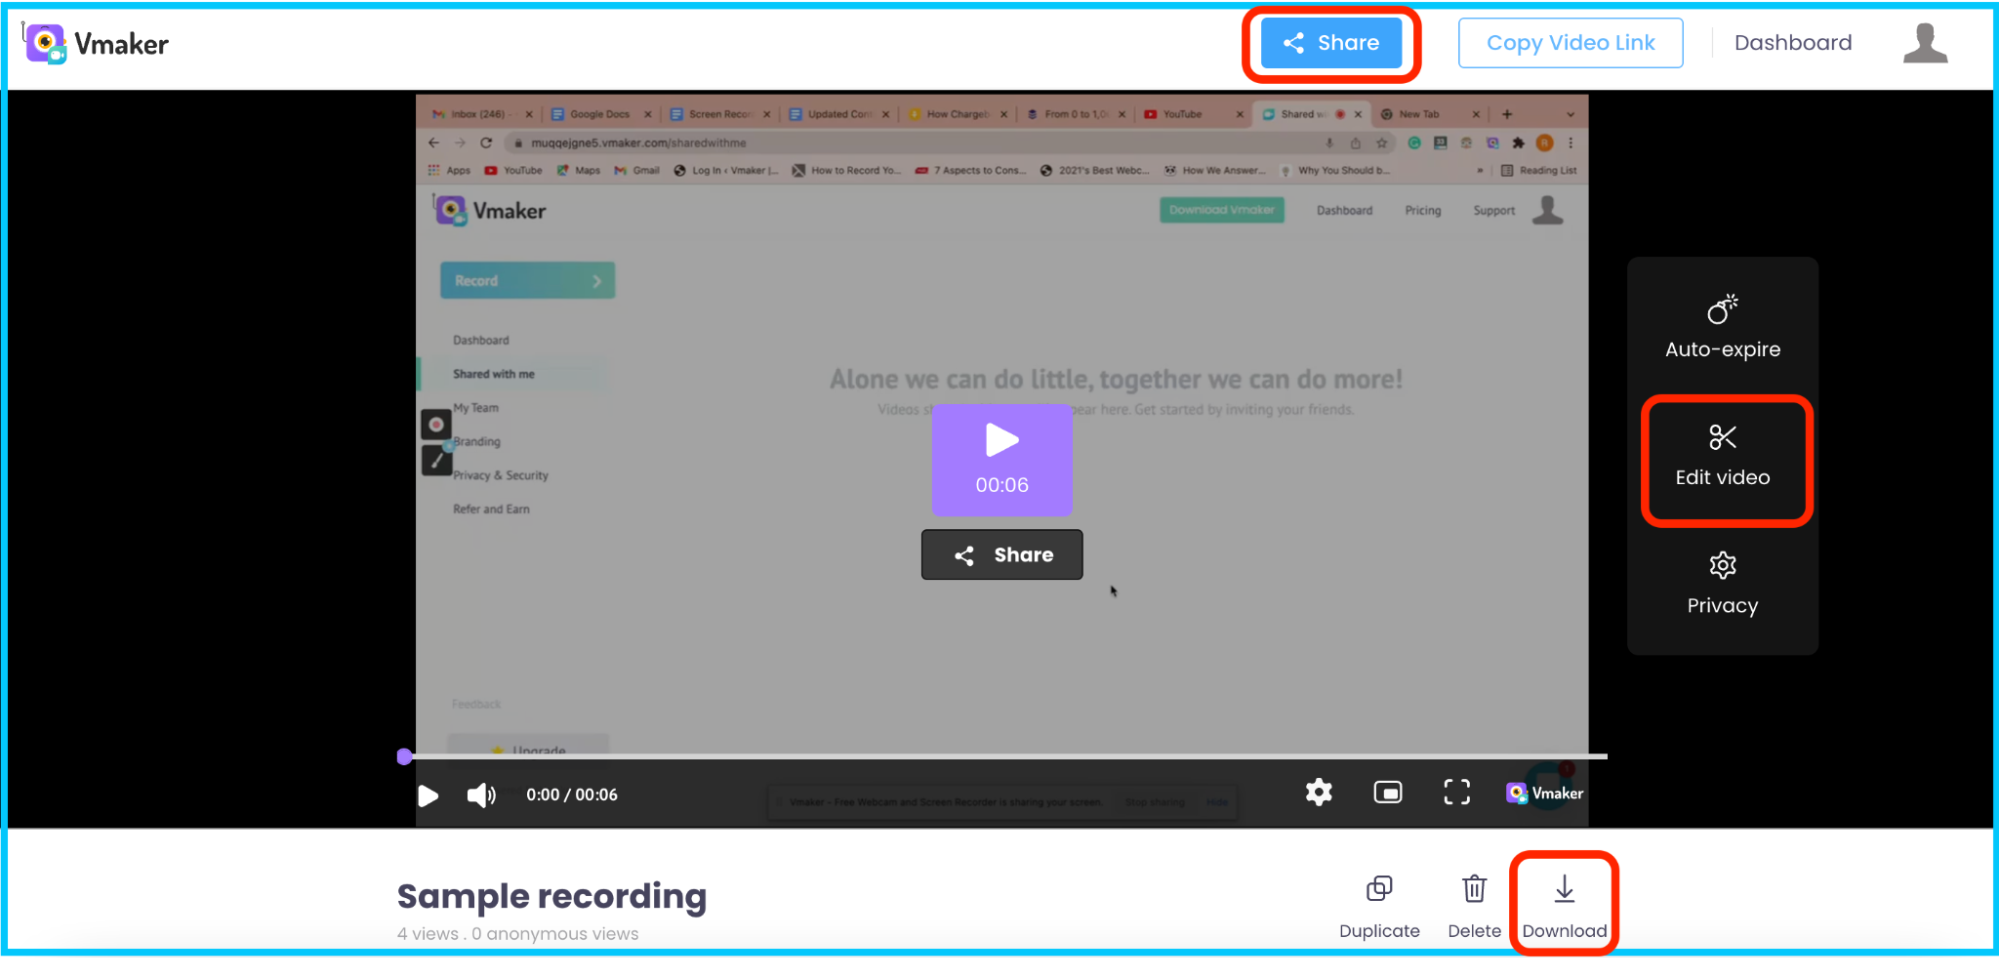
v) Edit & share your recording with others
The finished recording will now be available on Vmaker's player page.
Here, you will have options to download, edit, and share your video with others.
2. How to Screen Record on Windows PC with Sound using Xbox Game Bar
While Xbox Game Bar allows you to record your screen for free, it does have a few serious limitations. Here's a list of the common problems users face while using the Xbox Game Bar:
- It cannot record internal audio
- It cannot record multiple screens and windows simultaneously
- It has a 2-hour recording time limit
- It can only record one application at a time
- It cannot capture your entire screen or your desktop
But, if you're a light user who wishes to record just gameplay, you can go ahead and use this tool to record your screen on Windows with sound.
Just follow these simple instructions.
Step 1: Close all the other unnecessary applications running in the background and keep only the application you'd like to record from open.
Step 2: Use the shortcut combination Windows Key + G to open the Xbox Game Bar.
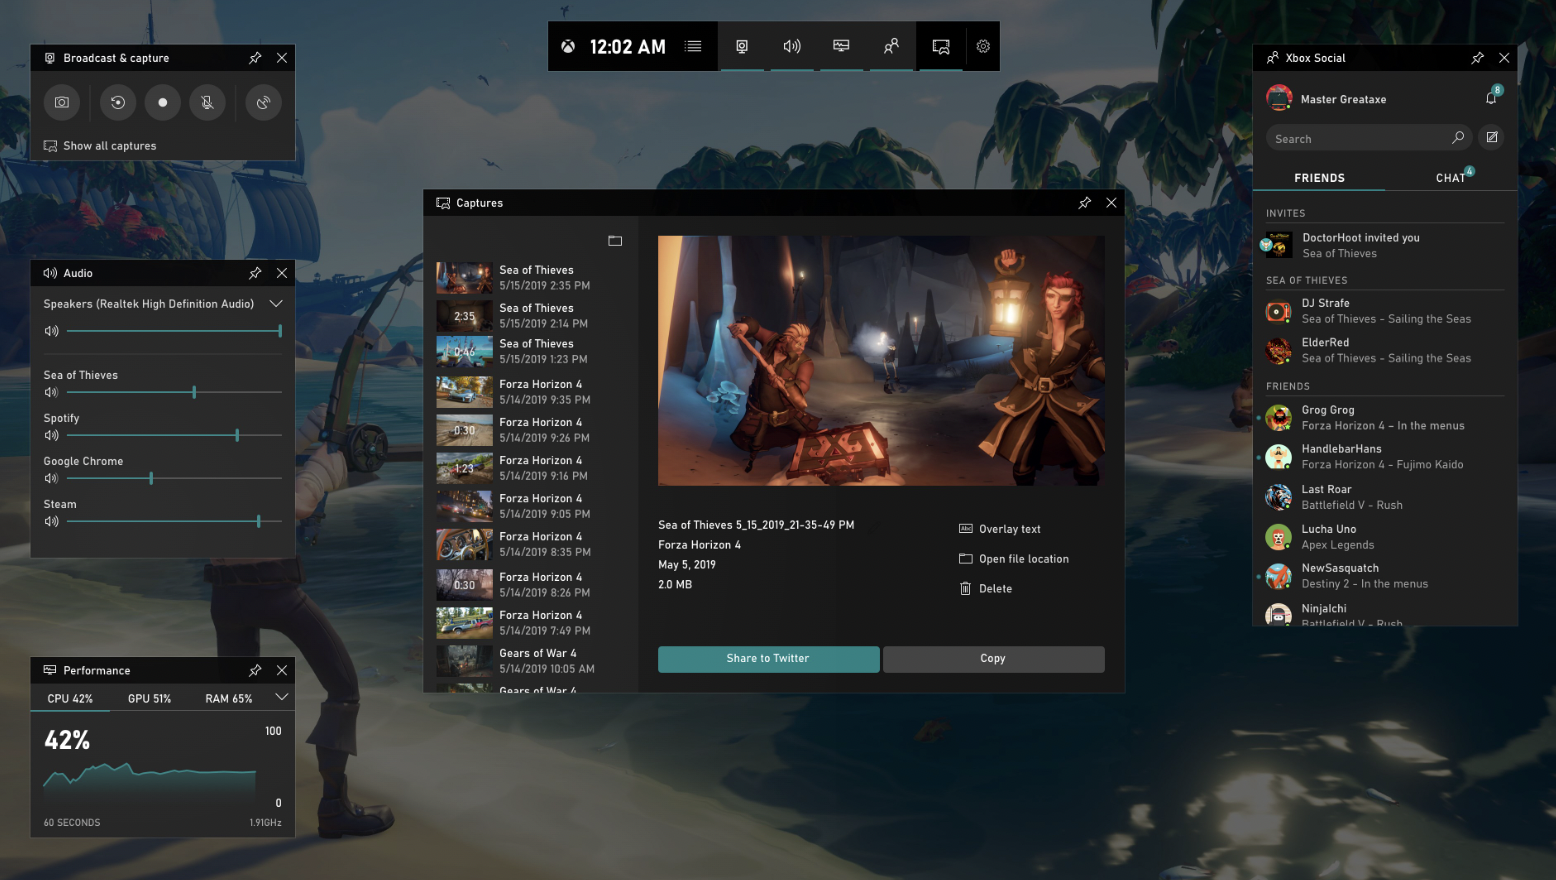
Step 3: Once you have access to the Game Bar, you can go ahead and start recording your screen by clicking on the Capture icon from the menu bar on top of the screen.
Step 4: If you're recording your gameplay with a voice over, make sure your webcam and microphone are turned on.
Step 5: When you're ready to record, click on the Record icon.
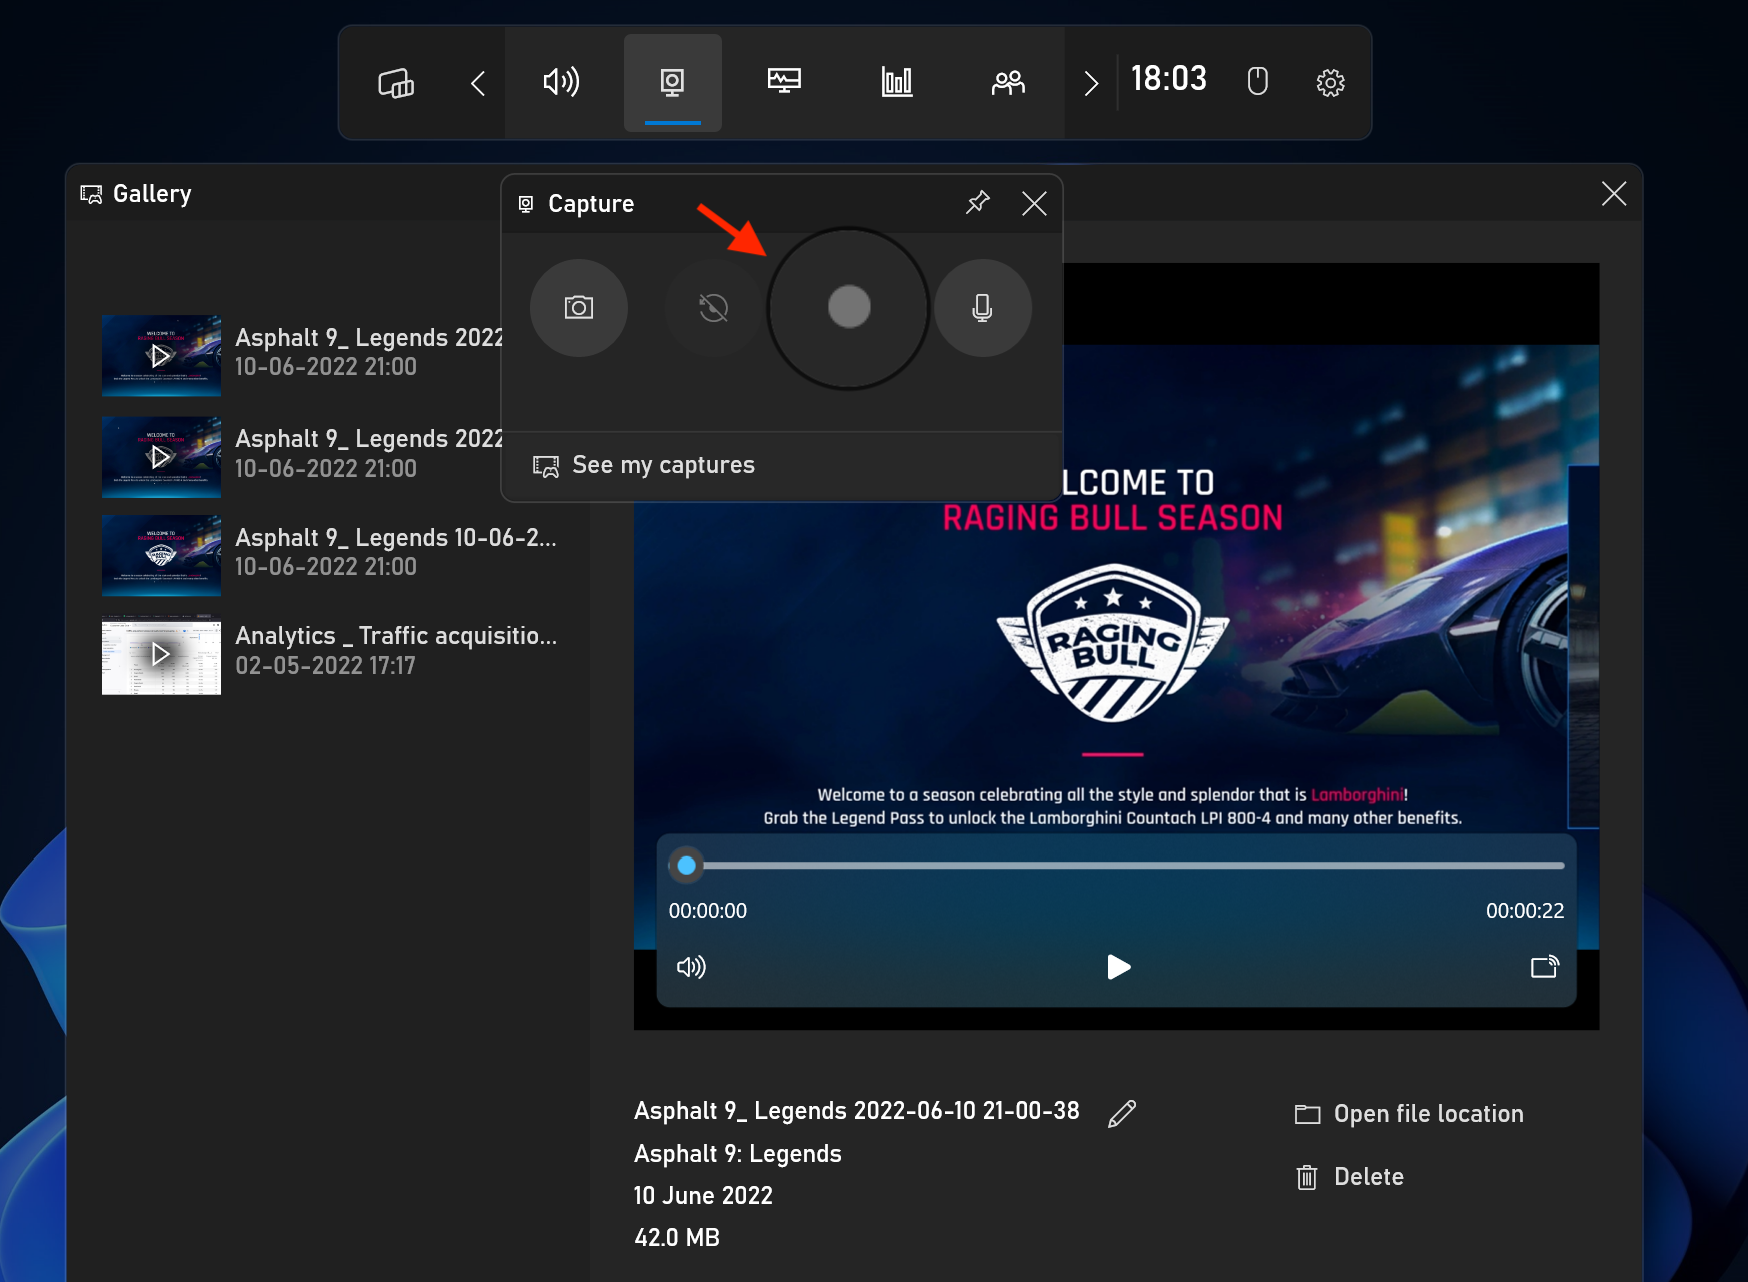
Step 6: Whenever you're done, you can click on the same button to stop the recording. The video will automatically be saved in the captured file.
You can view your videos by clicking on 'see my captures' option.

3. Record your Screen on Windows PC with Sound using Microsoft PowerPoint
Another quick way to record your screen on Windows with audio is to use Microsoft PowerPoint.
Follow these simple instructions to get started.
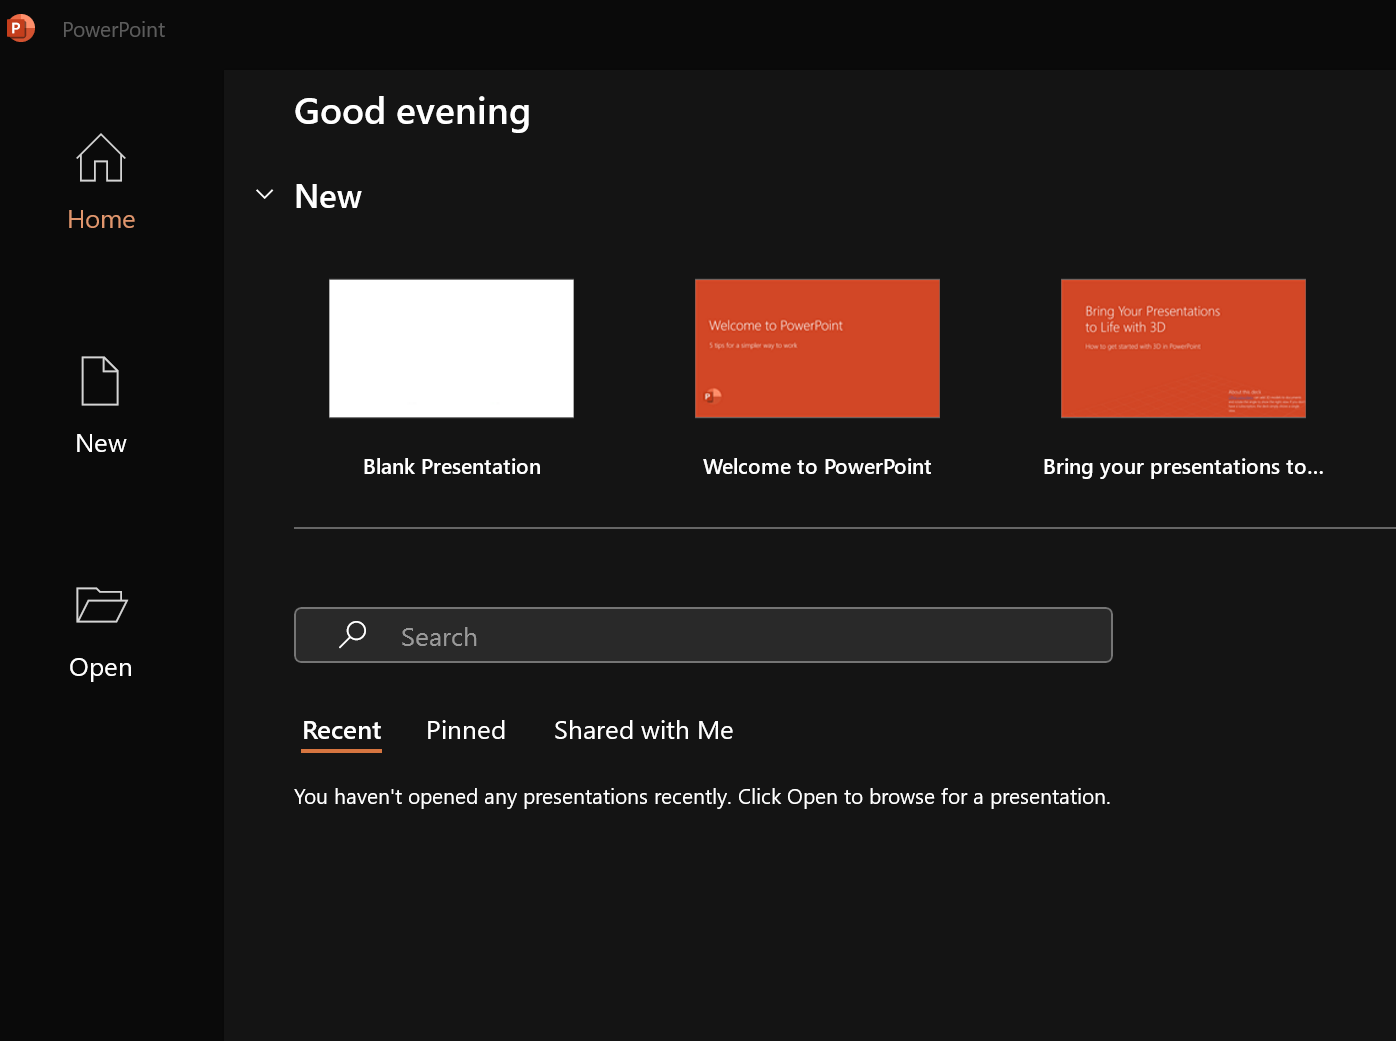
Step 1: Open Microsoft PowerPoint.
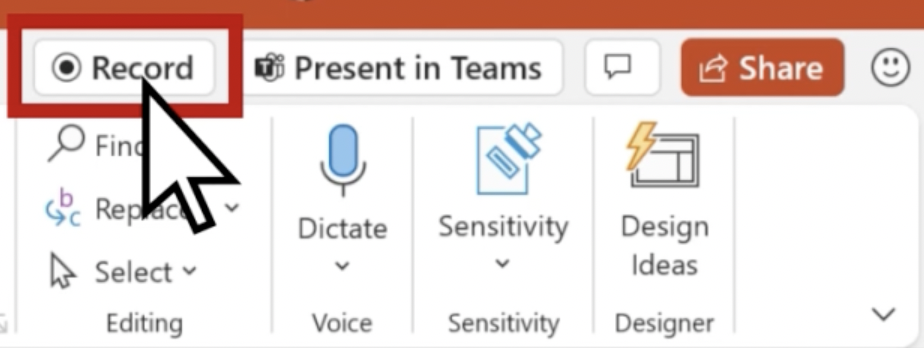
Step 2: Open a new slide and click on the ‘Record’ option in the home tab.
Step 3: As soon as you click on the ‘Record’ option, you will be able to see multiple recording options on your screen. You can customize your recording preferences according to your own needs.
You can enable your camera & microphone, and also change your webcam background.

Step 4: Once you've customized your recording preferences, you can go ahead and start recording your video. Just click on the red dock button to get started.

Step 5: When you're done recording, you can stop the recording and export the video.

4. How to Screen Record on Windows PC with Sound using Movavi Screen Recorder
If you need a versatile desktop screen recorder that has both basic and advanced features, Movavi Screen Recorder can help you out.
In fact, even for free screen recording, it still manages to provide you with a lot of flexibility and control. Let's see how you can get started with the program:
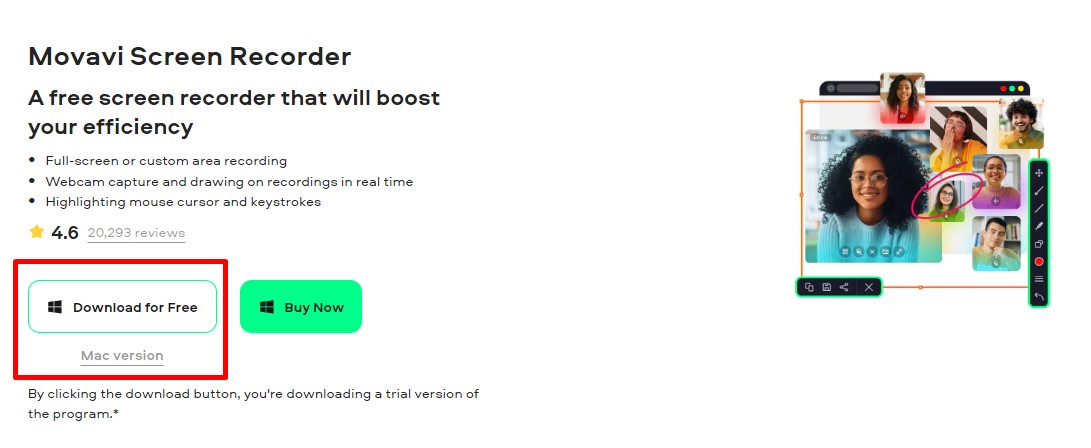
Step 1: Head over to the official website and download this free screen recorder for PC. Choose between Windows and Mac versions.
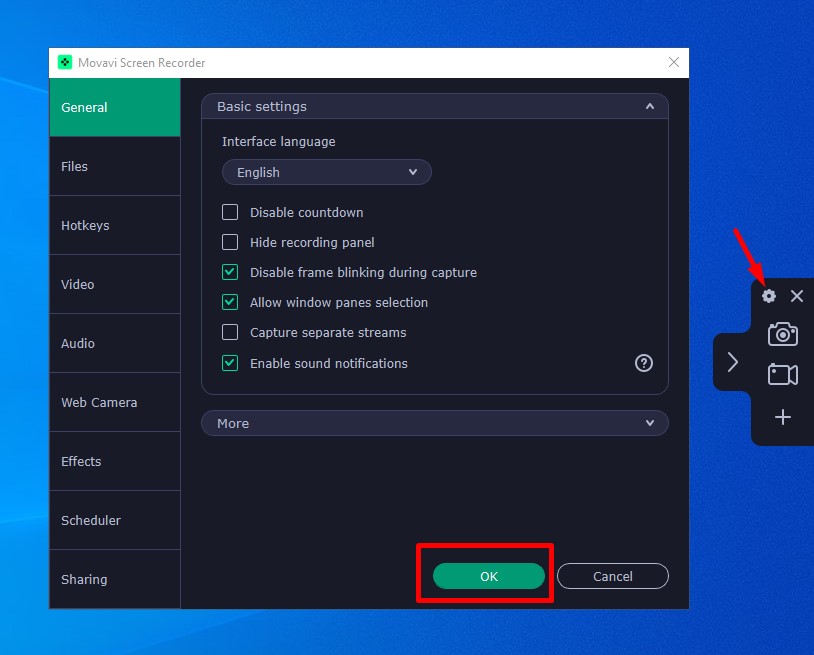
Step 2: Launch Movavi Screen Recorder and head to the Settings.
Here, you can change the basic settings like countdown and sound notification, as well as things like file destination, hotkeys, frame rate, audio quality, cursor effects, etc. Click OK to save the changes.
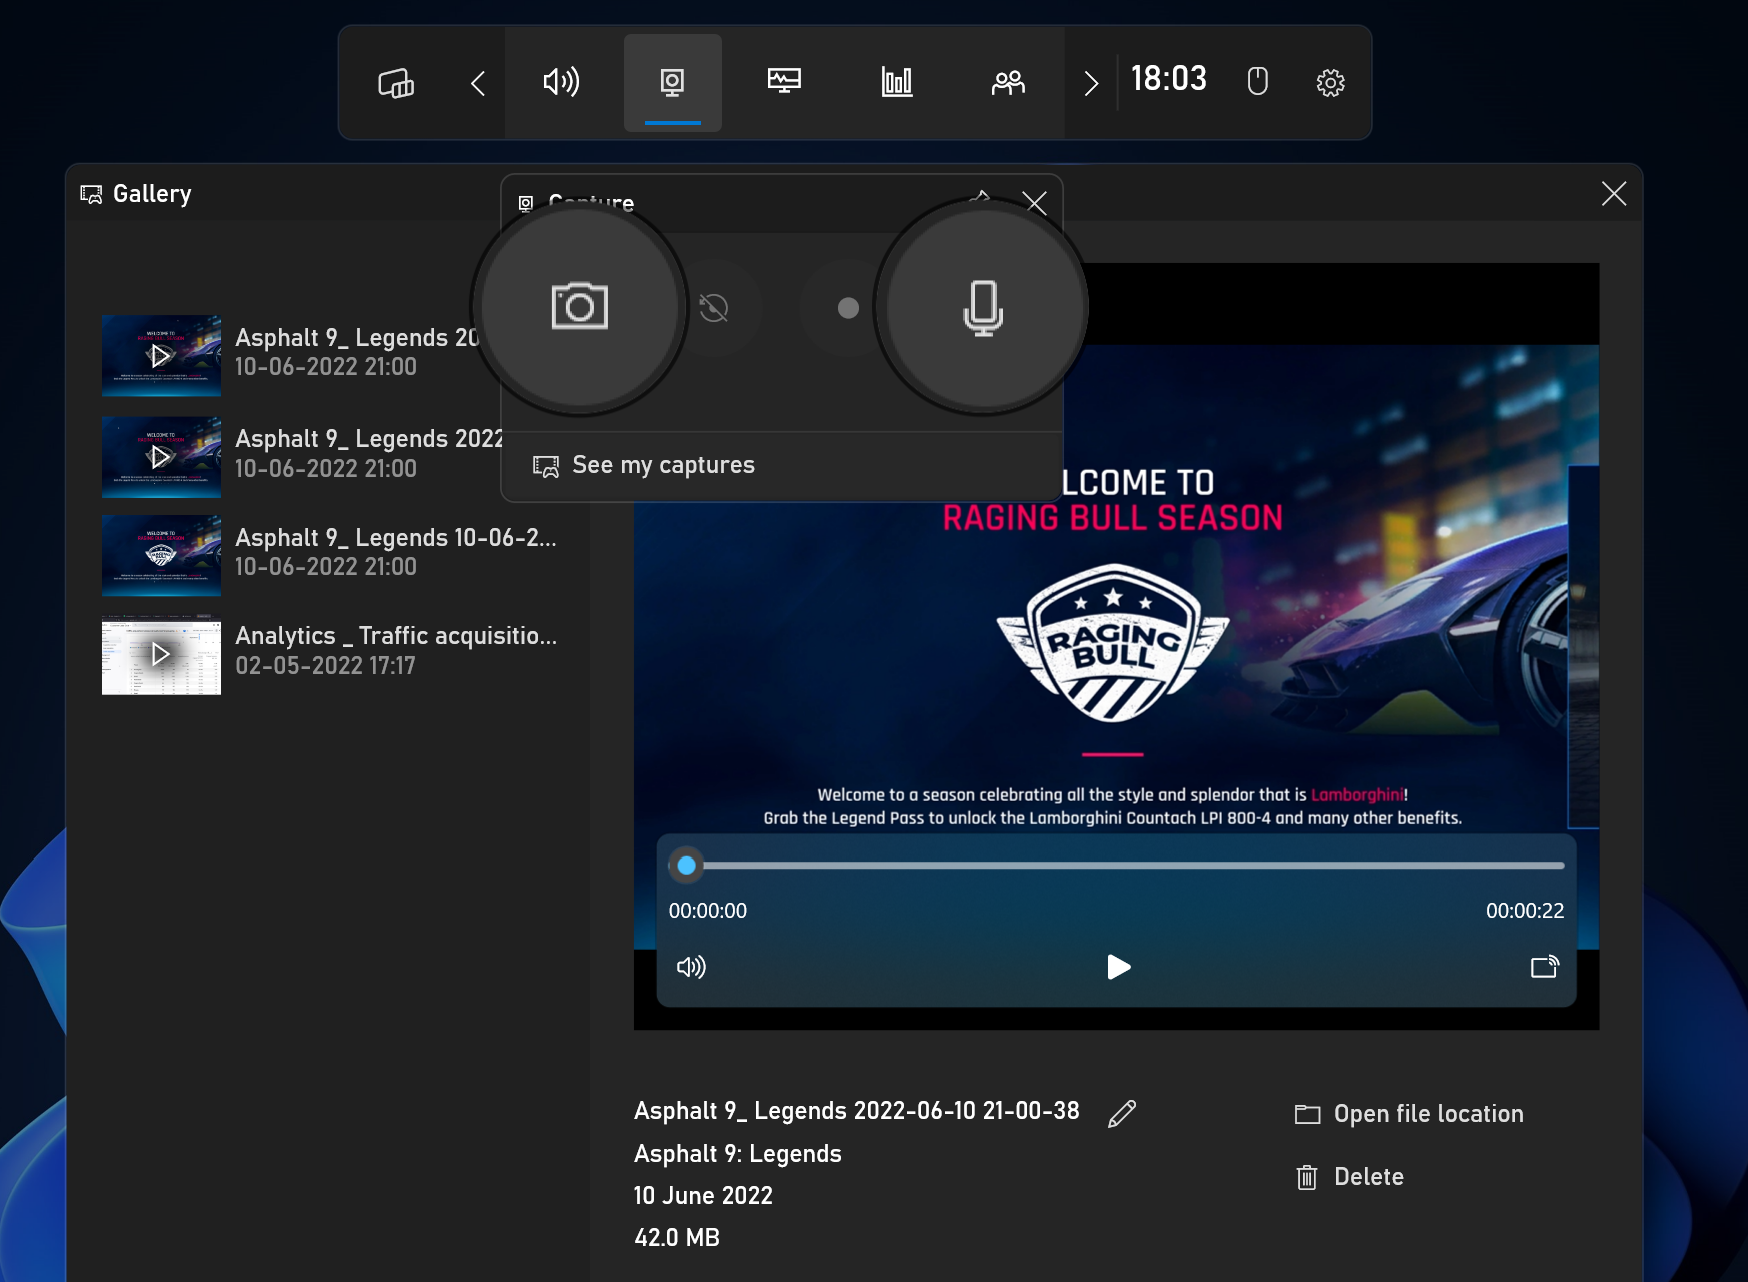
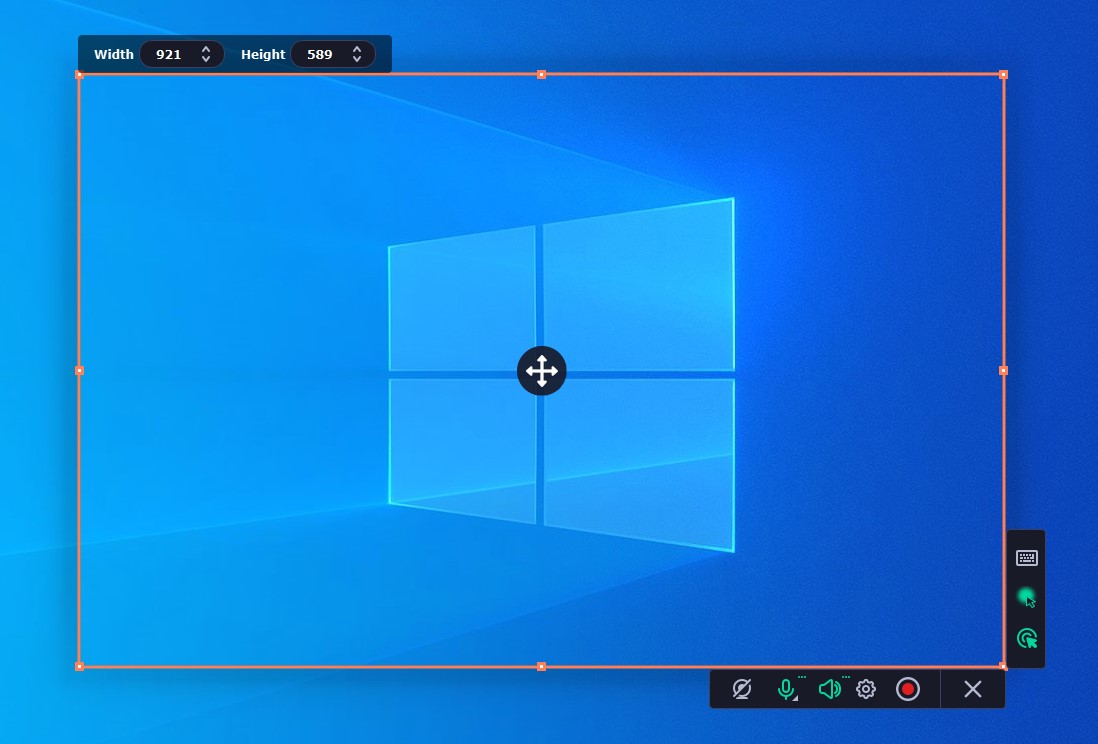
Step 3: On the toolbar, hit on the Screen recording icon. You can also use the default keyboard shortcut F10 to start. Choose the area you want to record.
You can capture a specific window, app, entire screen, or a custom region. Turn any switches on if you need to record audio from a microphone, system sound, or webcam.
Step 4: Hit the REC button. After a 3-second countdown, the recording will start. You can pause it anytime with the respective button or F9 hotkey.
While recording, add annotations with arrows, shapes, or pen. You can also use your cursor to highlight or point out something important and take screenshots if needed.
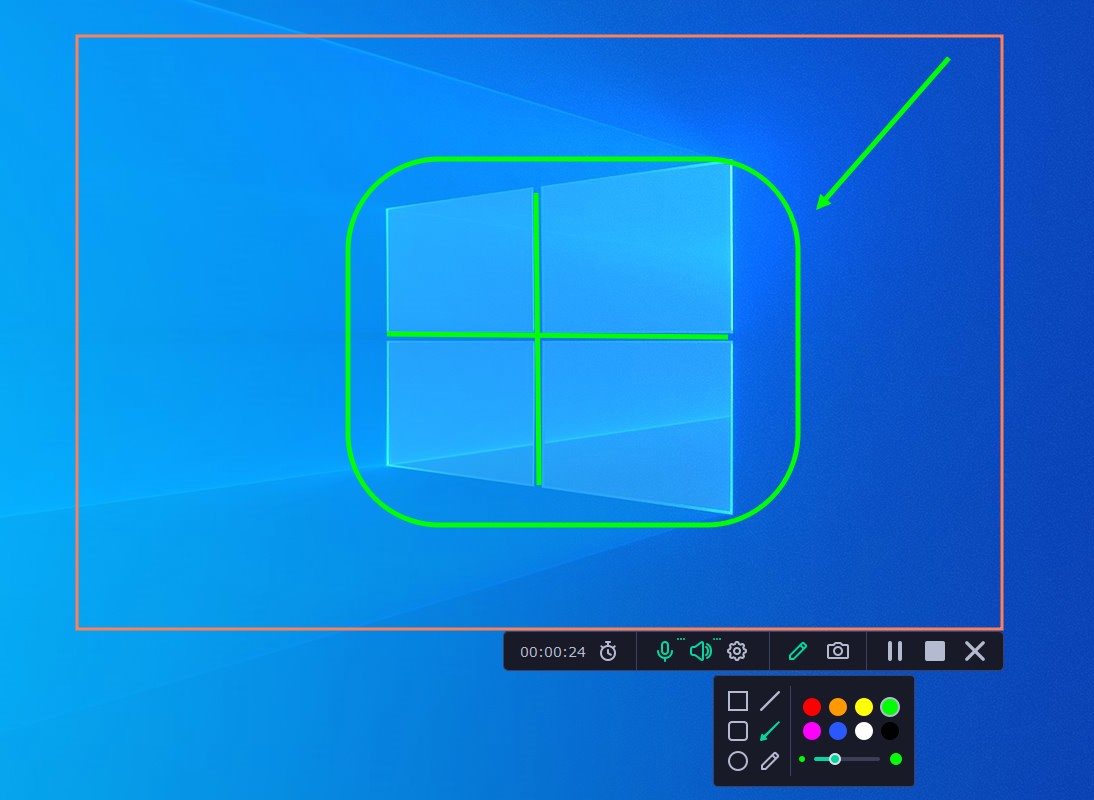
Step 5: When you're done, click the Stop icon or F10 key to end the session.
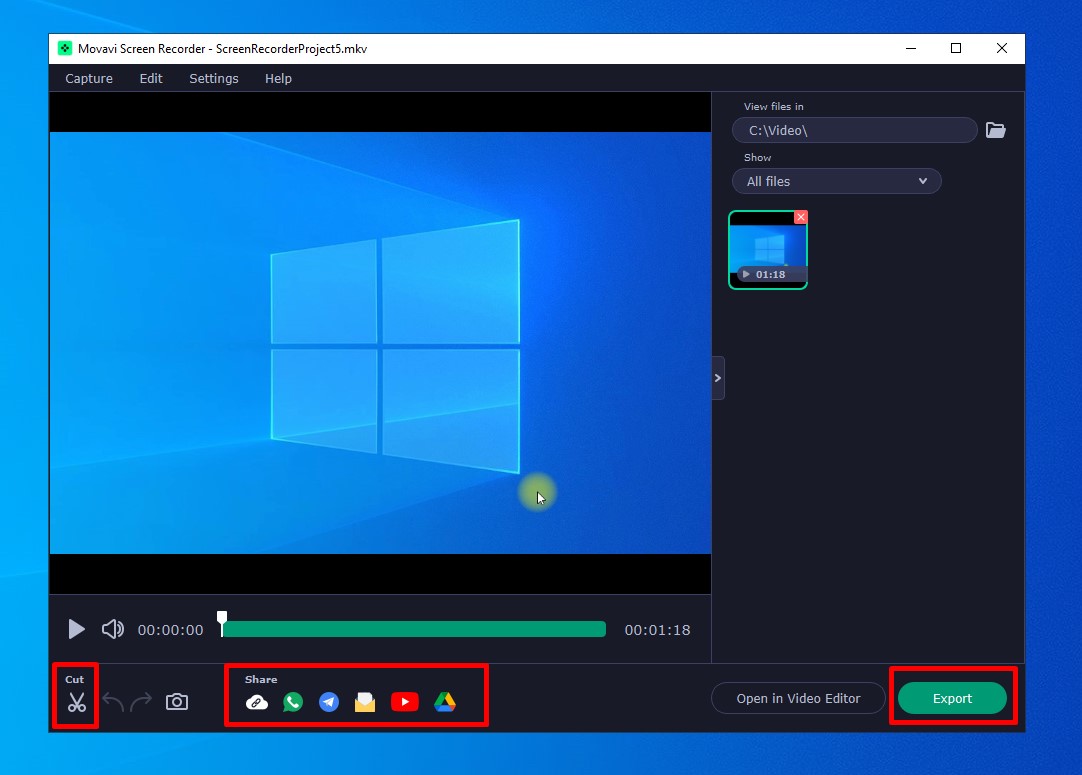
You'll get a preview of your video and a trimming window to cut out the unnecessary parts if needed. Then, use the Export button to save the file in a desired format or share it on YouTube, Google Drive, and some other platforms.
FAQs
1) Does Windows 10 have a screen recorder with audio?
Windows 10 comes with a built-in screen recorder called Xbox Game bar. This screen recorder can record screen, webcam and audio, which can then be used to create interactive digital brochures and other types of media. It’s easy to use, but comes with many disadvantages.
You can also use Vmaker, which is a more advanced screen recorder and comes with an AI video editor too. This editor can help you transform raw videos into stunning videos and offers manual video editing features like cut, crop, trim, resize, rotate, change speed, flip, merge, and more.
2) How do I record screen and audio on Windows 10 for free?
You can use the Windows 10 built-in screen recorder Xbox Game Bar for recording screen with audio for free.
You can also use advanced Windows screen recorders like Vmaker, OBS, & Screenrec. These are free screen recorders with more advanced features.
3) What is the best screen recorder for recording the screen with audio on a Windows PC?
The best screen recorder will depend on the choice of features you’re looking for in a screen recorder and your budget. Here’s a list of 10 best tools for Windows PC for recording screen
- Vmaker
- OBS
- Screenrec
- Bandicam
- Loom
- Icecream screen recorder
- Flashback Pro
- Movavi
- Ashampoo
- Apowersoft
4) How to screen record in laptop with audio?
To screen record in your laptop with audio, you can use a screen recorder like Vmaker. You can follow these simple steps to record your Windows laptop screen using Vmaker:
- Install Vmaker on your laptop
- Open Vmaker and choose your preferences
- Click on the "Start Recording" button
That's it. You have made the first screen recording video on your laptop using Vmaker.
Recommended Readings:
How to Screen Record on Windows 7 with Audio
How to Screen Record on Windows 11 with Sound
How to Screen Record on Windows with Voice
How to Screen Record on PC with Audio
How to Screen Record on Computer with Audio
How to Screen Record on Laptop with Audio
How to screen record on Windows PC - The easiest way to do that