
Contents
Pick the right screen recorder for you
How to screen record on Windows the easiest way. And, for free?
I) Screen recording Windows PC using Windows built-in screen recorder - Xbox Game Bar
II) Screen recording Windows PC using Vmaker Windows application
4 steps to make your first screen recording video on your Windows PC using Vmaker
How to screen record on Windows PC - The easiest way to do that
Planning to make screen recording videos on your Windows computer?
Great. This blog will tell you how to do it in the simplest way and for free.
This blog will be useful to you irrespective of what version of Windows you’re using. It can be Windows 10 or Windows 11. Doesn’t matter. All you have to do is follow the steps listed in the blog.
Let’s get going.
Pick the right screen recorder for you
This is the first, and the most important step before you start screen recording videos on Windows. Choosing the right screen recorder is like making the right investment.
When you use a screen recorder that is easy-to-use and has all the required features, you don’t have to worry about switching from one tool to another. You can just stick to one, and keep making videos.
To help you decide the best screen recorder for your Windows PC we have written a detailed blog on this topic - The 10 best screen recorders for Windows PC
As it’s not easy to decide which screen recorder will be the right one for you, we have curated the list by highlighting when a particular screen recorder can be the best choice for you. We highly recommend you read the blog to get a deep idea about each screen recorder.
But, for a quick reference, here’s the list of tools we covered in that blog -
| Vmaker | Best free screen recorder with advanced features in the premium plans for an all-round user experience |
| Screenrec | Best free screen recorder if you want to screen record videos only once in a while |
| OBS | Best free screen recorder if you like video streaming and don’t mind boring user interface |
| Bandicam | Great for Gamers and people who like to record videos for long durations |
| Loom | The most-user friendly paid Windows screen recorder |
| Icecream screen recorder | Simple paid Windows screen recorder for light users |
| Flashback Pro screen recorder | One of the oldest Windows screen recorder with advanced editing features, but a lackluster user-interface |
| Movavi screen recorder | Trustable screen recorder from the house of an experienced software development company |
| Ashampoo screen recorder | Useful screen recorder especially for those who love taking screenshots on their Windows PC |
| Apowersoft screen recorder | Simple screen recorder that comes with a built-in video converter |

How to screen record on Windows the easiest way. And, for free?
As we’re tackling the question of how you can record your Windows PC screen for free and the easiest way, we will suggest two techniques for this.
I) Using Windows 10 built-in screen recorder Xbox Game Bar - A step-by-step guide of how you can use this tool to record gameplays & single window screen recordings
II) Using Vmaker - A walkthrough of the free version, so that you can try it out yourself without making any monetary commitment.
I) Screen recording Windows PC using Windows built-in screen recorder - Xbox Game Bar
We didn’t include Xbox Game Bar in our list of best screen recording tools for Windows PC because it lacks many features. We couldn’t recommend it to anyone who creates or wants to create multiple screen recording videos during the day.
But, if you’re a light user, like a gamer who only wants to record gameplays for fun, then you can definitely go ahead with this tool.
Here are the steps you need to follow to make a screen recording video using Xbox Game Bar -
1) Keep the application open that you want to record. Close or minimize the other windows because Game Bar can only record one window at a time
2) Press the Windows Key + G to open Game Bar
3) Select the Capture icon from the menu bar of the tool
4) If you’re recording your face, then ensure that the webcam access is turned on. Similarly, if you’re recording your voice and system audio, check if the microphone access is turned on
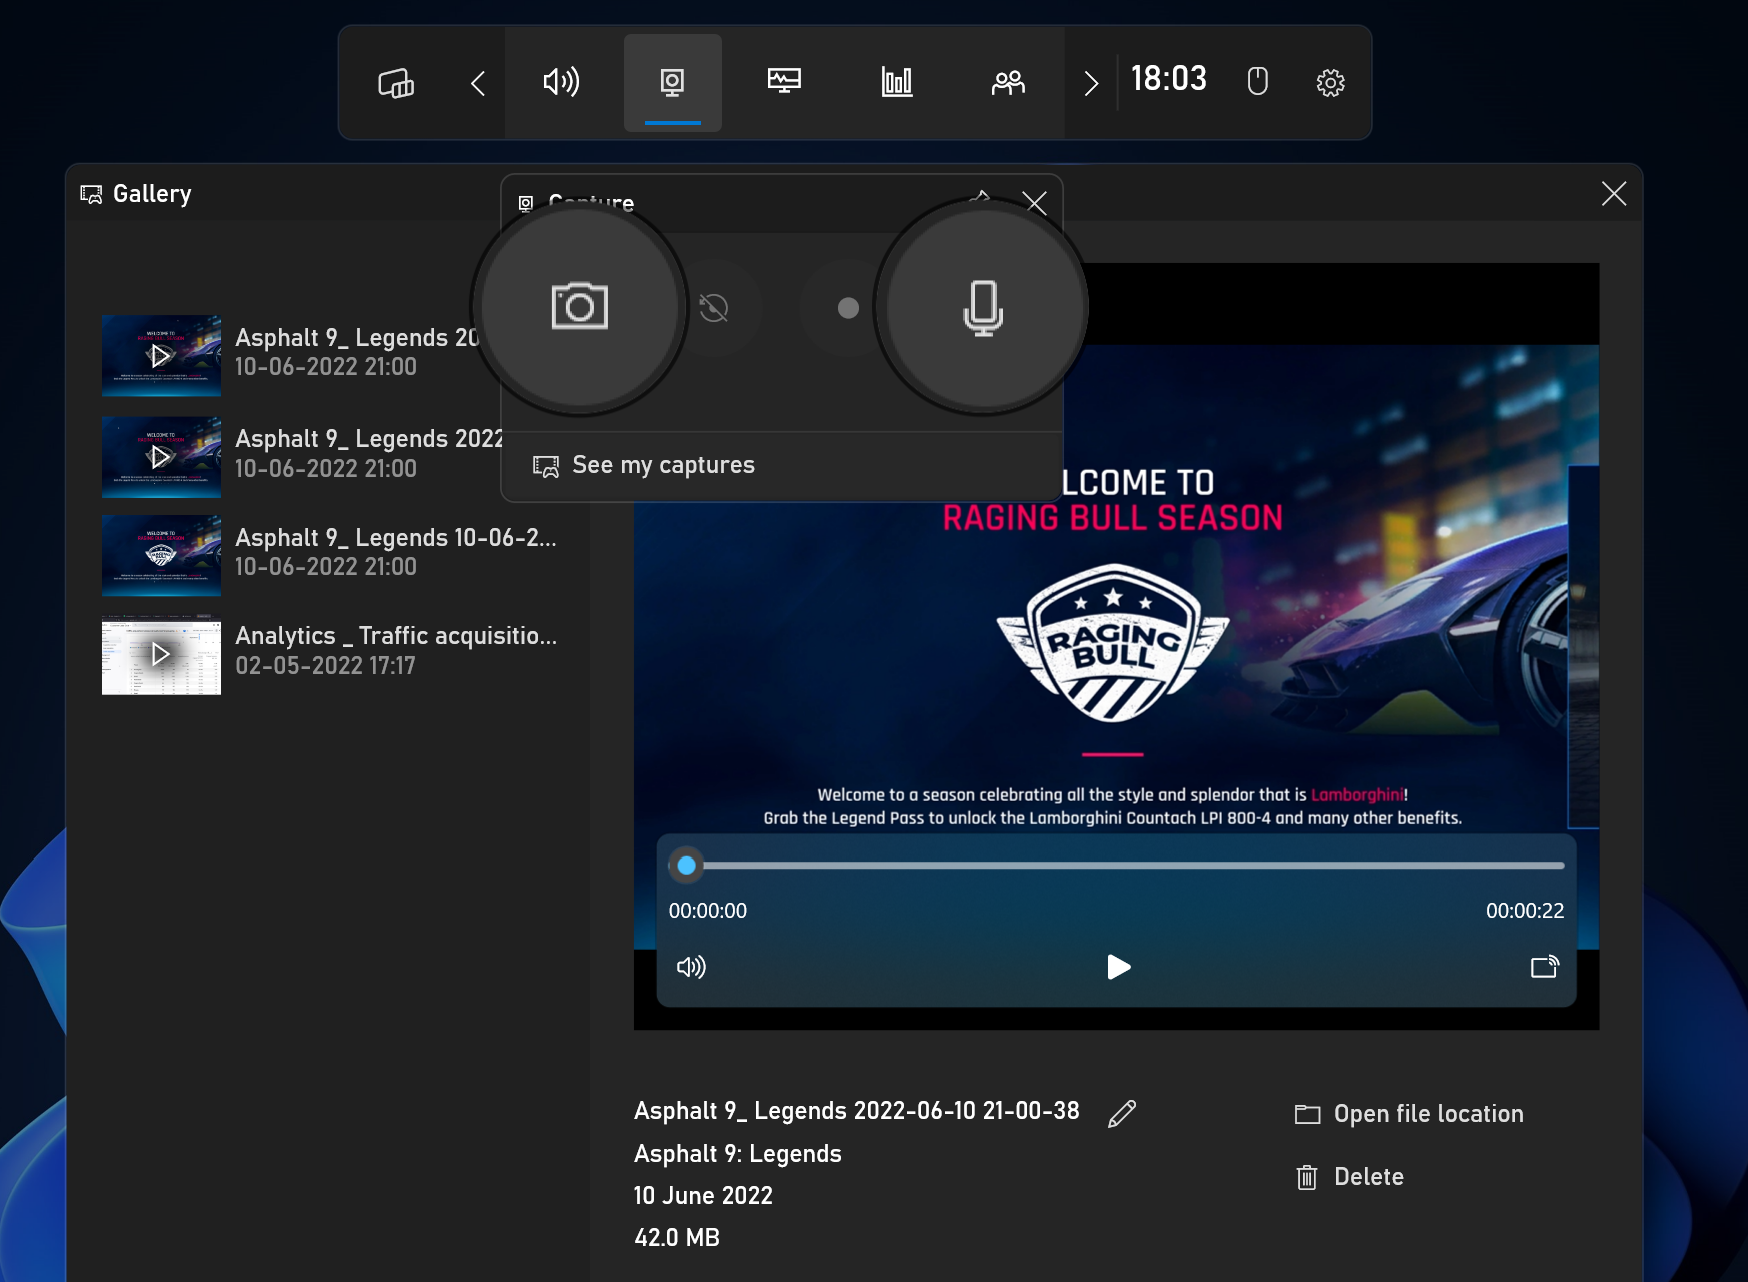
5) Click on the Record button to start recording
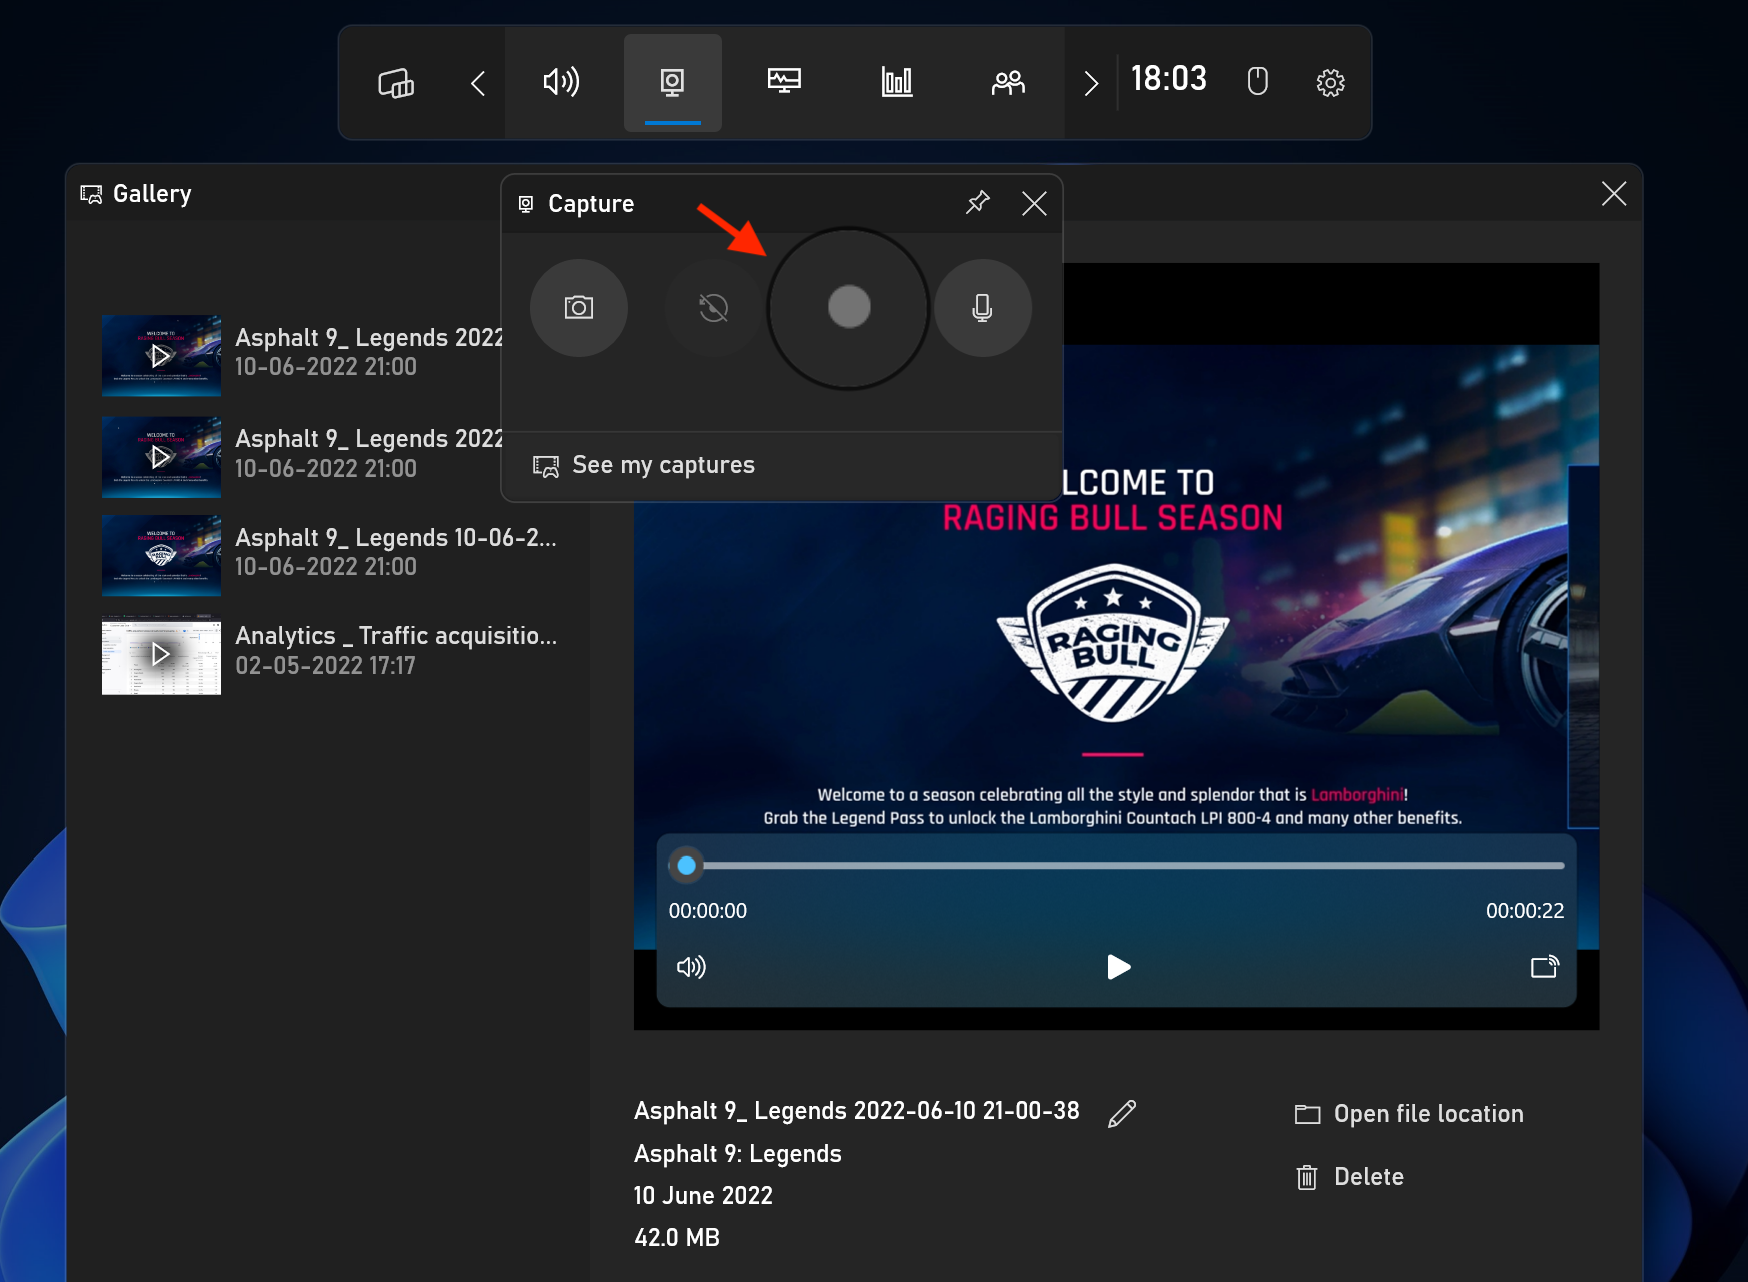
6) If the Game Bar menu disappears while recording, then press Windows Key + G to make it reappear
7) Once it’s back, use the same recording button to stop recording
8) After you have recorded the video, you can watch the recordings by clicking on See my captures option

II) Screen recording Windows PC using Vmaker Windows application
To start with the recording you have to download the Vmaker's Screen Recorder for Windows.
Follow these steps to get that done -
- Head over to the Vmaker website
- Click on the Sign up now button
- Enter your username, email address and password. You can also sign up with your Google and Facebook account
- After you click on the Sign up button, you will see a dashboard pop-up. Download the Vmaker for Windows app
- Follow the on-screen instructions to complete the installation
4 steps to make your first screen recording video on your Windows PC using Vmaker
After you have downloaded the Vmaker app, you can start using it immediately. You don’t have to create a paid account at the get-go. You can enjoy using the free features for a lifetime and upgrade anytime you like.
Step 1: Open the Vmaker app

You will see a screen like the one above
Step 2: Choose your mode
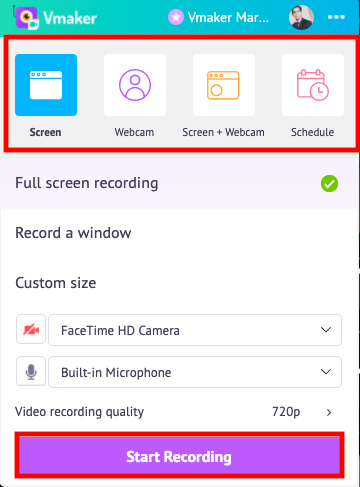
From the screen above, you need to choose the mode of recording.
Screen: This mode will record only your screen. This is an ideal choice for recording YouTube videos, webinars or even meetings.
Webcam: If you just want to record a personalized message for someone, and don’t have anything to share on your screen, then this should be your go-to choice.
Screen + Webcam: This is our favorite recording mode. Because you can use this mode for multiple reasons. We highly recommend trying out this mode for maximum engagement.
Schedule: This is a paid feature. It allows you to schedule your recordings. Once you set the time, Vmaker will automatically start recording your screen. All you have to do is keep the app open.
Step 3: Start recording
After you have chosen the recording mode, click on the Start Recording button. If you’re recording webcam and screen, check if you have enabled Webcam recording.
Step 4: Stop recording
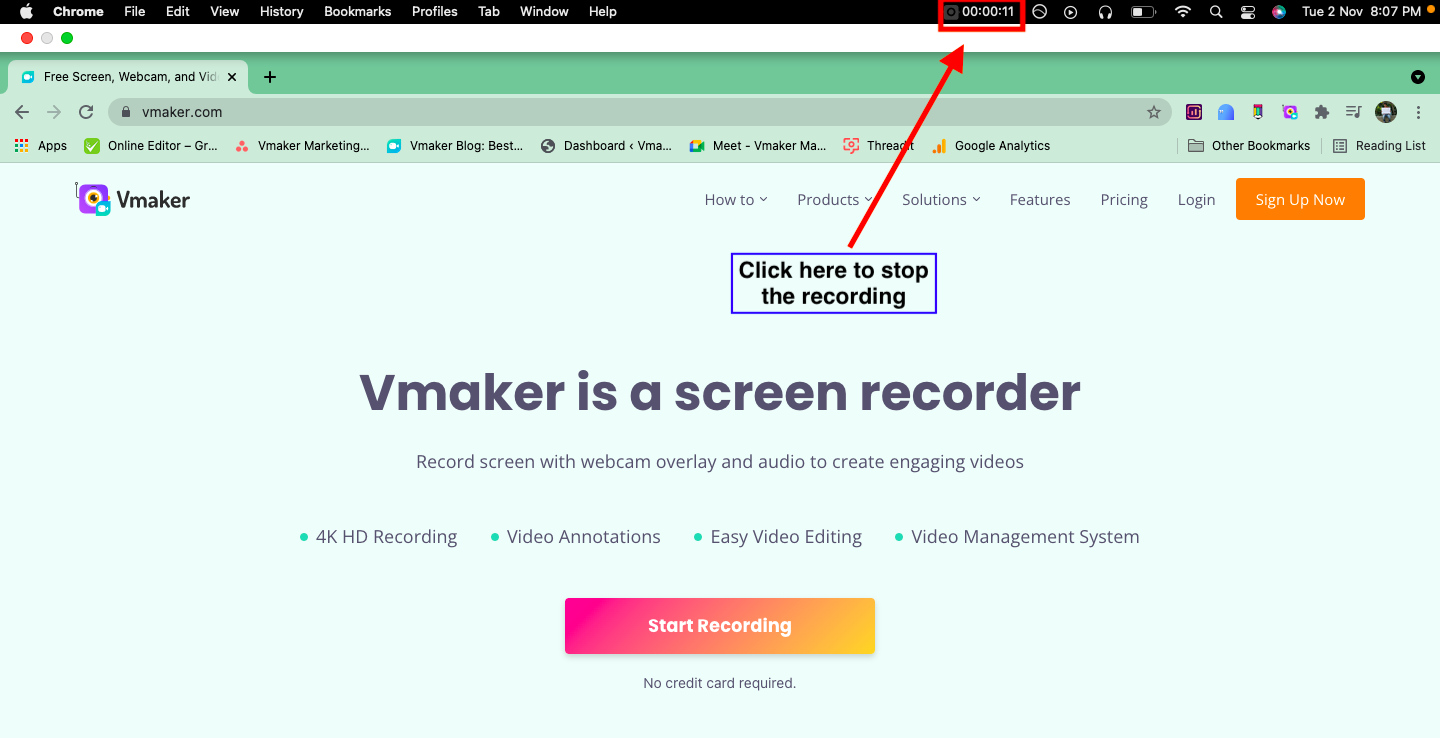
To stop recording you can click on the timer that appears at the top of the page as highlighted in the screenshot above. After you stop recording, you will see a window open in a new tab. It will show the status of the video you just recorded getting uploaded on the cloud.
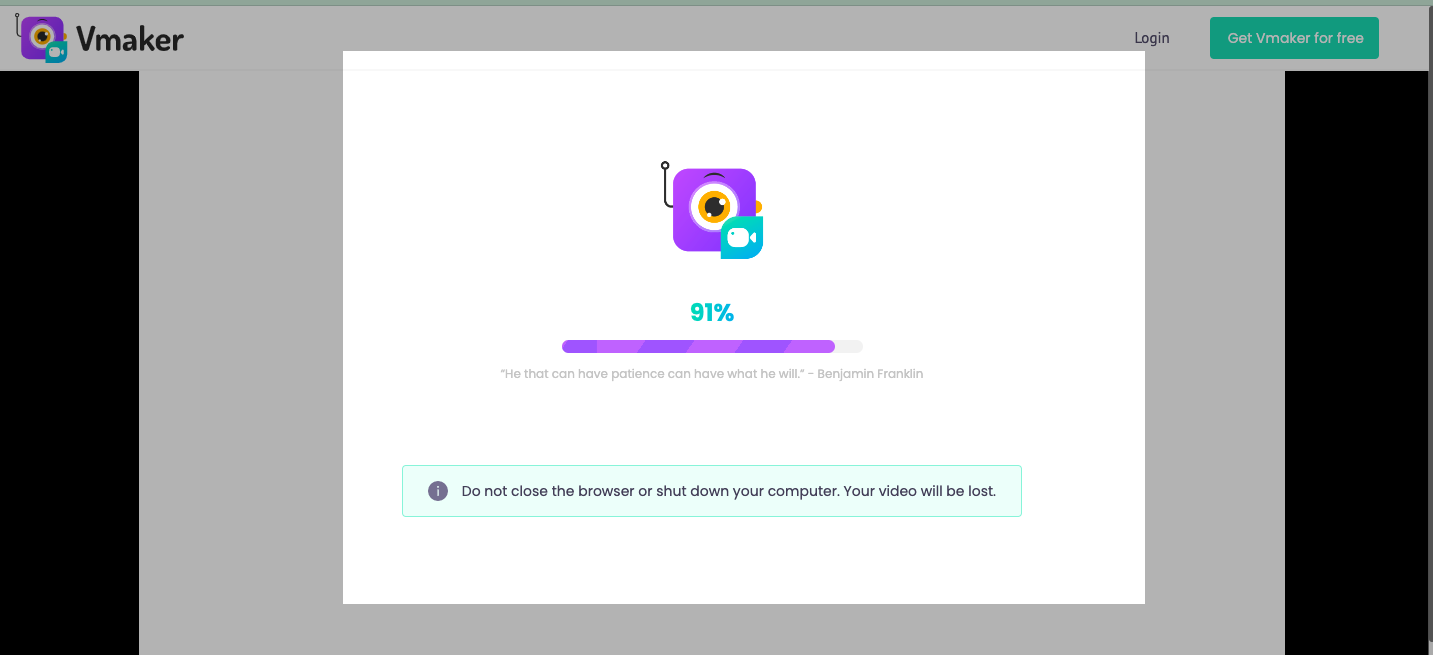
Do not close the tab or refresh the page as it may result in losing the recording
Edit your recordings with Vmaker’s built-in video editor
It’s tough to get a perfect recording at one go. Therefore, the basic editing suite inside Vmaker will help you to tweak the video to make it more appealing. In the free plan you can trim, crop, zoom in, flip and rotate your videos.
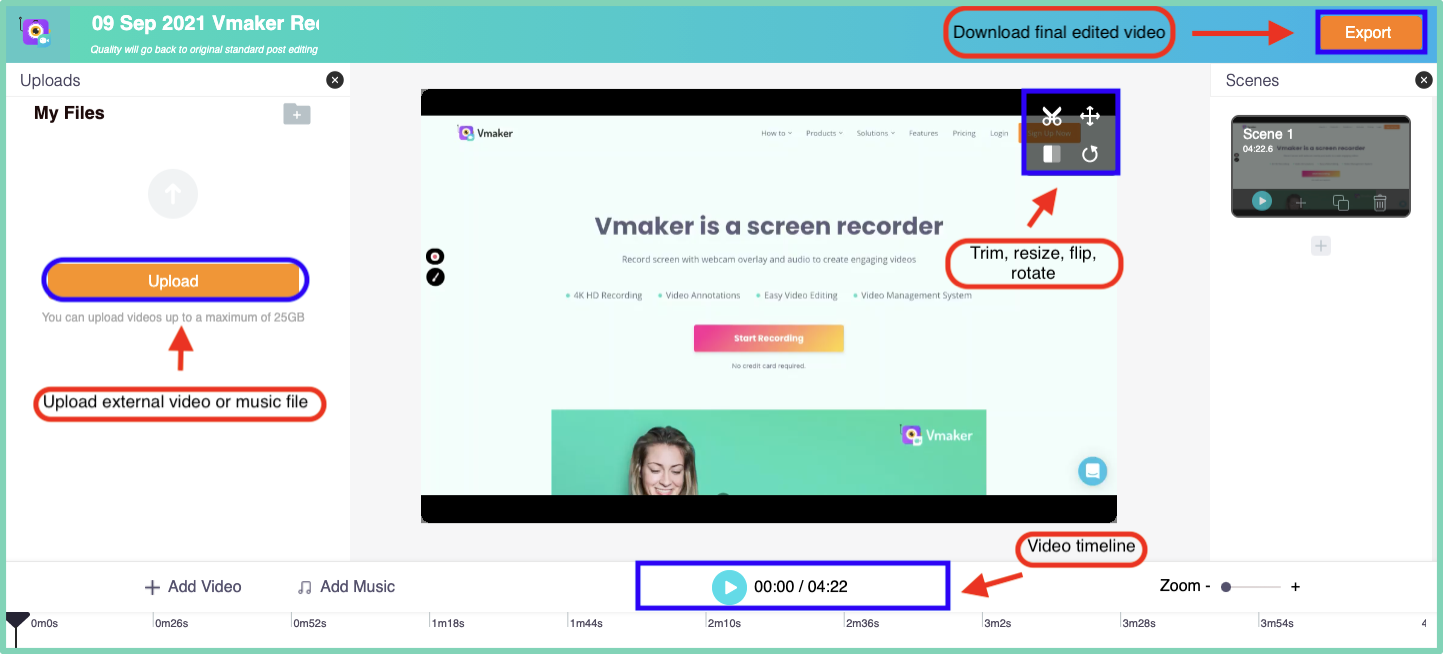
If you plan to add your own videos in between, at the start or end of the video, or add a soundtrack, then you can get access to these features by signing up for the premium plans.
For a complete comparison of the pricing plans, you can check the pricing page.
Share your videos on social media instantly
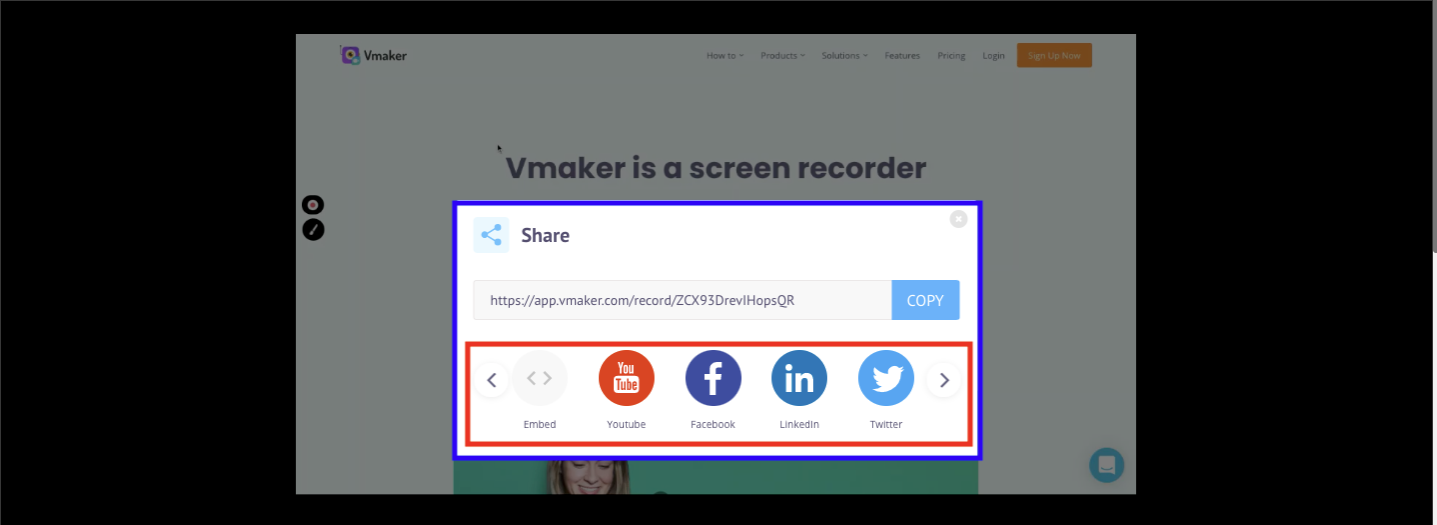
After you have edited your video, you can share it from the Vmaker dashboard.
Click on the icons of Facebook, Twitter or any other social media channel where you want to share your video.
After you’ve done that, log-in to your account and click share. You can also embed the link or share it via Gmail with others.
Wrapping up
It’s an excellent idea to make videos by recording screen and webcam on your Windows computer. It’s easy and takes a lot less effort to create a video on your own.
However, there is an element of risk attached here. And, that is picking the right screen recorder for your computer. There are ample choices, and by all means, refer to our blog on the best screen recorders because it will give you straight facts & deep analysis.
But, if you want to save time, then we recommend trying the built-in screen recorder Xbox Game Bar or Vmaker. If you’re a light user, and you make screen recording videos occasionally, then the Game Bar is the best choice.
If you’re a regular user and make multiple screen recording videos every day, then Vmaker will be an ideal investment for you.
FAQs
1) What is screen recording?
Screen recording is a process of making videos by recording the screen of your Windows computer. Screen recording videos are very useful for making tutorial videos, sharing video feedback, product support videos and for a lot of other purposes. It’s easy to make screen recordings and doesn’t require any kind of formal training in video making
2) Which screen recorder is the best for Windows PC?
The best screen recorder will depend on the choice of features you’re looking for in a screen recorder and your budget. Here’s a list of 10 best tools for Windows PC for recording screen
- Vmaker
- OBS
- Screenrec
- Bandicam
- Loom
- Icecream screen recorder
- Flashback Pro
- Movavi
- Ashampoo
- Apowersoft
3) How to screen record on Windows PC for free?
You can use the Windows built-in screen recorder Xbox Game Bar to record your screen for free. But, it has limited features and cannot record the whole screen.
You can also use screen recorders like Vmaker that offer a free plan for the lifetime. It can record in multiple modes, and it’s more advanced than Xbox Game Bar
Recommended Readings:
How to Screen Record on Windows 10
How to Screen Record on Windows 7 with Audio
How to Screen Record on Dell Windows