Contents
How can you record meetings with Zoom?
Where do recorded Zoom meetings go?
How to share a recorded Zoom meeting?
What are the limitations of recording meetings in Zoom?
How to record a Zoom meeting on Vmaker?
How to Record a Video on Zoom and Share it
Recording Zoom meetings is tough if you’re a participant. If you want to record the meeting using Zoom, and if you’re not the host, then you have to get their permission first.
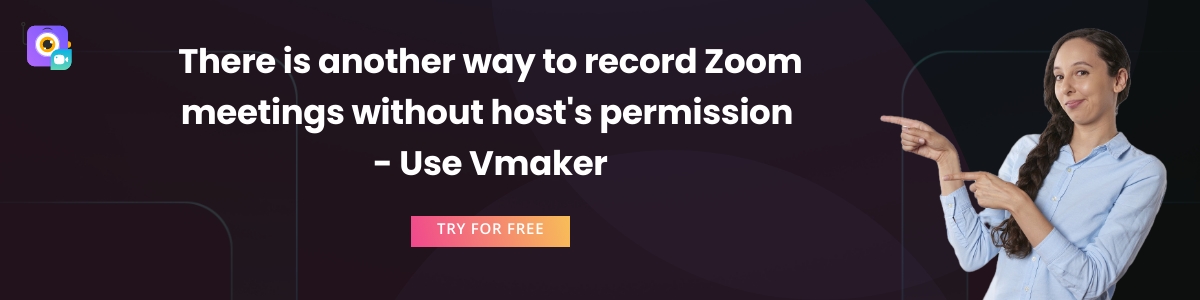
This is alright in certain situations, but for things like daily stand-up calls, and personal meetings, it might come across as odd. But, there is a way you can record any Zoom meeting without permission, and for free.
Sounds illegal, right? Well, not exactly if you use a screen recorder like Vmaker.
Vmaker is an advanced screen recorder that can record Zoom meetings even when you’re a participant. More about it in the latter parts of this blog.
Meanwhile, you can check out the flow of this blog. Feel free to skip to the most relevant section of the blog -
1) How can you record meetings with Zoom if you’re a participant?
2) What are the limitations of recording meetings in Zoom?
3) What is Vmaker?
4) How to record a Zoom meeting on Vmaker?
5) How to save, watch and share Zoom meetings?
How can you record meetings with Zoom?
If you’re planning to record your meetings in Zoom itself, then you can do it in a simple way. However, there is a minor difference if you’re recording as a host or a participant. So we will split this part into two sections -
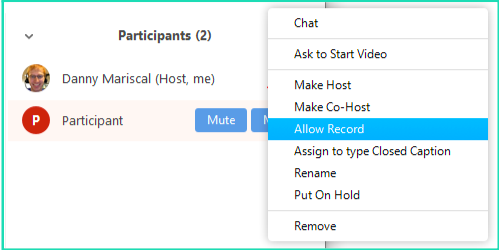
Recording meeting in Zoom as a participant
To record on Zoom as a participant, you have to ask the host for permission. Only when they give you permission, can you record the meeting in Zoom.
This is how the host can give you permission to start recording the meeting.
Where do recorded Zoom meetings go?
When you’re about to start recording in Zoom, you get the options of choosing whether you want to record the meeting on Cloud or on your computer.
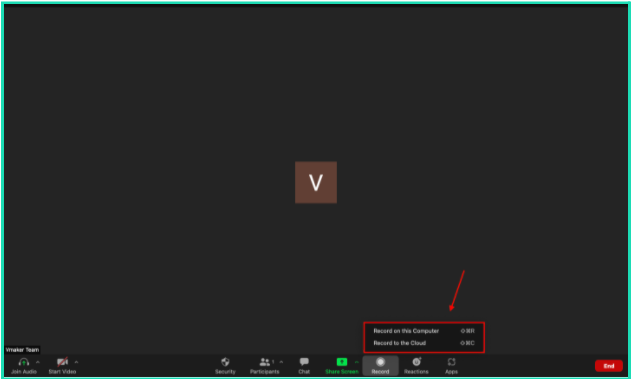
i) If you choose Record on this computer, then after the recording is over, the video will get downloaded and saved locally, in other words, your computer. Mostly, the location of the file will be Documents folder in your computer
ii) If you choose the other option, Recording to the cloud, then your video gets saved in the cloud storage of Zoom. To watch the recorded Zoom meeting, here’s what you have to do -
a) If you were the host, sign in to the Zoom web portal. Click on Account Management, then Recording management. Here, you can search the meeting by entering the meeting ID
b) If you were the participant, then sign in to the Zoom web portal. Click Recordings in the navigation menu. Here, you can search the meeting by entering the meeting ID
How to share a recorded Zoom meeting?
To share your recorded meeting with others, follow the previous steps of accessing your recordings. Once you’re there, click on the Share button.
This will open a Share this cloud recording pop up dialogue box. Click on Copy Sharing information. Now, you can use this link to enter in your email or share it wherever you feel like.
Before sharing you can also decide some settings for the recording. Like you can keep an expiration time on the video, allow/disallow the users from downloading the video, password protect it and more.
What are the limitations of recording meetings in Zoom?
Till now, we have been talking about how Zoom can be used for recording its own meeting. From the outset, it looks good, however, Zoom does come with a few limitations when it comes to recording meetings.
1) Permission required: If you’re a participant, then there’s no way you can record the meeting without permission. This curtails the freedom of a participant, and you may miss recording crucial parts of the meeting if you don’t let the host know in advance
2) Limited cloud storage: Zoom offers limited cloud storage for paid plan users. For those who are in the free plan, they don’t even get that option. Moreover, extending cloud storage costs a high amount of money.
3) No in-built editor: This is probably the biggest disappointment of using Zoom. It has a few third-party integrations, but the lack of in-built editor makes it tough to sharpen the video if required.
What is Vmaker?
Vmaker is a free screen recorder that allows you to make video content by recording your screen, webcam, voice and system audio at the same time. It’s compatible to work on both Windows and Mac laptops.
With Vmaker, you can record personalized video and audio messages, and use it to communicate with someone asynchronously. Moreover, it’s very useful to record videos playing on your laptop or computer screen.
It has a line of smart features like an advanced video editor that can help to make your video ready for production without being dependent on a third-party tool. It has the one of a kind schedule recording feature which can start recording your screen even without your presence. This means you can record Zoom meetings if you’re not sitting in front of the laptop.
There’s more to Vmaker. Check out the features page to get all the details.
How to record a Zoom meeting on Vmaker?
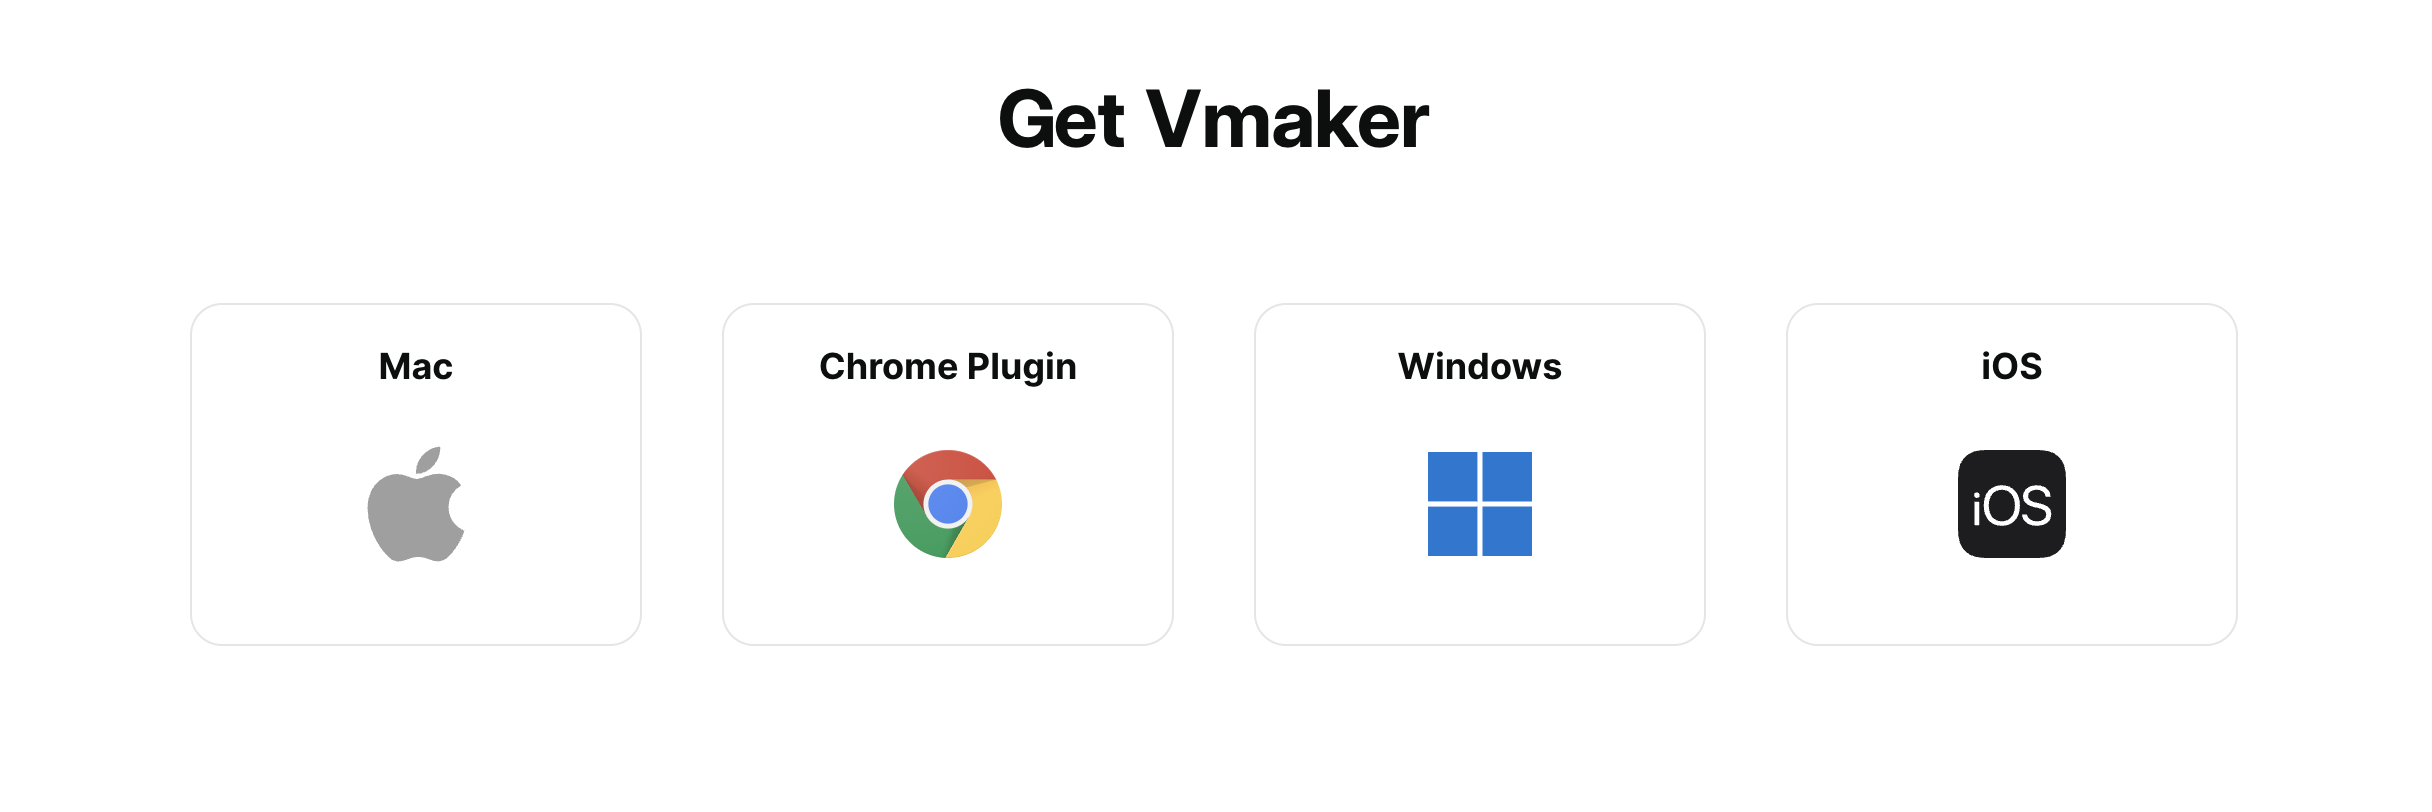
As we said earlier, Vmaker is compatible with Windows and Mac computers, and it’s available as a Chrome extension too. Therefore, to start using Vmaker you have to either download the Vmaker app for Windows or Mac computer. Or you have to add the Chrome extension.
We have split the section below into different categories. Scroll down to the one that is relevant to you.
Here are the steps that you have to follow -
How to download the Vmaker app on Mac
- Head over to the Vmaker's Screen Recorder for Mac
- Click on the Sign-up now button
- Enter your username, email address, and password. You can also sign up with your Google and Facebook account
- After you click on the Sign-up button, you will see a dashboard pop-up. Download the Vmaker for Mac app
- Follow the on-screen instructions to complete the installation
How to download the Vmaker app on Windows
- Head over to the Vmake's Screen Recorder for Windows
- Click on the Sign-up now button
- Enter your username, email address and password. You can also sign up with your Google and Facebook account
- After you click on the Sign-up button, you will see a dashboard pop-up. Download the Vmaker for Windows app
- Follow the on-screen instructions to complete the installation
How to add the Google Chrome extension to your browser
- Head out to the Google Chrome Web Store
- Search for Vmaker in the search bar
- Click on the Add to Chrome button
- Open your Google Chrome browser, and from the extension drop-down, pin the Vmaker extension
- Click on the Vmaker logo after it’s pinned
- Sign up with your email address and start recording videos
Once you have followed the above steps, you can now start recording your Zoom meeting. Now, follow the steps listed below after joining the Zoom meeting
1. Choose the recording area
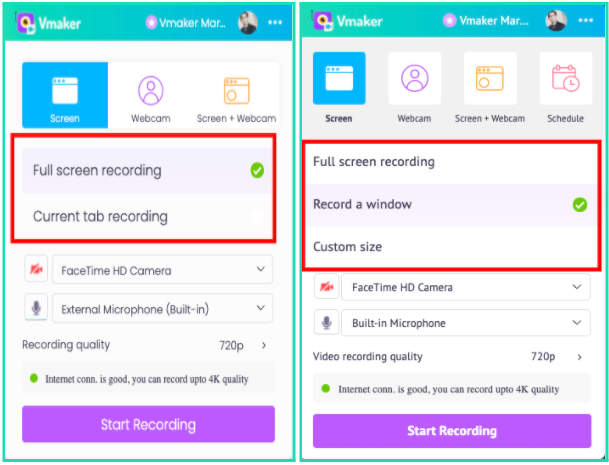
In this step, you can select the area that you want to record with Vmaker. If you select Full-screen recording, Vmaker will record everything in your laptop. So, if you switch tabs, it will start recording the other tab too. If you just want to record the Zoom meeting, we recommend choosing the Current tab recording in the Google Chrome Plug-in. If you’re using the Mac app, then choose the Record a Window option, and then click on the window which has the Zoom meeting open.
2. Enable audio recording
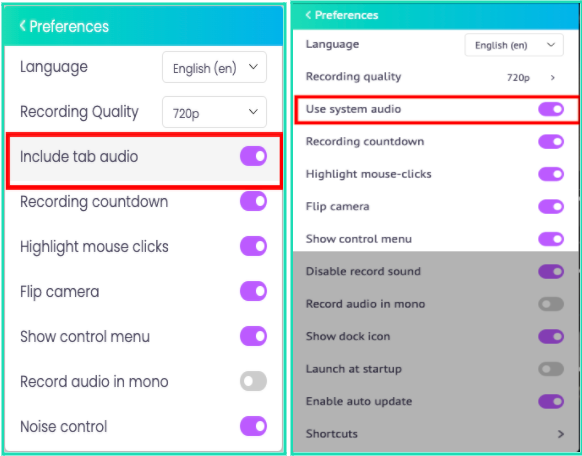
If you want to record the voice of the participants in the meeting, then you have enable audio recording from the menu. At the top right corner of the app and plug-in you’ll find three horizontal dots. Click on it to select the “Preferences” menu from the drop-down. Switch on the toggle as shown in the screenshots above.
3. Start recording
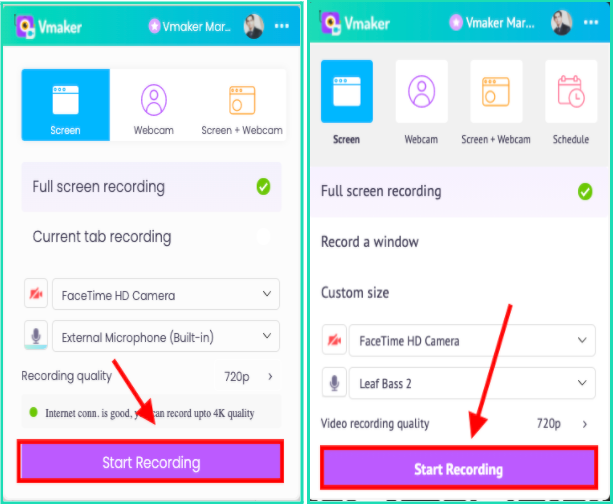
Once your recording dimensions and audio recording is set, you’re good to go ahead to start recording. Click on the recording button at the bottom of the app or Chrome plug-in and sit back.
Saving, Watching and Sharing Zoom meetings with Vmaker
Till this part, we have seen how you can start recording your Zoom meeting with Vmaker. From here, we will show you how to save the recording, watch it and share it with others
4. Where do recorded Zoom meetings go?
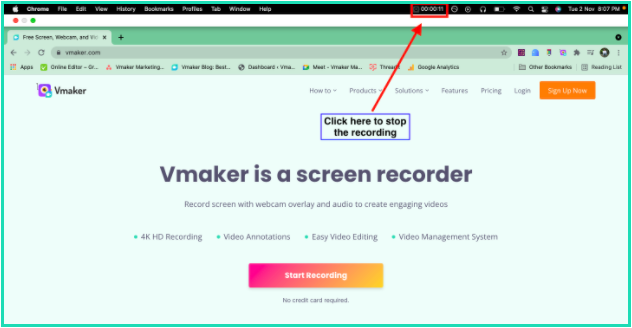
To save your Zoom meeting recording, click on the stop button that appears in your top toolbar. As soon as you save it, your recording will get saved in your workspace.
5. How to watch recorded Zoom meetings?
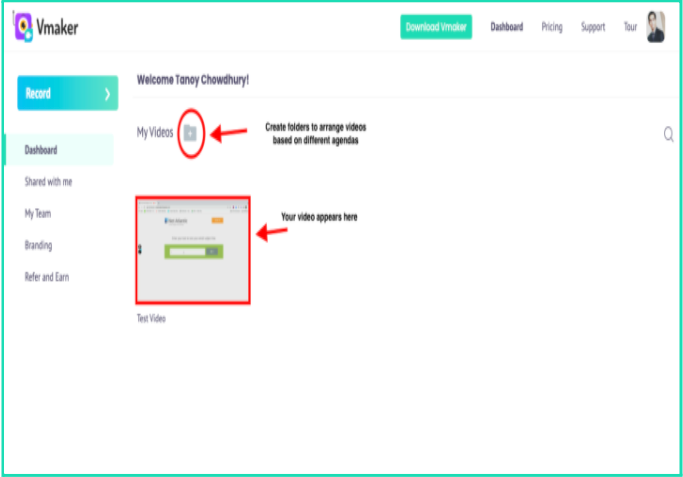
After the video has been saved, it will appear on your workspace. The above screenshot shows where the video gets saved. Once you click on the thumbnail, the video will load in a player page in a separate tab.
The folder icon just above your video, allows you to create folders for specific purpose. So, you can create a folder for “Zoom meetings” only, and move your videos there. This way, you will have better control, and your dashboard will look organized too.
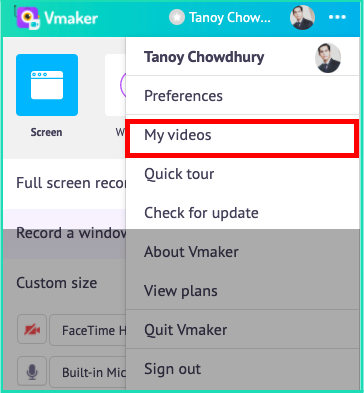
You can watch your videos by directly accessing your workspace from the app or Chrome plug-in. Head over the three horizontal dots, and select “My videos” from the drop-down. Your Workspace will open in a separate tab
6. How to share a recorded Zoom meeting?
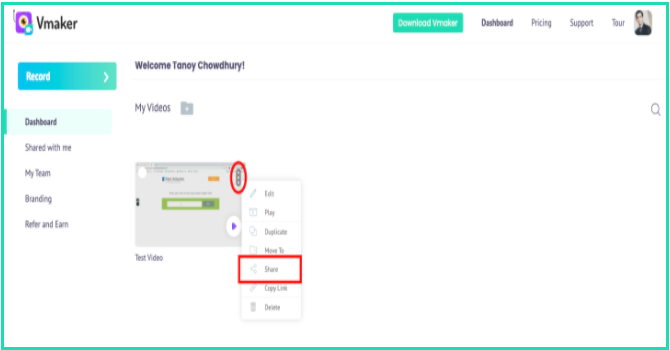
You can share your videos, directly from your workspace. Click on the three vertical three dots at the top right corner of the thumbnail. Click on share from the drop-down.
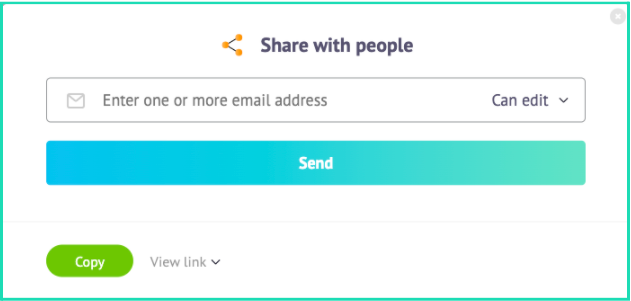
You will see a dialogue box open like above. Here, you can enter the email address of the person you want to share the video along with editing or viewing only access.
There’s one more way by which you can share a video with others. And, that’s done from the player page.
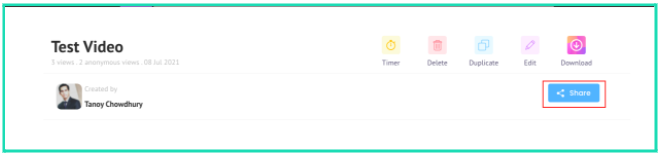
Click on the Share button on the player page.
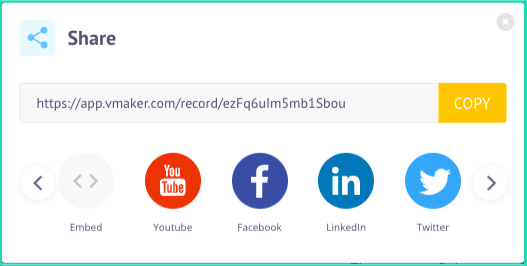
As you click on the button, you will see a lot of options to share your recording with others. You can copy the link, and embed the link in the email too.
Closing note
Vmaker is a savior if you attend many Zoom meetings in a day as a participant. It’s tough to be attentive in all the calls, and it’s natural to miss out on some details. By recording these calls using Vmaker, you can always go back to check if you have missed something that is important.
With its simple user interface and advanced features, Vmaker is certainly a tool that you should include in your tool kit.
Bonus Read: