Contents
What makes Vmaker the best way to record Zoom?
How to record Zoom with Vmaker
How to record Zoom using the Chrome extension
How to schedule a Zoom recording with Vmaker
Record on Zoom for Free - A step-by-step guide (with video)
Zoom is a daily part of how teams work today. From standups to client calls to all-hands meetings, most professionals are on a Zoom call several times a week.
The downside? Too many meetings eat into productive time, and it is impossible to focus on every call and remember every detail.
The fix is to record the meeting. The host can do that inside Zoom, but participants do not have a built-in option. That is where Vmaker comes in.
Watch this video and follow the steps to start recording your Zoom meeting.
Prefer reading? Here is the index.
| Content | Est. read time |
|---|---|
| What makes Vmaker better than others? | 30 seconds |
| How to record on Zoom with Vmaker | 30 seconds |
| How to record Zoom meetings on Mac using Vmaker | 2 minutes |
| How to record Zoom meetings using Vmaker Chrome extension | 1.5 minutes |
| How to use the Schedule feature in Vmaker | 30 seconds |
What makes Vmaker the best way to record Zoom?
No build-up. Straight to the point.
Unlimited recordings
You do not need to pay to record Zoom meetings. Record as many as you want, download as many as you want, all on the free plan.
No host permission needed
With Vmaker's Screen Recorder, you can record your Zoom meeting without notifying the host or other participants.
Automatic recording
If you cannot start the recording yourself, schedule it. Vmaker will start the recording at the scheduled time without your input.
Organised recordings
Sort your recordings into folders to keep them tidy. You can also share a folder with teammates so they can view the recordings.
How to record Zoom with Vmaker
Here are the steps to start recording Zoom meetings without permission.
You can record Zoom with Vmaker in two ways.
- Download the Vmaker desktop app for Mac or Windows
- Use the Vmaker Chrome extension to record Zoom in the browser
First, the Mac flow. Skip ahead if you are on Windows or want to avoid the desktop app. The Chrome extension steps are below.
How to record Zoom on Mac
- Go to the Vmaker website
- Click Sign up now
- Enter your username, email, and password. You can also sign up with Google or Facebook.
- After you sign up, you will land on the dashboard. Download the Vmaker for Mac app.
- Follow the on-screen prompts to install
Once installed, you can start recording your Zoom meeting. If you cannot find the app, search for it in Finder.
Step 1: Join the Zoom meeting
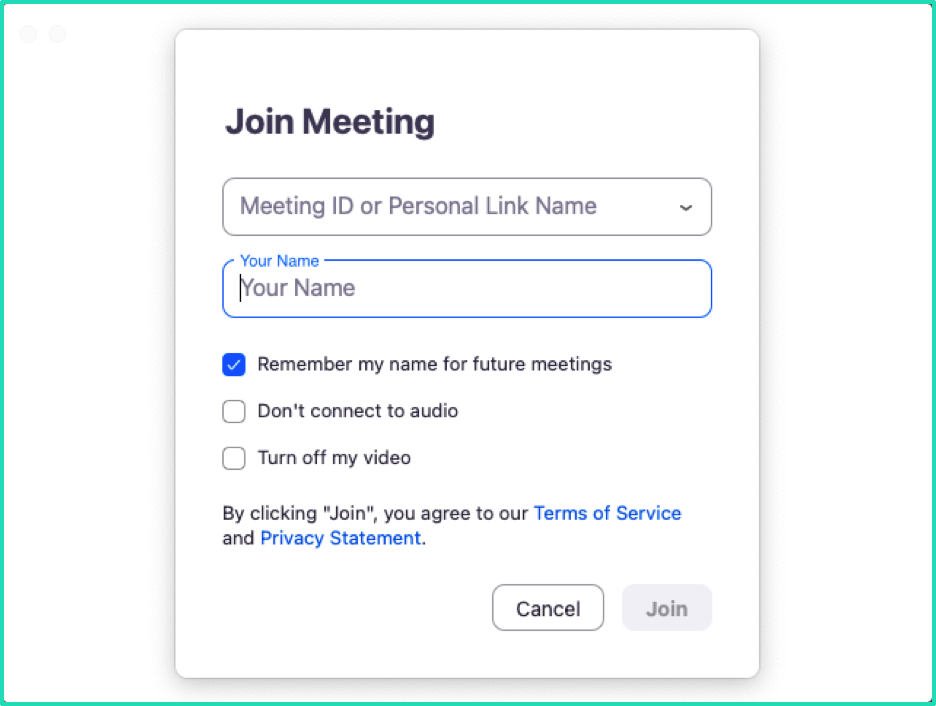
Add the meeting link and your name, then join the meeting.
Step 2: Open Vmaker and pick Screen recording
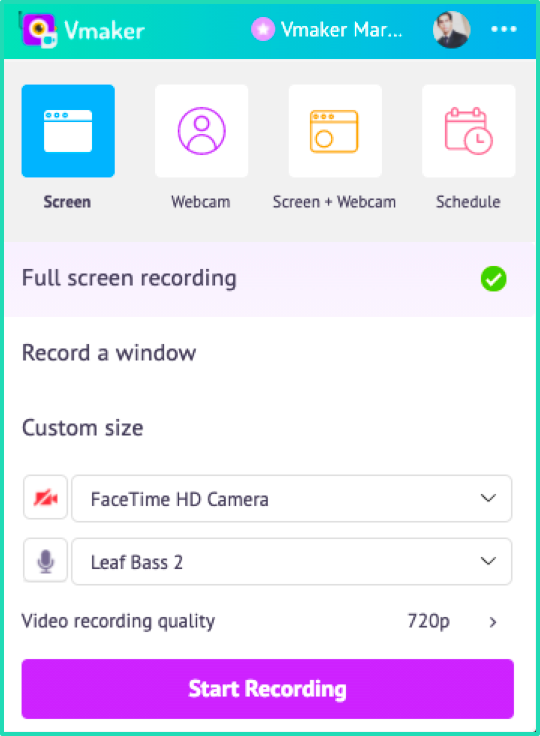
Open Vmaker and pick the Screen option. This records only what is on your screen. To record yourself in a webcam bubble too, pick Screen + Webcam.
Step 3 (optional): Enable internal audio
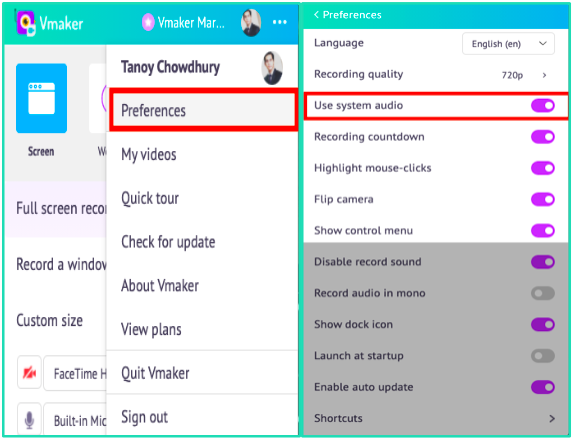
To record the audio of the meeting, enable internal audio. Open Preferences from the dropdown menu and turn on Use system audio. Vmaker will then record every voice on the call.
Step 4: Click Start Recording
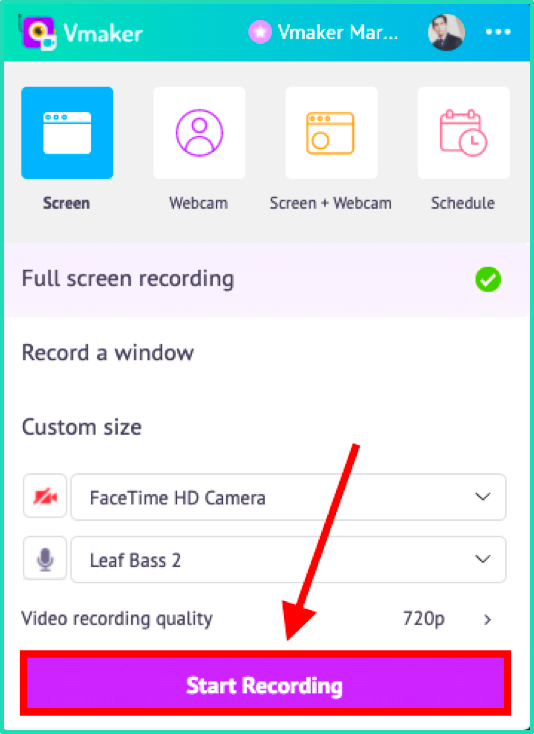
Vmaker will start recording on a 3-second countdown. From here, sit back. Vmaker keeps recording until you stop it.
Step 5: Stop the recording
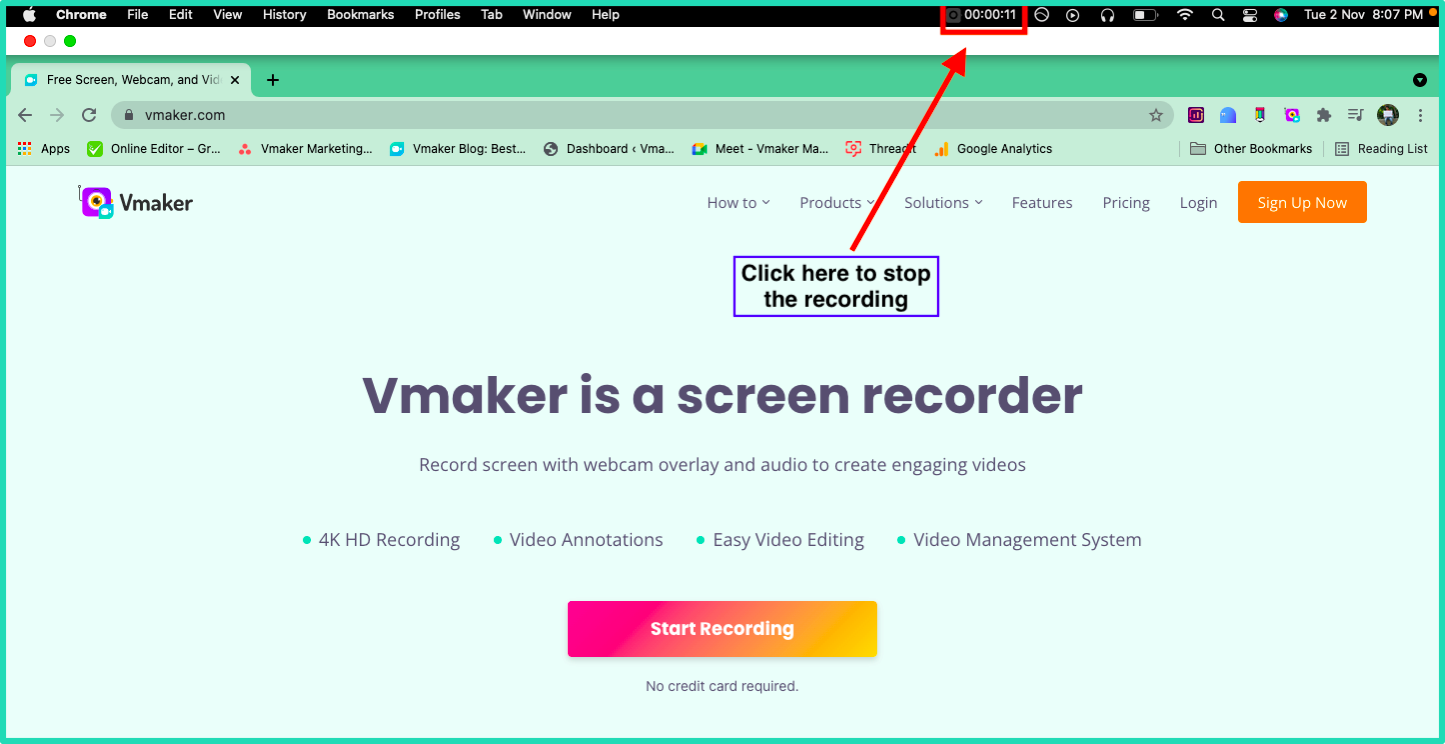
The Vmaker icon and recording timer sit at the top of your browser. Click the icon to stop the recording. A new tab opens to show the upload progress. Once the upload is done, you get a notification.
Done. Your Zoom recording is ready.
How to record Zoom using the Chrome extension
If you are on Windows or do not want to install the desktop app, the Vmaker Chrome extension is the way to go.
Add the Vmaker Chrome extension to your browser:
- Open the Chrome Web Store
- Search for Vmaker
- Click Add to Chrome
- From the extensions dropdown in your browser, pin the Vmaker extension
- Click the Vmaker icon
- Sign up with your email and start recording
Once the Vmaker Chrome extension is installed, follow these steps.
Step 1: Join the Zoom meeting

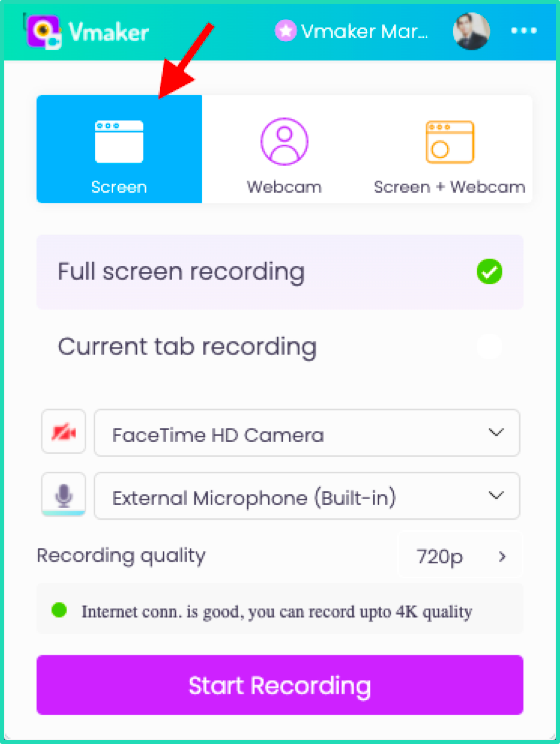
Step 2: Open the Vmaker Chrome extension

You may be prompted to log in the first time. Enter your email and password. Once signed in, you will see the screen above.
Step 3: Pick a screen recording mode
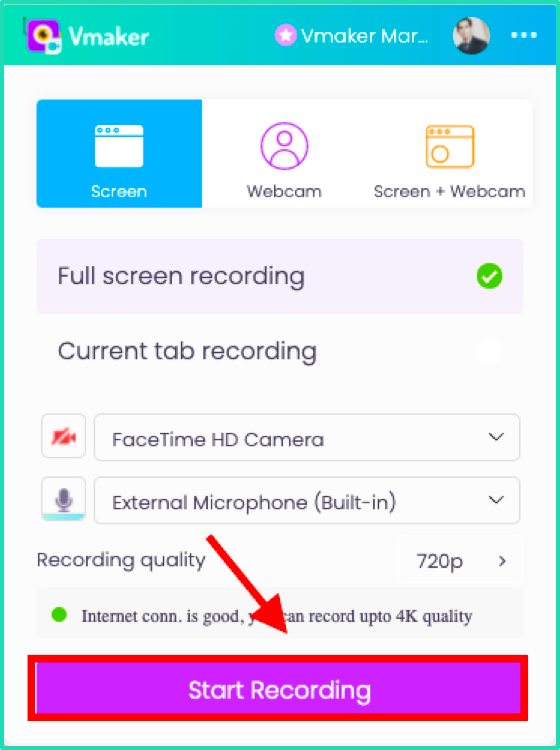
Step 4: Pick the recording type
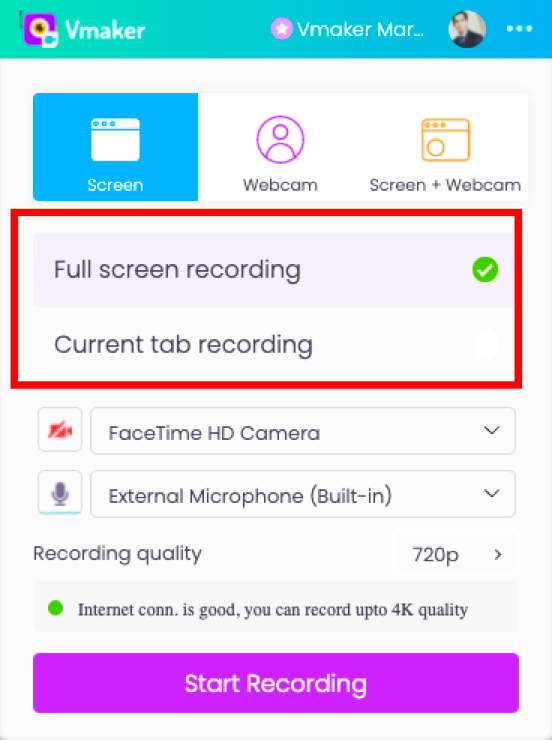
Pick how you want to record. Full-screen records everything in the browser, so if you switch tabs, those tabs end up in the recording too. Current tab only records the Zoom tab. Pick that one if you want a clean Zoom-only recording.
Step 5 (optional): Enable Include tab audio
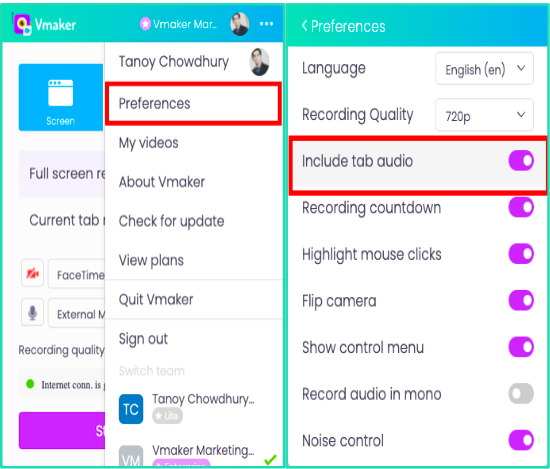
To record the meeting audio, turn on Include tab audio in the Preferences section of the extension.
Step 6: Click Start Recording
How to schedule a Zoom recording with Vmaker
You can also schedule a Zoom recording in advance. The recording will start automatically at the scheduled time, even if you are not at your desk.
Here is how to do it.
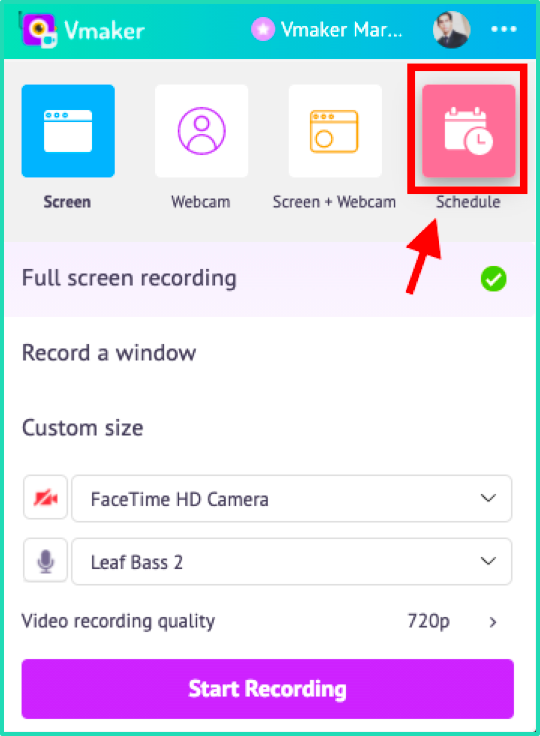
Open the Vmaker app and pick Schedule.
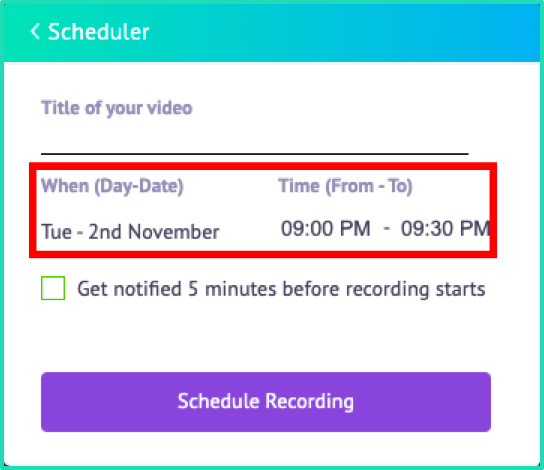
A pop-up will appear. Set the title of the recording, plus the date and time of the meeting.
Tick the notification box so you get a reminder when the meeting is about to start. Keep the app open on your laptop so the recording can begin automatically.
Want subtitles on your Zoom recording too? Vmaker has an AI subtitle generator built in. Auto-generate captions in 35+ languages right after the recording finishes.
Video: How to record a Zoom meeting with subtitles (without host permission)
Final words
That is the full Vmaker Zoom recording flow. No extra cost, no payment, free for life. To see what else Vmaker can do, head to the features page.
Ready to start? Sign up for Vmaker for free. No trial, no credit card.
Recommended Reading:
How to Record a Zoom Meeting as a Participant: A Complete Guide
10 Best Screen Recorders to Record Zoom Meetings
How to Save, Watch and Share Zoom Meetings for Free
How to Record Zoom, Google Meet, or Any Online Meeting with Subtitles