Contents
Which Screen Recorder should you pick?
How to screen record on Mac with audio using Vmaker?
Step 2: Check the microphone settings
Step 3: Click on the three dots at the top right corner of the app
Step 4: Select Preferences from the drop-down
Step 5: Select System Audio option from the options
Step 6: Choose your mode and start recording!
Step 7: Use screen annotations
Step 8: Add frames and filters
Why is QuickTime player NOT the right screen recorder to screen record on Mac with audio ?
Why should you even record audio with screen recording?
How to screen record on Mac with audio for free in 2024
Any simple screen recorder should be able to record your screen and webcam in your Mac computer at the same time. So, if you like recording games, YouTube videos, or Webinars, then picking the most basic screen recorder can help you.
But, if you want to record your voice or internal audio along with the screen & webcam recording, then you need an advanced screen recorder. These screen recorders can record audio and sync them with the video in real-time.
If you love streaming videos or sharing commentary, then you should have an advanced screen recorder.
Which Screen Recorder should you pick?
As there are many screen recorders in the market, settling for only one can be a tough choice.
Here’s a quick list of screen recorders that can not only record audio along with screen and webcam, but also have a host of features that can help you with video making.
- Vmaker
- Camtasia
- OBS
- ScreenFlow
- Loom
- Snagit
- Active Presenter
- Screencast-O-Matic
- TinyTake
- Claquette
You can check our detailed analysis of these tools on how to record screen video on Mac blog.
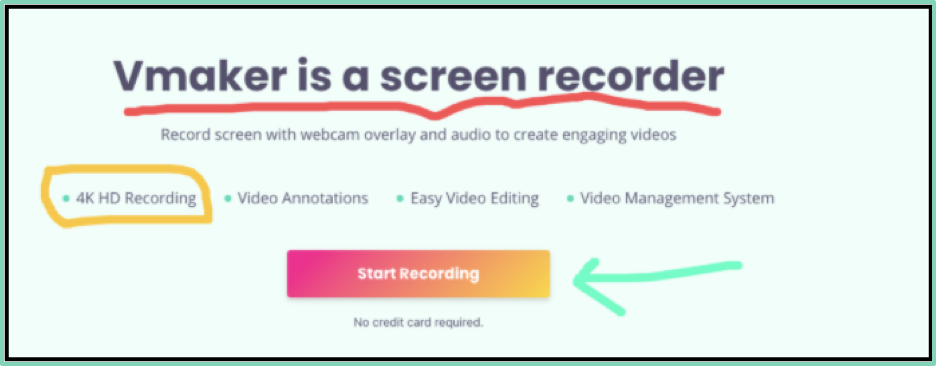
In this blog, we will be telling you about how you can screen record on Mac with audio using Vmaker. Vmaker is the best advanced screen recorder for Mac and Windows. It’s user-friendly and has all the features you need to make impeccable videos with audio. The best part is that you can do all of that without paying a single penny.
How to screen record on Mac with audio using Vmaker?
To get started with Vmaker, you can download the Vmaker app on your Mac computer. You can also add it as a Chrome extension from the Chrome Web Store. Following are the steps for each of them.
Downloading Vmaker app on your Mac computer
- Head over to the Vmaker website
- Click on the Sign up now button
- Enter your user name, email address and password. You can also sign up with your Google and Facebook account
- After you click on the Sign up button, you will see a dashboard pop-up. Download the Vmaker for Mac app
- Follow the on screen instructions to complete the installation

Installing the Vmaker Google Chrome extension
- Head out to the Google Chrome Web Store
- Search for Vmaker in the search bar
- Click on the Add to Chrome button
- Open your Google Chrome browser, and from the extension drop-down, pin the Vmaker extension
- Click on the Vmaker logo after it’s pinned
- Sign up with your email address and start recording videos
Now that you have downloaded the Vmaker app or installed the Chrome extension, you can start recording your screen on Mac with internal audio.
Here are the steps to follow in the Vmaker app. If you’re using the Chrome browser, you can relate to the above steps as the user interface is the same
Step 1: Open the Vmaker app
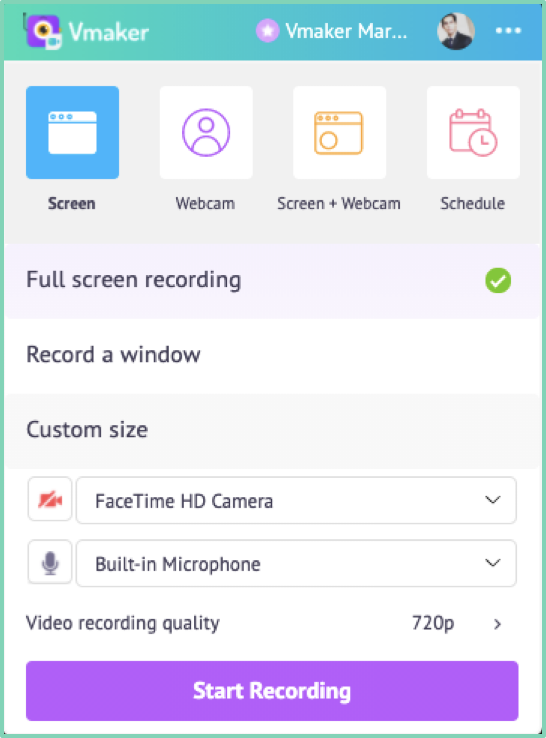
You should see a screen similar to the above screenshot.
Step 2: Check the microphone settings
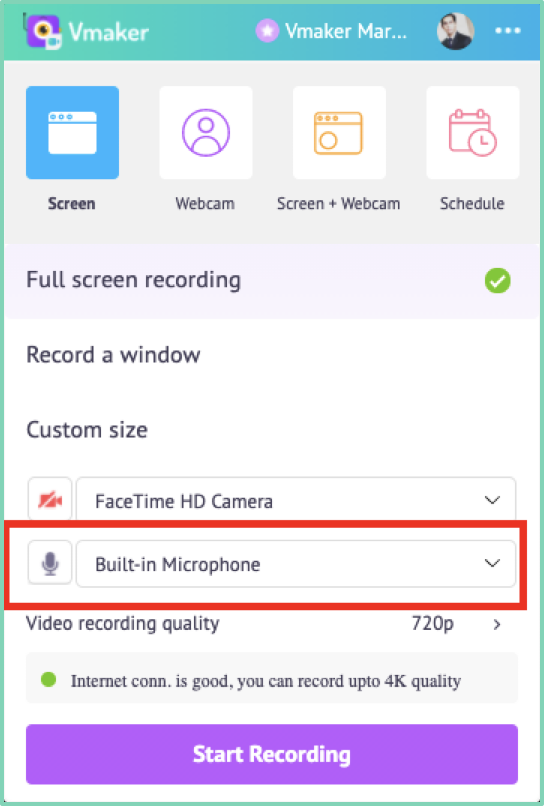
To record your voice, check the highlighted section in the screenshot above. Make sure that the microphone is enabled, and it’s not on mute . If you’re using a bluetooth headset, then Vmaker will automatically identify the microphone. Select it from the drop-down, and your audio will be recorded from that microphone. After you start screen recording on Mac, you can mute and unmute your microphone if that’s needed.
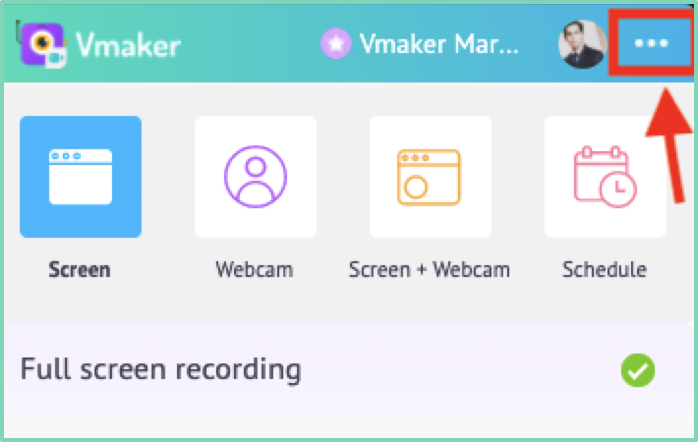
Step 3: Click on the three dots at the top right corner of the app
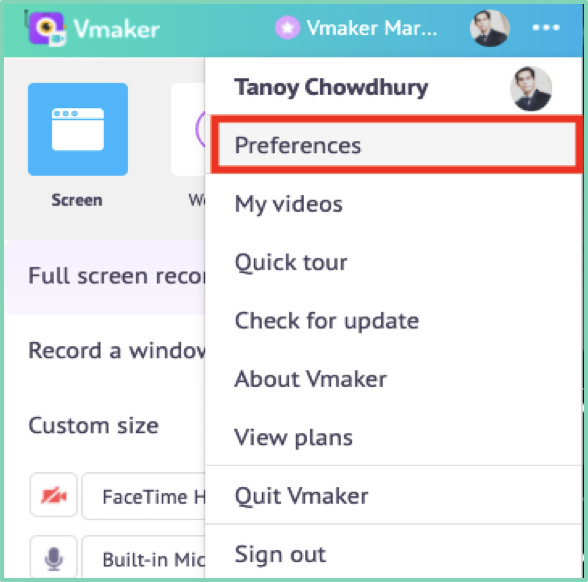
Step 4: Select Preferences from the drop-down
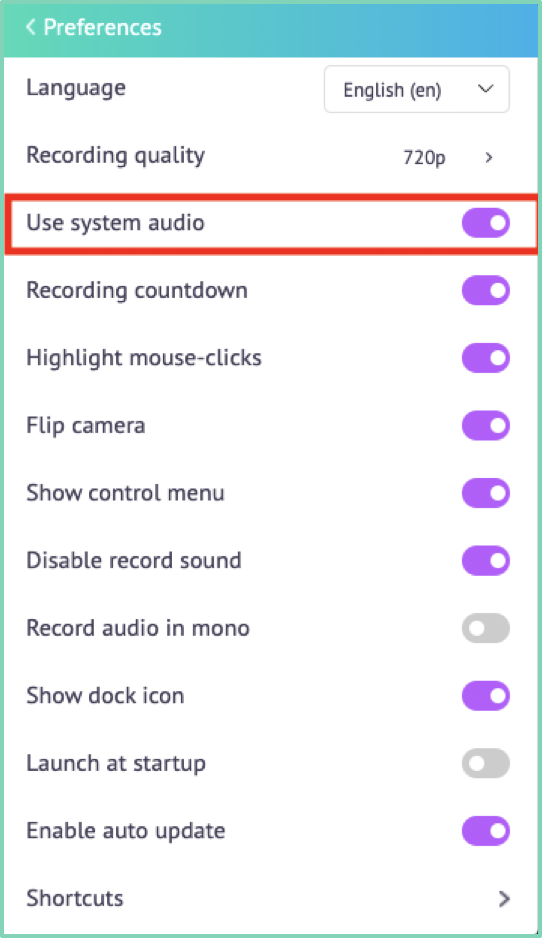
Step 5: Select System Audio option from the options
Step 6: Choose your mode and start recording!
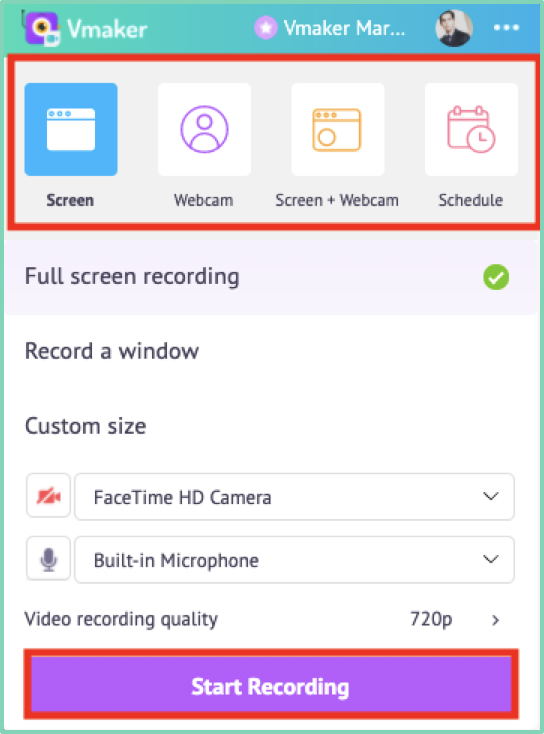
Choose your screen, screen with webcam or webcam only to start recording videos. You can also schedule screen recording, to automatically start recording your screen at a pre-destined time. Make sure you keep the Vmaker app open.
Step 7: Use screen annotations
To highlight the content in your recording, use annotations. You can choose different colours tailored to your needs
Step 8: Add frames and filters
If you’re recording your webcam too, then make sure you try out the frames feature. You can add different filters on the webcam view to make the recording more interesting.
Step 9: Edit your videos
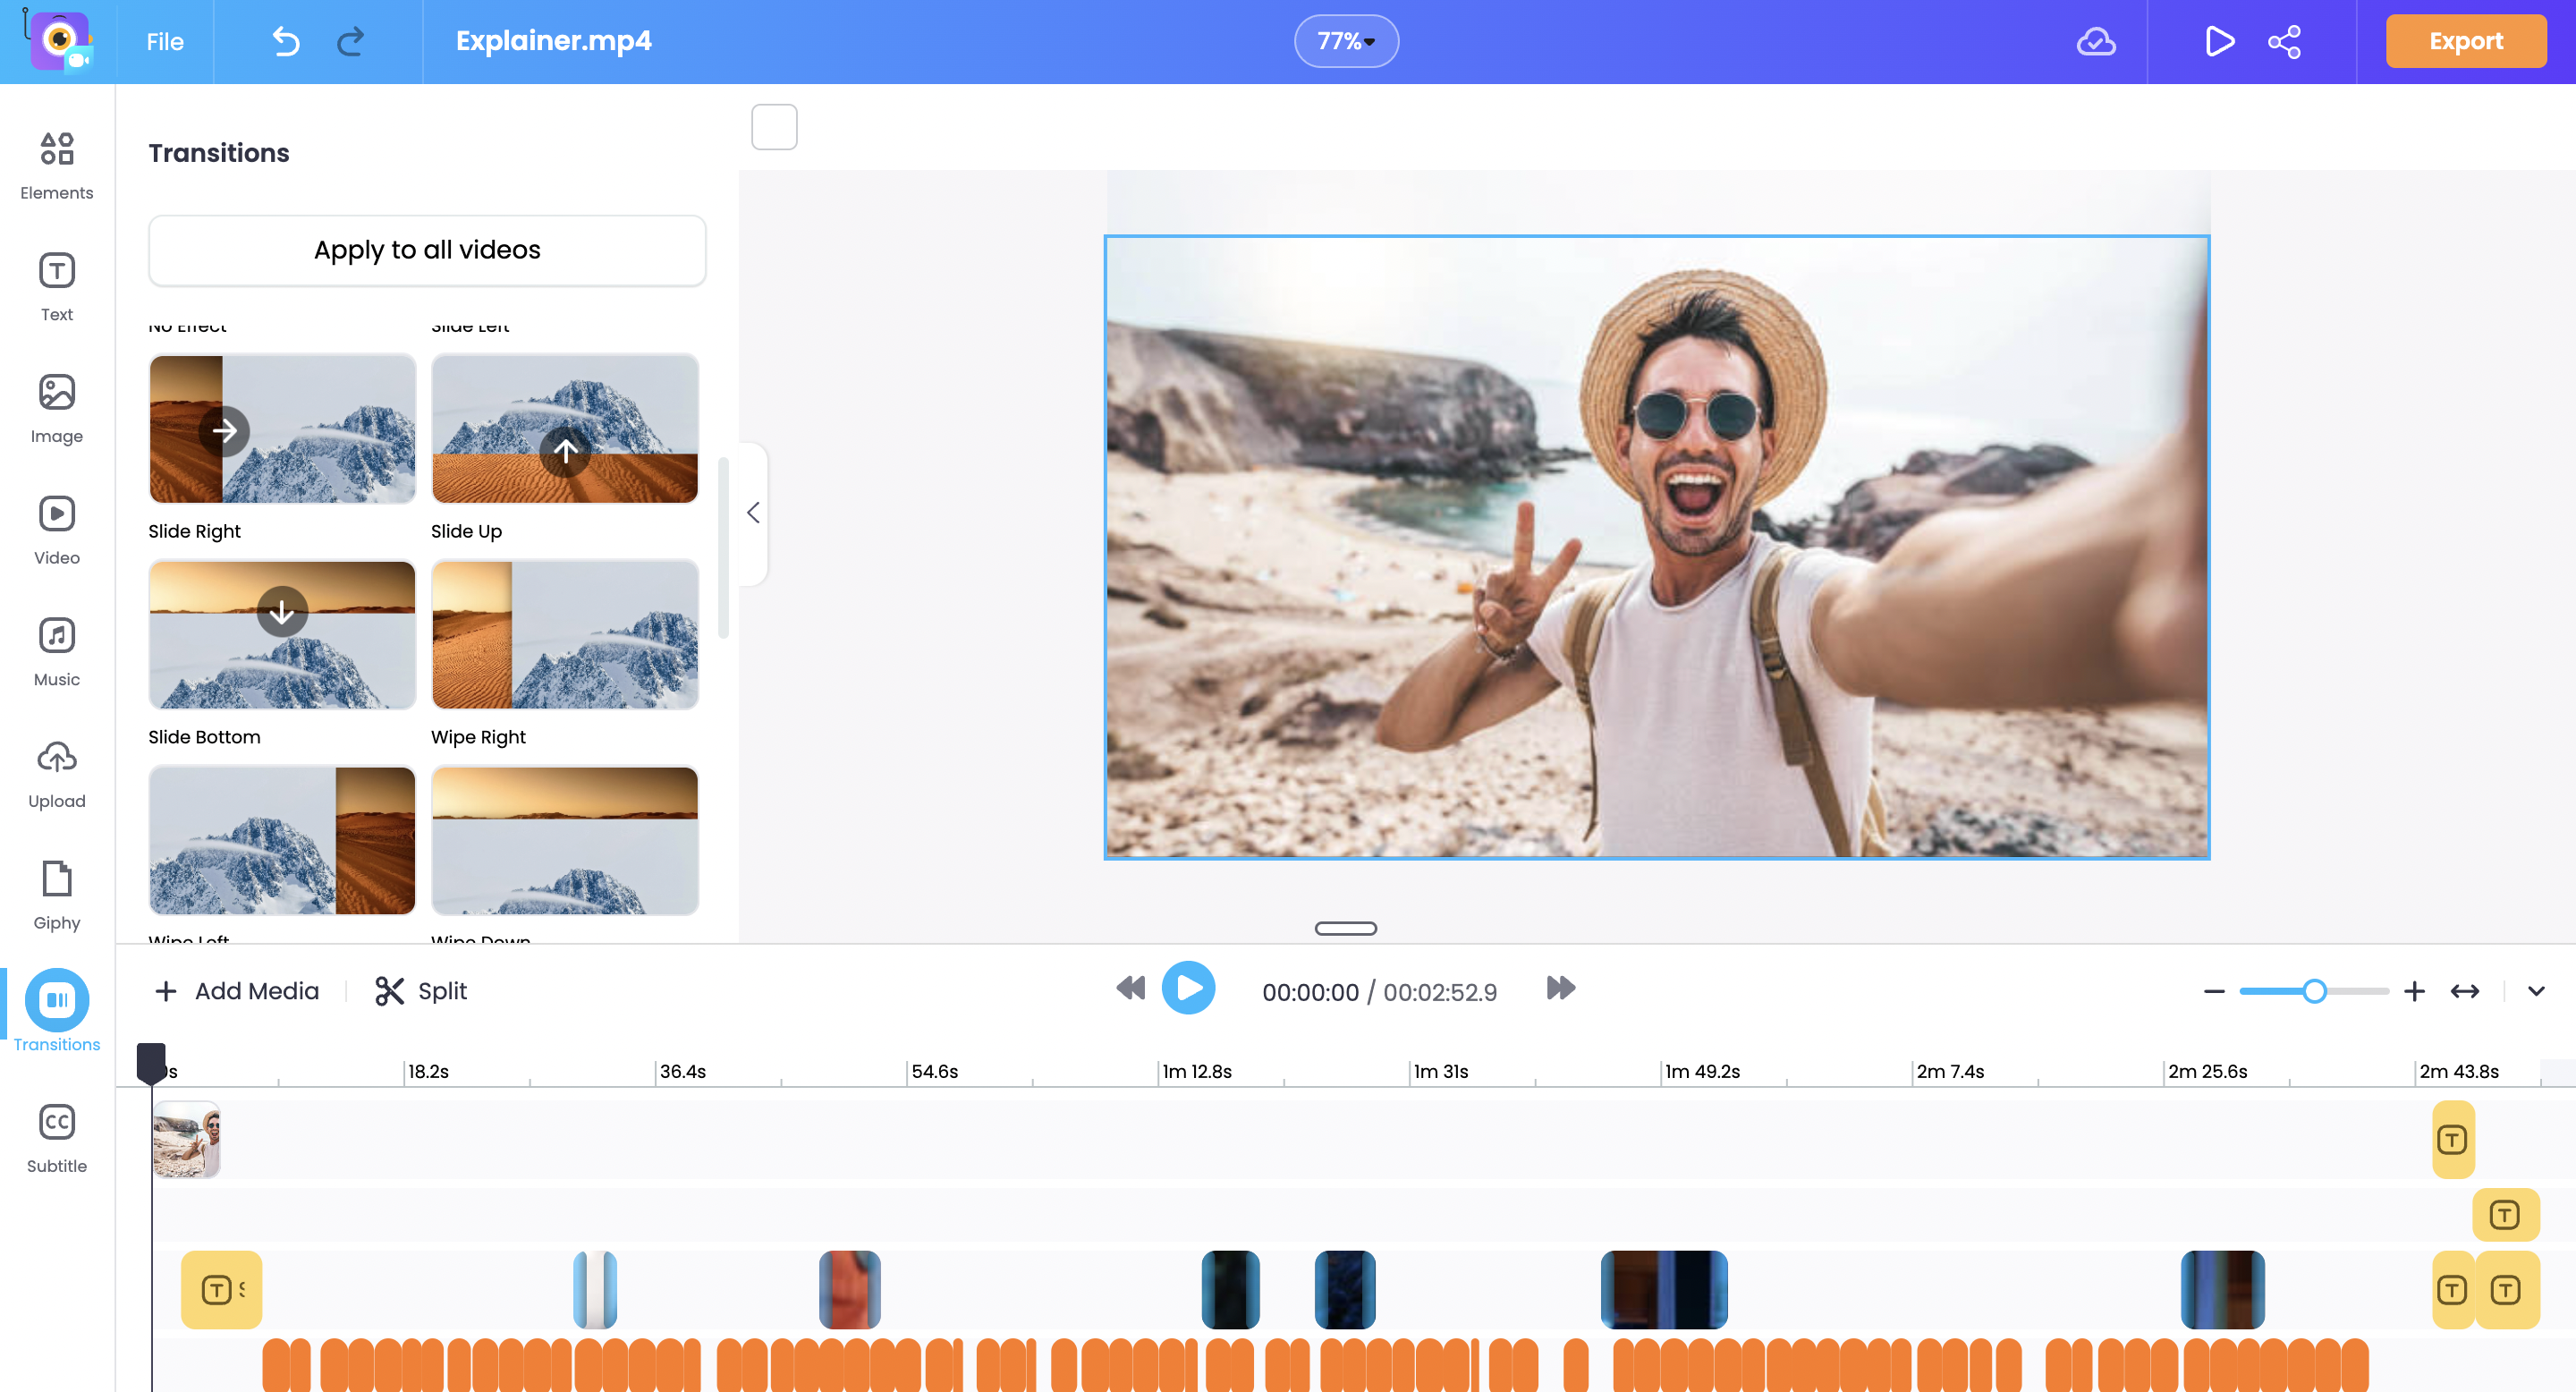
After you finish recording, edit your video by using Vmaker AI video editor. All you have to do is upload your raw footage and select the kind of visual enhancements or elements you want to add to your video like Subtitles, B-rolls, Background Music, Text Animations, Intro, Outro, etc— Vmaker AI will intelligently add them for you.
Not just AI, it also comes with an intuitive timeline. So, you can easily edit the parts of the video as you like.
Step 10: Share it with others
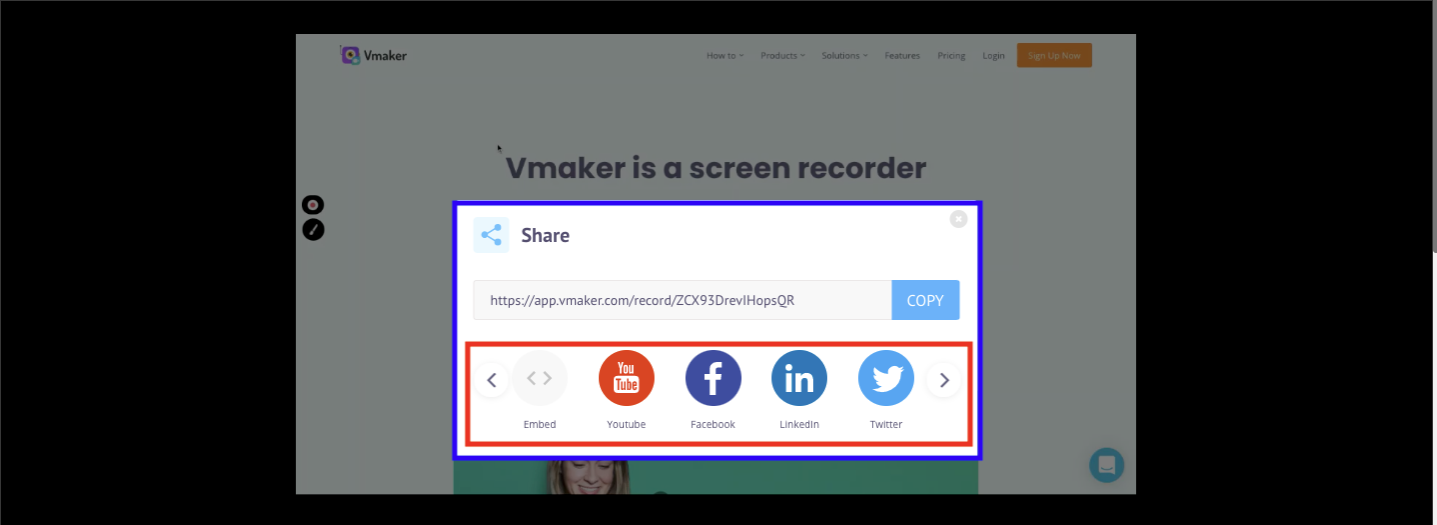
Once you’re done with chiseling your video, don’t waste any time in sharing it with your friends. Upload it on social media in a click right from the Vmaker dashboard
If you want to check out the other cool features that will help you to make, edit and share videos, then here’s the features page link.
Why is QuickTime player NOT the right screen recorder to screen record on Mac with audio ?
For Mac users, it’s tough to understand why they can’t use QuickTime player to record audio while recording their screen. It’s in-built, therefore it’s more convenient to use. Also, there is no need to download an application or sign up anywhere.
That makes sense, but the problem is that you can’t do it with QuickTime player. It is a basic tool for making screen recording videos on Mac. It cannot record your internal audio while recording the screen at the same time.
When you play videos on your Mac computer, it will not record the audio of the file being played. As an alternative, you can record your voice as narration in a voice recorder, and then sync it with the screen recording.
But, that’s too much work. And, it’s tedious too. If you’re serious about generating more engagement on your videos, QuickTime player is not the right tool for you.
Why should you even record audio with screen recording?
If you already know it, feel free to skip it. But, I think there will be a few inquisitive readers who want to know more about this. It’s not mandatory to record your audio while making a screen video on Mac. But, in a few cases, it has its advantages. Here are a few that come at the top of our head -
Immersive experience
With audio recording, you can give that immersive experience to your audience. You can play multimedia files from your desktop all the while recording your screen. So, you don’t have to share the link with them, and tell them to go check it out later. You can get things done right then, and make the whole experience more engaging.
Explain easily
Simple, with audio recording you can add more explain stuff in the screen recording more easily. Instead of only putting numbers or words in slides, you can add your voice narration to explain to the viewers what exactly they’re looking at.
High personalization
Audio recording gives the audience a feeling that they’re having a private conversation with you. Due to the asynchronous nature of communication, they can’t see you, but as they hear your voice, it gets more personal for them. So, it becomes a lot more than just any other screen recording video.
High engagement
The most important point: you make better content with voice and internal audio recording. When your content is better, it means you will get more engagement too. They will watch your videos as the go-to content for learning something new. It will also encourage them to share your videos with others, which will ultimately improve your popularity.
Wrapping it up
So that was the complete walkthrough of how you can screen record on Mac with audio. Audio recording is very helpful for recording both voice narration and internal audio. If you’re using a screen recorder that doesn’t allow this, then switch to Vmaker for better experience. With Vmaker, you not only get things done quickly, but also in an efficient way.
You can also read our other blogs to get more insights on Vmaker and screen recording. Here are a few suggestions to help you get started
How to record online lectures for free
How to make instructional videos with screen recording
How To Record Internal Audio on Mac
How to Screen Record on MacBook Pro
How to Screen Record on Mac with audio and video
How to Screen Record on Mac without Quicktime