Contents
How to create tutorial videos for YouTube?
How to create tutorial videos that rank well and get more views?
6 Simple Tips to Create Viral YouTube Tutorial Videos
The fun part about tutorial videos on YouTube is that people love watching them. And you don’t need to read a research paper to prove that. Because you have watched these videos, you know that they’re popular.
Google also supports this. According to Think With Google, we’re 3X more likely to watch a tutorial video than reading product instructions.
The not-so-fun part about tutorial videos on YouTube is how to make them. There are too many options, and it’s not that easy to get started if you’re a newbie in this. Even if you’re experienced in video making, then you’ve only solved half of the problem. You should also know how to beat the competition and impress the algorithm.
In this blog, we will take both these challenges head on. After reading this blog, you should know what type of tutorial video you want to create for YouTube and how to do it.
How to create tutorial videos for YouTube?
Let’s take care of this first. We have picked 3 easiest ways to create a tutorial video for YouTube.
Screen recording tutorial video
A screen recorder is a powerful tool for making tutorial videos because it keeps things simple, but gets the job done very well. If you have a limited budget and only a few members in your team to create tutorial content, then this should be your choice. No second thoughts.
With a screen recorder, you can record your screen to show whatever’s playing on it. It can be a presentation, video, spreadsheet, doc file, anything that tells your audience what you’re trying to achieve.
From here it gets better - you can record your webcam and voice while recording the screen. The upside is that your audience can also see their instructor now. From being just a screen recording video, you can transform it to a virtual asynchronous instructor-led tutorial video by only turning on your webcam.
Here’s an example of a tutorial video recorded using a screen recorder:
Animated tutorial videos
As a kid, we all love watching videos. Most of us still do. Animated videos are fun, entertaining and are great for learning new things. However, creating animated videos is no joke. It takes tonnes of effort and long hours to come up with the first cut.
Having said that, if you’re using tools like Animaker, you can create 2-D animation videos of impressive quality. No need to hire a team of professionals, you can do it on your own. But, before you make an animated video, ask yourself if it’s really necessary.
A good way of deciding that will be by determining the timeline of making an animated tutorial video. For example, how many hours in a day can you allot for making this video, and based on that, how many days it will take to complete the video.
If you’re curious, you can watch this video on how to make 2D animation on your own.
Whiteboard tutorial video
A whiteboard tutorial video is a mix of animation and recording. The concept is that there’s a whiteboard, which you must have already guessed. And, there are images appearing on it in the form of animation.
The viewers can only see your hand and hear your voice. Whatever you show on the whiteboard, and whatever you narrate, gets saved as a video. You can share this video with anyone as a tutorial.
The benefit of whiteboard tutorial videos are that you can cover a massive amount of information in a visual manner. If there is a lot of data, graphs and figures, then this form of video can be the right choice for you and can play a key role in your YouTube growth strategies.
Before you scroll down, here’s an example of whiteboard animation tutorial video:
How to create tutorial videos that rank well and get more views?
To help you excel in the process of making tutorial videos, no matter what technique you choose, we have collated a list of 6 tips. These tips will not only help you make quality videos but also help you gain more views and more subscribers on YouTube and stay ahead of the competition.
1. Create an outline
An outline is a structure that you would want to follow while recording the tutorial video. This structure will mostly include the sequence of actions that you’re going to perform. And, it can also include elements like images, clips or illustrations that you’re going to use in your video.
For example, you’re making a screen recorded tutorial video. You can write down the total length of the video and split it into different scenes. Under each scene, you can include what exactly you want to show to your audience.
This way you’re prepared beforehand. When it’s time for recording, you’re not anxious or confused about what comes next. You will have a smooth ride making the video, and your audience will enjoy it too.
2. Write a script
You might be good at recording videos in an impromptu manner. But, while making a tutorial video, we insist that you write a script.
Because in a tutorial you want to give the best value to your audience. And, there’s YouTube algorithm too. Your video will stand out if you make it special for your audience; a tight script helps you to achieve that.
Your script can include exact lines that you want to say in your video, or it can only include pointers. The other important aspect of writing your script is knowing your audience. You should know what kind of audience you’re catering to. Are they young? How much knowledge do they have about the topic? These are a few questions you should ask yourself.
We have written a comprehensive guide, but a simple guide on writing a script for YouTube video. Go check it out.
3. Add subtitles
Your viewers can be from different countries, therefore there is no guarantee that they will know your language very well. A subtitle generator tool is essential for such scenarios. After your video is recorded, you can upload the video to this tool to auto-generate the captions.
With the help of subtitles, you will make it easy for foreign viewers to follow the video content. And, it’s not only about the viewers. It’s great for video SEO too. Because Google spiders crawl the captions too. This means your video will be indexed and ranked for web searches as well.
4. Fix lighting
This is more applicable for screen recording videos and any other form of video where your audience can see your face. Poor lighting can degrade your video, as it can hinder the visibility.
There is a separate guide on how to use lighting while screen recording a video. But, the top two tips that we can share here right now are - use natural lighting as much as possible, and face the window while recording your video.
Natural lighting is the best source because it’s available in abundant quantities, and it’s free. There is no harm in using artificial lighting, but ensure that you have the right lighting set-up. All the more reason why you should read our guide.
Be careful while recording in front of the open window though. If your back is towards the window, then your face will appear dark which is not what you want.
5. Reduce background noise
Too much noise in the background is a downer. It coincides with the audio and it’s a mess. Your audience will not know what you’re saying, and they will start dropping like flies. The best way to avoid this is by recording in a silent room.
Ensure that you close yourself in a room and hang a DND sign on the door handle. If that’s not possible, or you’re recording in a noisy area, then a video tool with DND function will work. Vmaker does that for its users without them having to do anything.
This function eliminates background noise and gives you clear audio after you finish recording the video.
6. Edit your videos
A video editor is a much-needed tool for making tutorial videos. For beginners, we don’t recommend spending thousands of dollars for video editing software. Instead, choose a video recording tool like Vmaker that comes with an AI video editor.
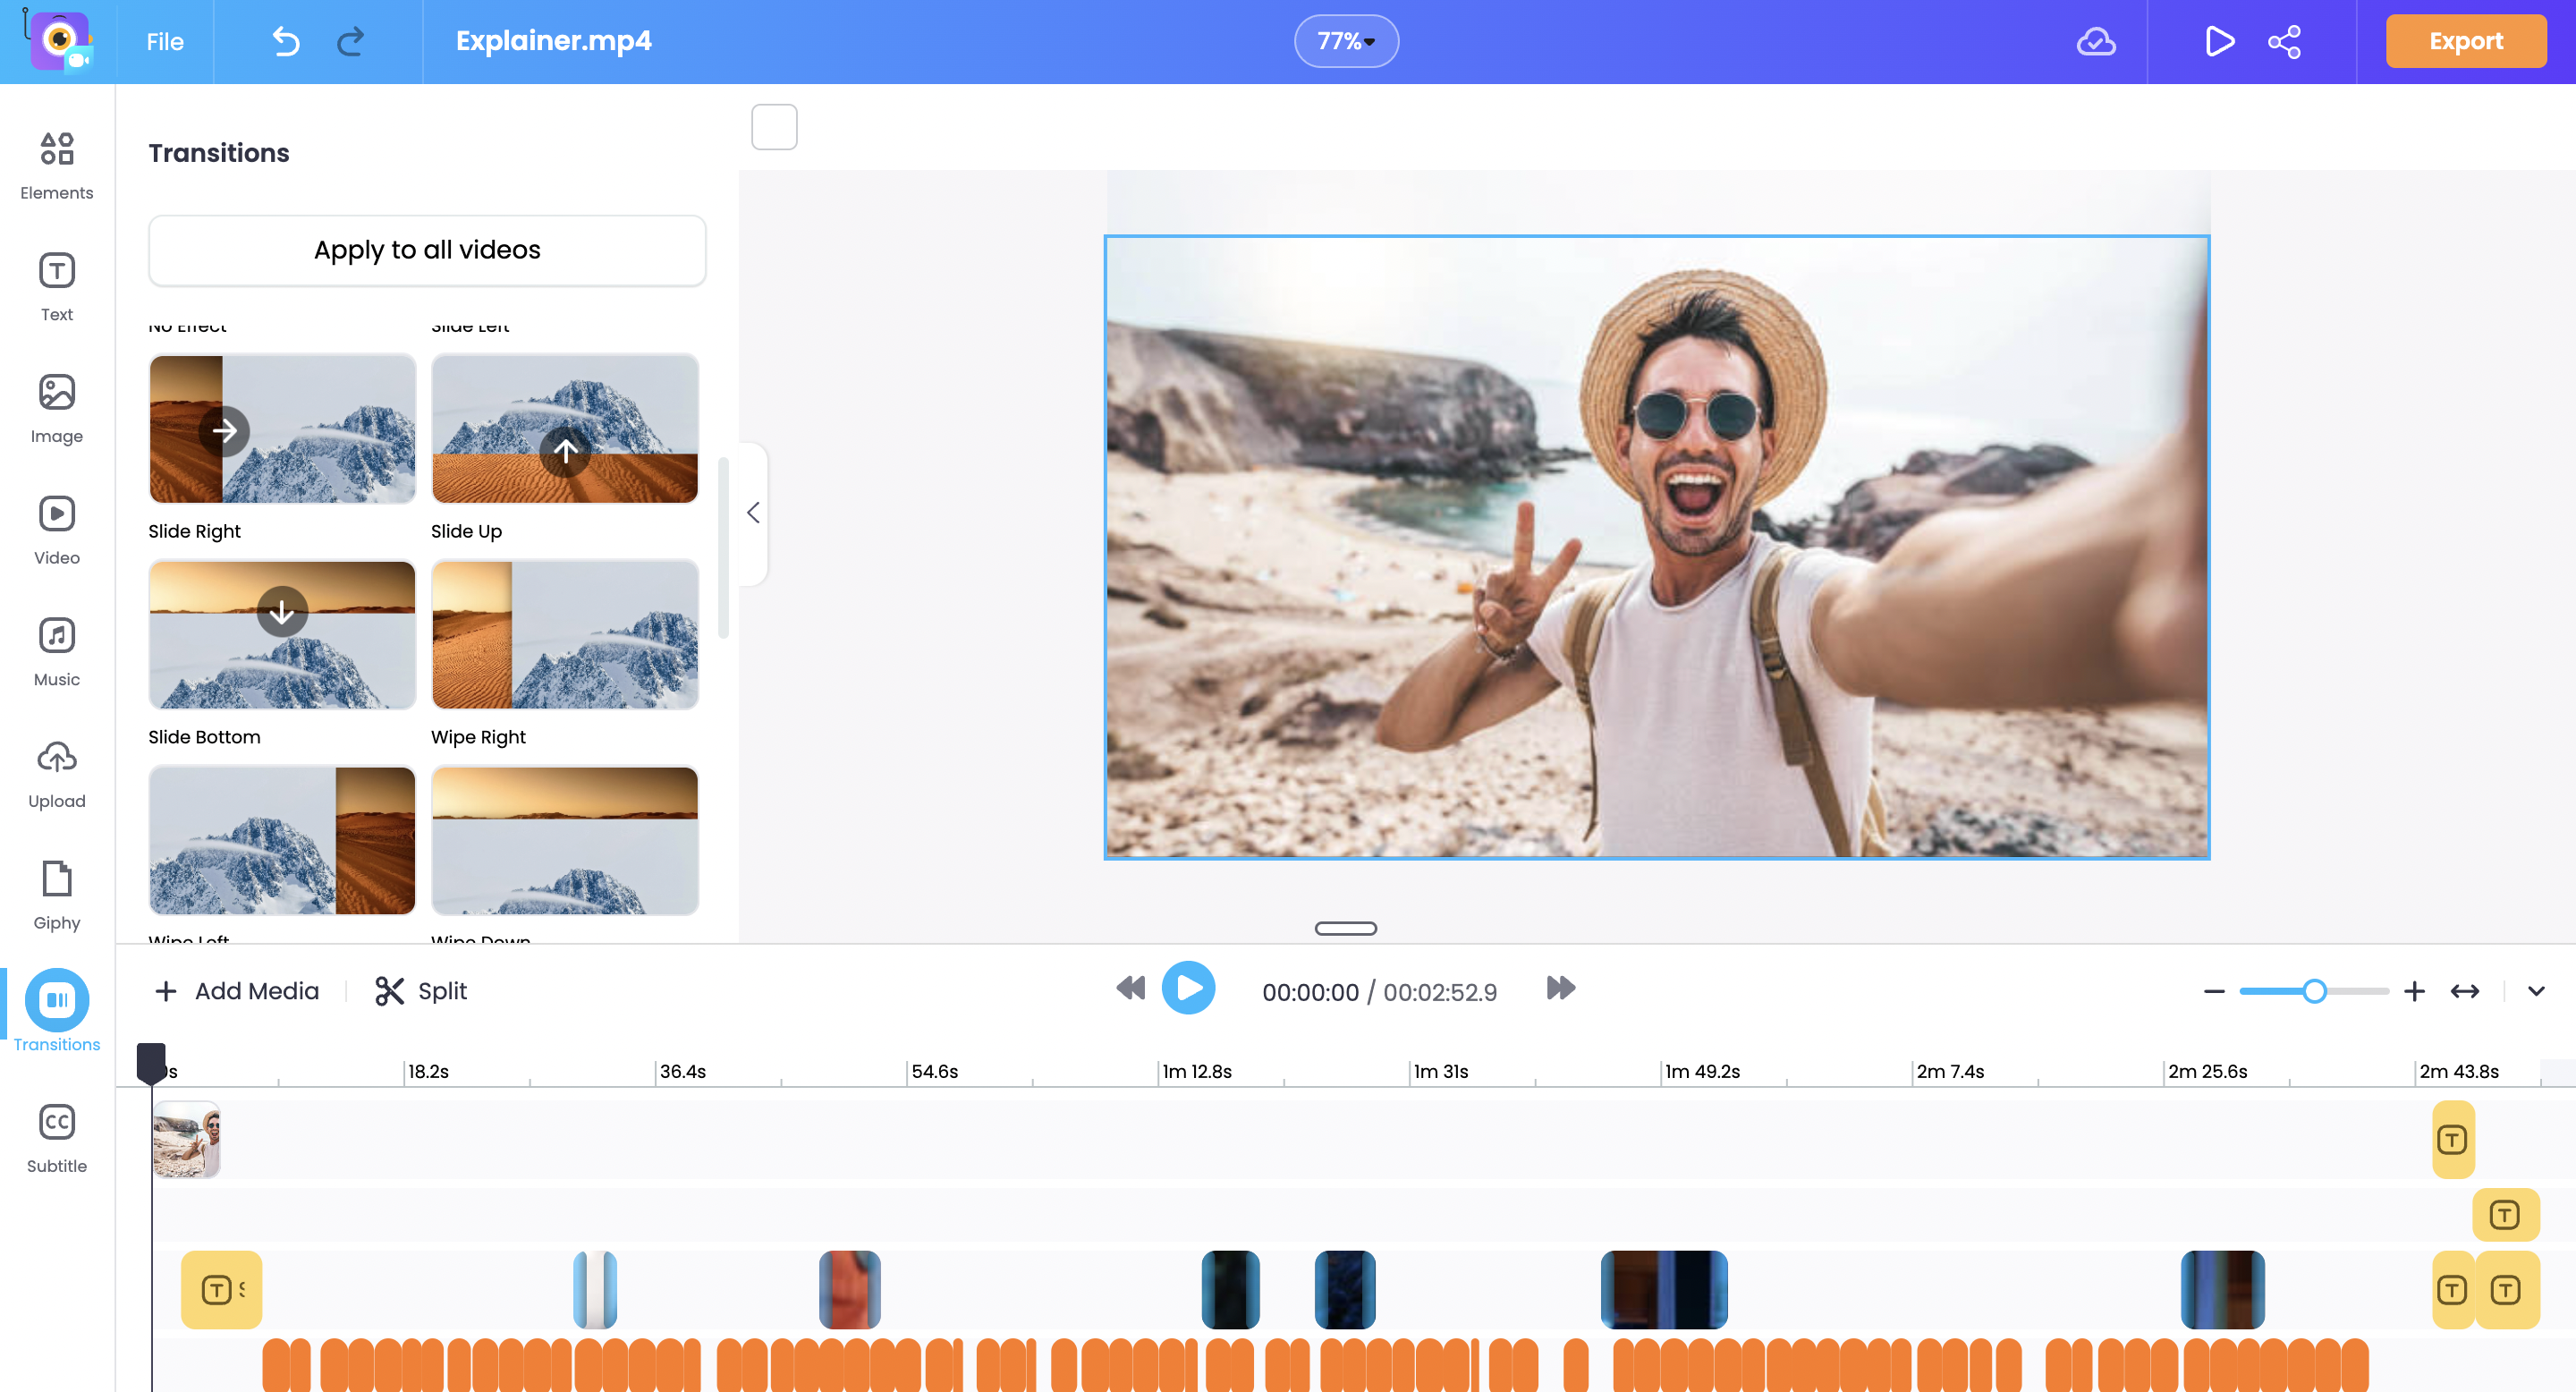
It offers advanced features such as automatic video editing, text-to-video conversion, long-to-short video conversion, generating video highlights, AI video background removal, streamlining the editing process, and enhancing the visual appeal of your videos.
Look for the basic video editing functions like trim, crop, resize, cut, speed control, transitions, merge, import and export. These are the ones you will need compulsorily to retain the best scenes in your video. The import option enables you to upload external audio or video files. And, export lets you download the whole video in one click.
Get. Set. Go
It’s challenging to make tutorial videos from scratch. With too many options, including YouTube video editor, and burgeoning competition, it can become stressful for any new content creator.
Choose the one technique that you’re most comfortable with. Keep practicing and don’t forget to follow the 6 tips we shared in this blog. A step-by-step approach with patience will go a long way in producing high quality tutorial videos that not just rank, but also get high amount of traffic.
Recommended Readings:
5 Best Screen Recorders for YouTube
3 Tips to Record High Quality Product Demo Videos for YouTube
How to do product review videos on YouTube?