Contents
Who should be reading this blog?
Using the right screen recorder
Editing screen recording videos using Vmaker Windows application
A walkthrough of the Vmaker video editor
Here are the steps you need to follow to add video to your recording
How to Edit Screen Recordings on Windows PC like a PRO
A screen recording video made on a Windows computer can be 10X more powerful after editing.
Using a strong video editor you can keep only relevant information, add a soundtrack or video clips to make the final output look like it’s been done by a professional.
This comes as a blessing because screen recording videos have so much potential. You can make how-to videos, record Twitter Spaces, replace hour-long synchronous calls and make your launch video on Product Hunt.
But, to do that you have to first learn how you can edit videos using a screen recorder on a Windows computer.
Who should be reading this blog?
This blog is not just for newbies looking to edit screen recording videos on their Windows PC.
Many experienced users rely on a different video editing software to edit videos. This means extra cost and time spent in downloading and uploading the video content from one tool to another.
This blog is going to be useful for such users too.
Using the right screen recorder
To demonstrate how you can edit a screen recording video on Windows, we will be using Vmaker, an advanced screen recorder that comes with a built-in video editor. As per our analysis, it’s a great fit for Windows users looking to edit videos.
But, you can use other screen recorders for Windows. There are some good options available, and you should definitely check them out before settling for one.
To help you make the choice, here’s a list of the best paid and free screen recorders for Windows PC that come with a built-in video editor.
1) Vmaker
2) Movavi
3) OBS
4) Flashback Pro
5) Filmora
Editing screen recording videos using Vmaker Windows application
To start with the editing you have to download the Vmaker Windows application first.
Follow these steps to get that done -
- Head over to the Vmaker website
- Click on the Sign up now button
- Enter your username, email address and password. You can also sign up with your Google and Facebook account
- After you click on the Sign up button, you will see a dashboard pop-up. Download the Vmaker for Windows app
- Follow the on-screen instructions to complete the installation
A walkthrough of the Vmaker video editor
After you have downloaded the application, you have to sign up to start using the app. You can use the free account for a lifetime, but honestly, if you want to get the entire benefit from editing videos, then you should go for the premium version.
Nevertheless, we will be telling you which editing features are free and which are the premium ones.
But, before we get on to that, you have to record your first video with Vmaker. Don’t worry, it’s simple, straightforward and will not take you a lot of time to figure out how you can do that.
You can also read our blog while keeping the Vmaker app open. Because this will help you replicate the steps mentioned in the blog.
Here’s the link to the blog: How to screen record on Windows PC
Editing videos with Vmaker
After you have stopped the recording, you will see your recently recorded video in the dashboard. The window opens up automatically after the video uploading process gets completed.
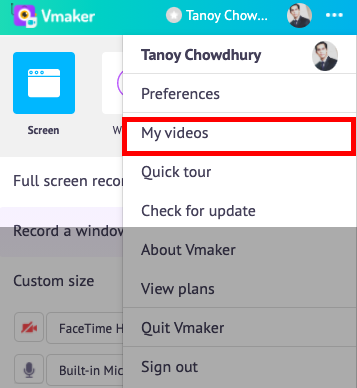
In case you close the window accidentally, you can go back to the dashboard by clicking on the three dots (...) in the upper left corner of the app and select “My videos” option from the dropdown menu.
Once you’re on the dashboard, click on the video that you want to edit. Right below the video you will see an edit option which will open the editor.
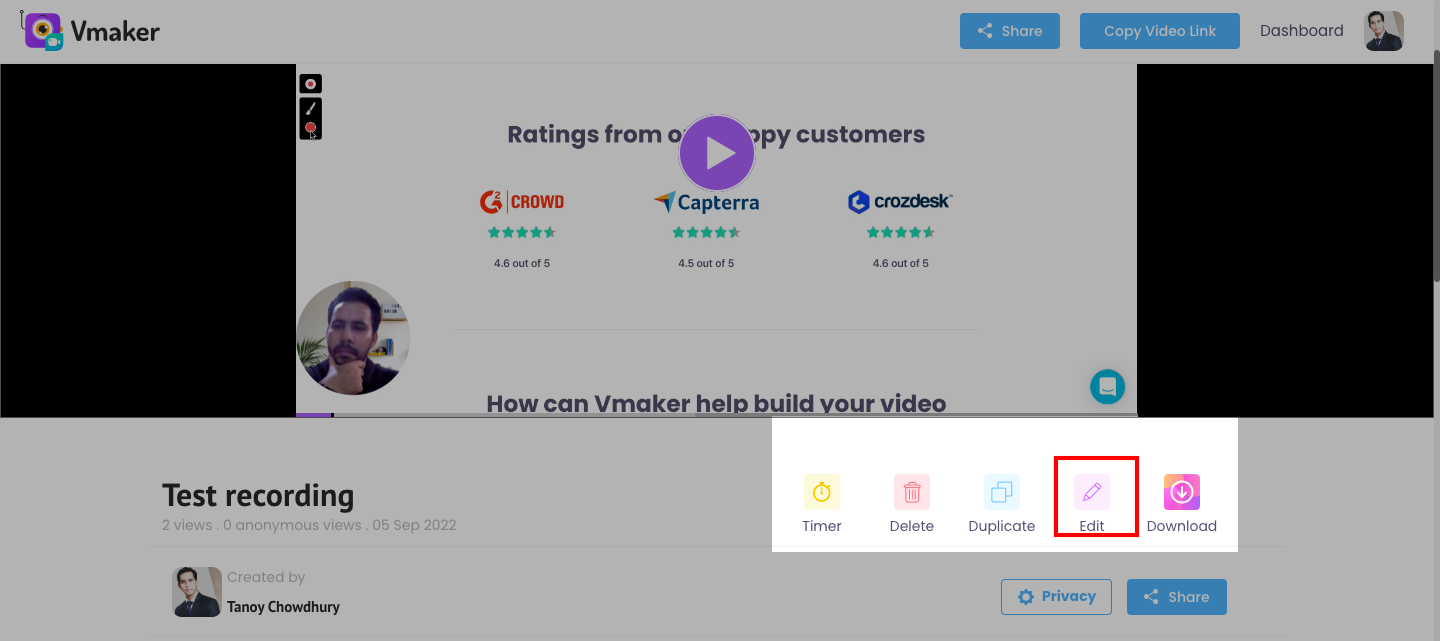
After you click on the edit button, you can start editing your screen recording video using our online AI video editor.
It converts your raw recording videos into publish-ready videos in just minutes. All you have to do is upload your raw footage and select the kind of visual enhancements or elements you want to add to your video, such as subtitles, B-rolls, background music, text animations, etc. Vmaker AI will automatically add them for you.
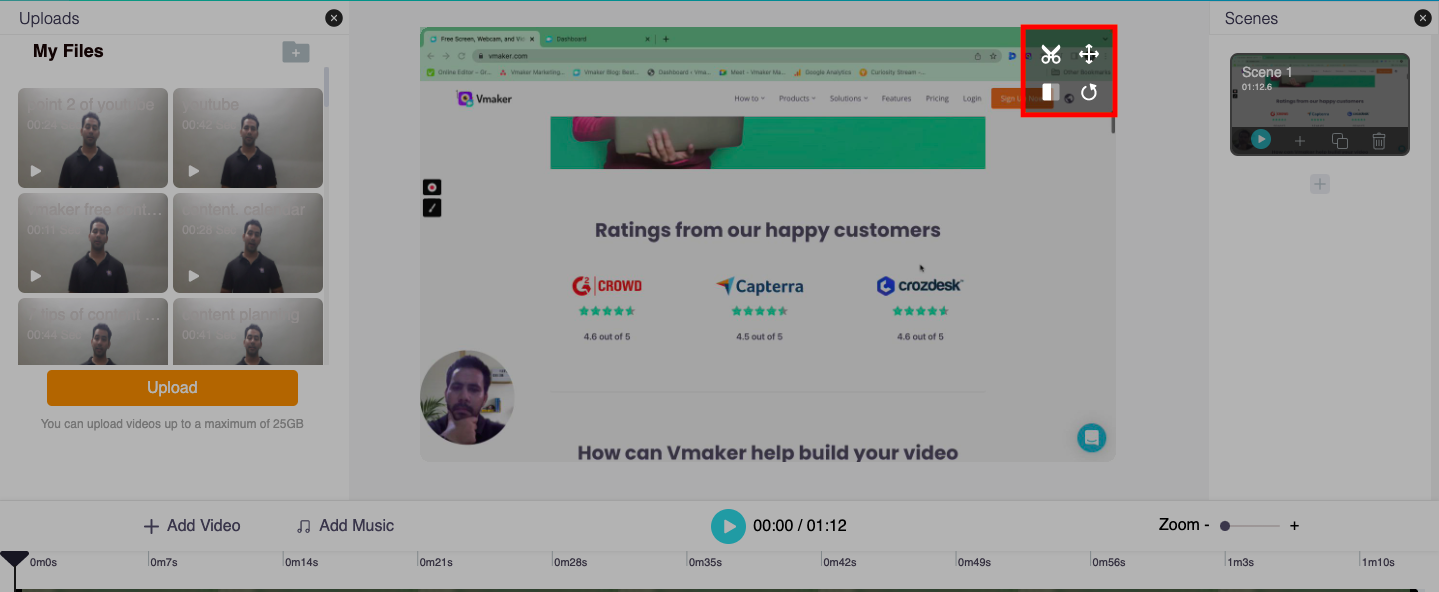
1) Trim, Resize, Rotate and Flip
These are the most basic editing functions of the Vmaker editor. Even if you’re on a free plan, you can use these features without restriction to make basic edits.
The above features get popped up at the top on the right-hand side of the editor screen. You can click on any of them to start using instantly.
Let’s take a look at all of them one by one.
Trim
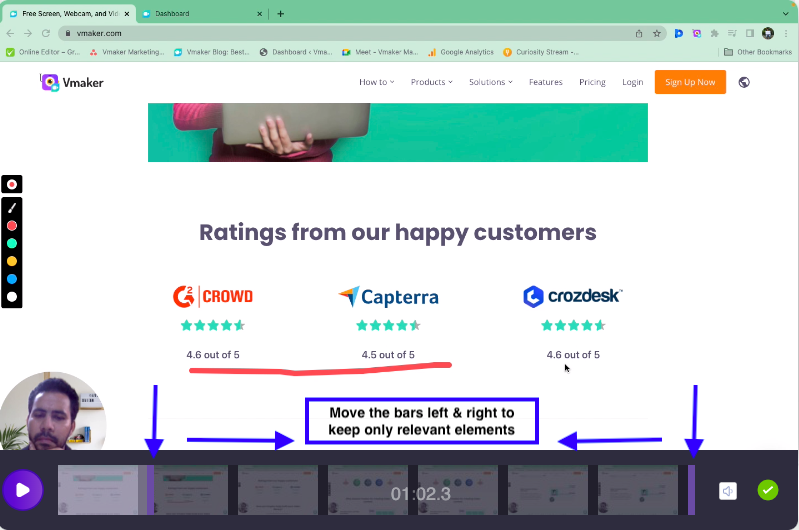
The Trim function will be greatly useful for removing unwanted parts from your video. Using it is simple because all you need to do is move the timeline to retain only the important parts in the video.
When you click on the trim function, you will see a timeline of your video pop up with vertical bars at both the ends of the video (I)
Drag these bars left and right to retain the final version of the video and keep only that is relevant for the video.
After you’re done, click on the green tick to make the video final.
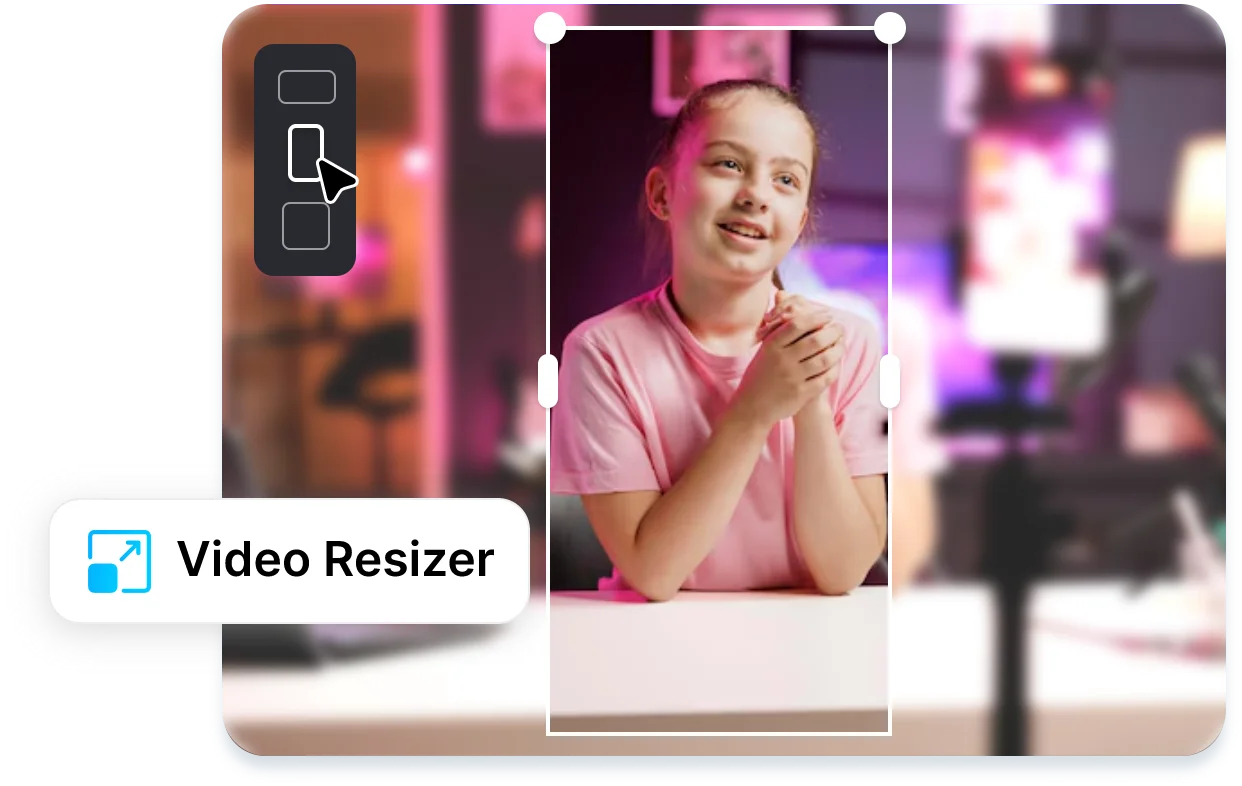
Resize
If you only want to concentrate on certain parts of the video that you have recorded, the resize function can be very useful.
All you have to do is drag the corners of the video, and when you have the subsequent size, click on the Apply button
Rotate and Flip
The rotate and flip functions are two separate functions, but we thought of covering them together. Because they’re similar and placed next to each other

The rotate function rotates the recording in the anti-clockwise direction
The flip function flips the recording up and down, and left to right
Here’s a screenshot of a recording that has been rotated and flipped too.
2) Add external videos to your recording
This is a paid feature, and is a very useful one
With this function you can add videos to the screen recordings that you have made on your Windows computer. The best part is that you can do it simply by selecting the right option, and choosing the video you want to upload.
Additionally, you can also decide the flow of the content by arranging the sequence of the videos.
Here are the steps you need to follow to add video to your recording
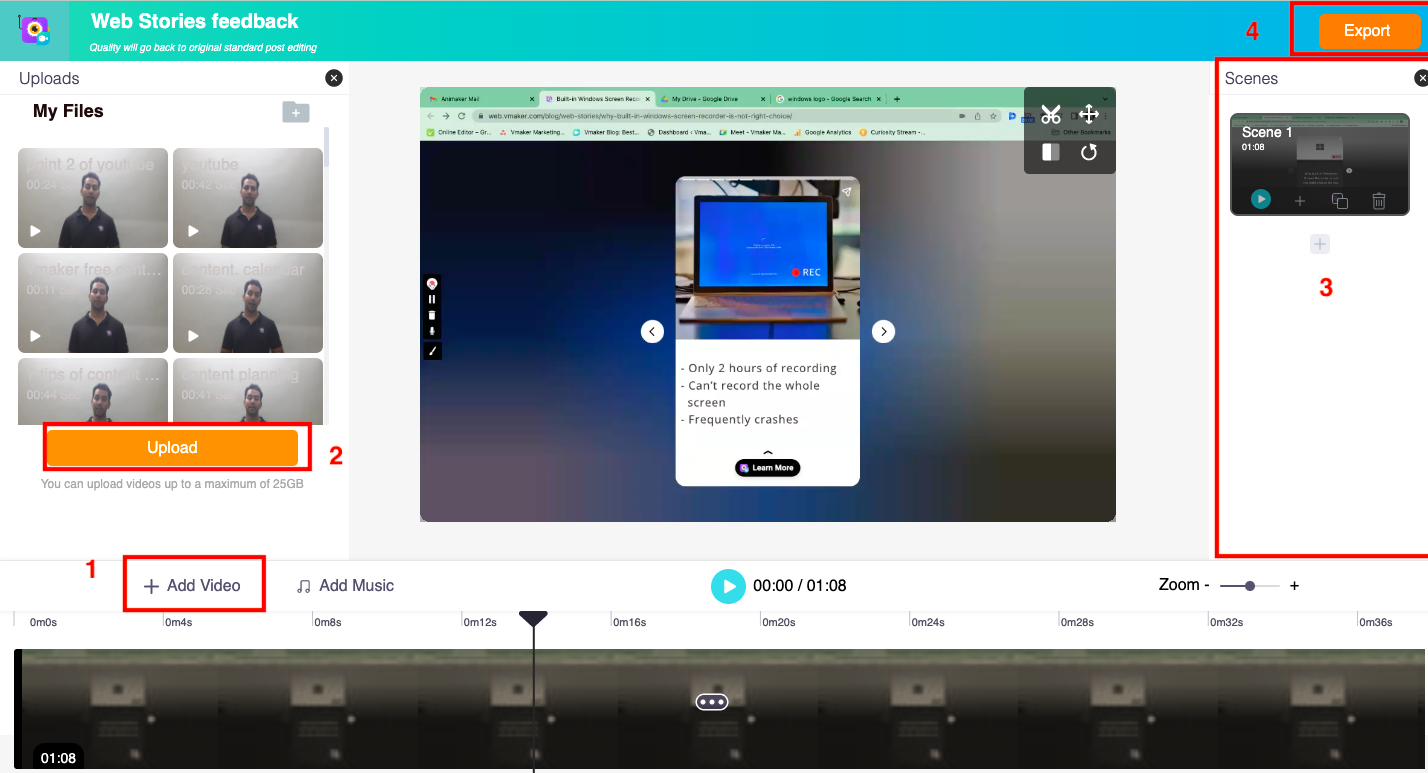
1) Click on the Add Video button on the editor page
You will see a window open which will ask you to choose the video that you want to upload from your computer
2) After you choose the video, you will see it appear on the left panel of the screen. Click on the video again and press on Upload
Once the video is uploaded, you will see at the center of the screen where you can edit it further
3) On the right side you will see a panel called Scenes where you can arrange the videos to create a flow. You can drag the videos up and down to keep changing the sequence as per your liking
4) After you have the final video ready, you can click on export to get the final version rendered and ready for download
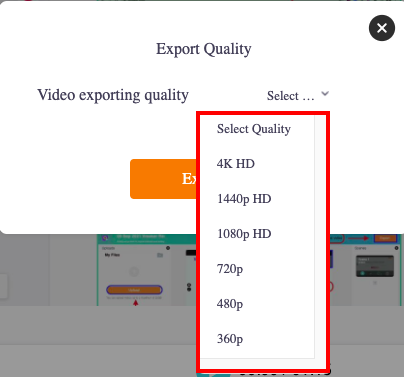
5) This is the final step before your video is ready. When you click on the Export button, you will see a dropdown menu from where you can select the quality of video. We recommend 4K HD for the best quality.
The Add Music feature also works in the same line and allows you to add music tracks to your recording. However, the feature is at the final stages and will be ready soon.
Start editing
That was all about the Vmaker editor, and how you can use its simple interface to make changes to your videos without investing in additional software.
You can start by signing up for the free plan of Vmaker and get a hang of the editing features. Once you’re ok with it, you can upgrade and try out more features to take your video making skills to the next level.
All of that from your own Windows computer.
Recommended Readings:
10 Best 4K Screen Recorders For Windows and Mac
How to Screen Record on Windows 10 with Audio
10 Best Free Webcam Software for Windows 7, 8, 10 & 11
10 Best Screen Recorders for Chromebook