Contents
Recording videos with computer audio
Advanced privacy and security on Vmaker
Try the three new features on Vmaker
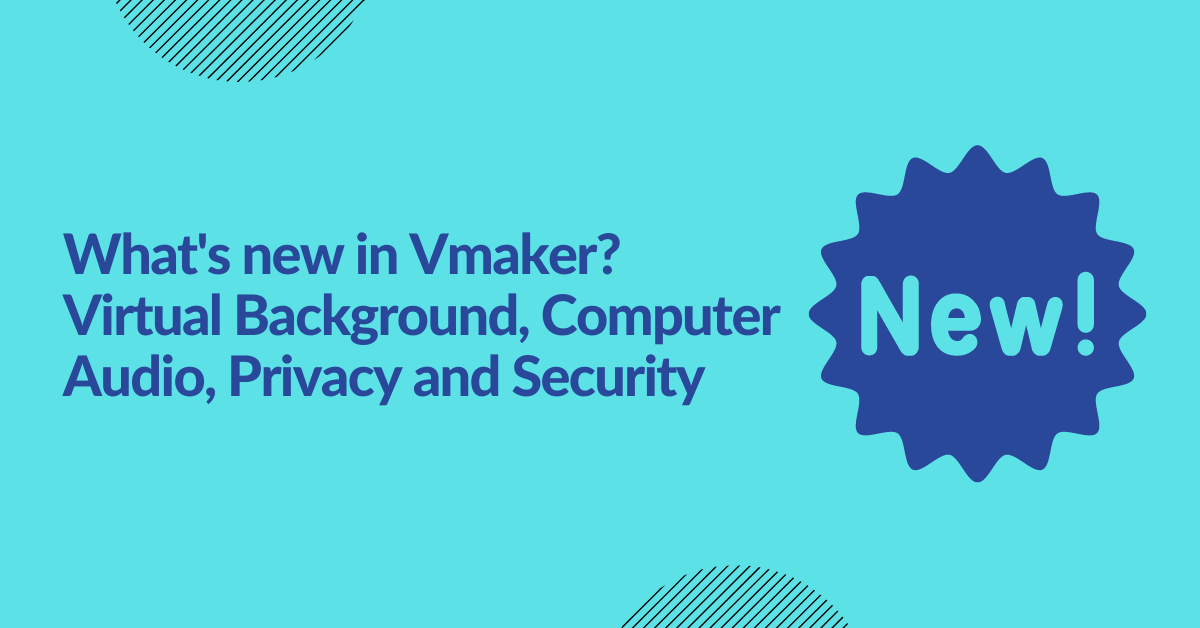
What's new in Vmaker? AI Virtual Background, Computer Audio, Privacy and Security
Vmaker has been buzzing with updates and the latest ones take the game a notch above. We’ve brought in some really cool features that aim to make your videos stand out and give you complete control over the privacy settings of your Vmaker videos.
As part of the latest updates, the three new features that have been launched on Vmaker are
- AI-Powered Virtual background
- Computer audio recording
- Advanced Privacy and security
If you’ve been following our product roadmap, I am sure you knew these features were coming and they are finally out for you to try out!
Let’s look at these sparkling new features in detail and how you can use them on Vmaker.
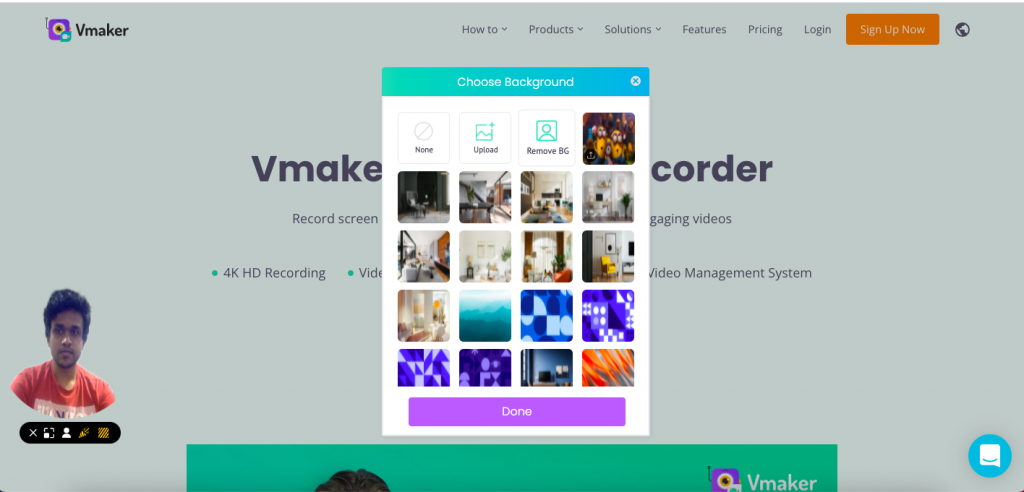
Virtual background
This is by far the coolest feature you can get your hands on Vmaker. If you’re recording your screen and webcam with voiceover, you’ll absolutely love this feature. With Virtual background, you can customize your background in the webcam bubble using some really cool default backgrounds. Not just that, you can also upload a custom background image from your PC or have a transparent background. If humor is your winning formula, you gotta try this feature with some really quirky backgrounds. For professional use, you can upload a picture of your office space or a corporate environment with a pleasant ambiance. Your viewers will think you actually recorded the video from the place that they see in your background.
Virtual background and frames feature on Vmaker
The already available frames feature perfectly complements the virtual background feature on Vmaker. Users get a plethora of customization options that allow them to create the perfect webcam bubble with a background that complements the video. For example, a gamer can use the frames feature to use a square webcam bubble and add transparent background to achieve a unique webcam look.
Here are the steps to use use the virtual background feature on Vmaker
Step 1: Launch Vmaker and select the screen and webcam recording option
Step 2: Click on the virtual background icon near the webcam bubble

Step 3: Choose your preferred background from the default options
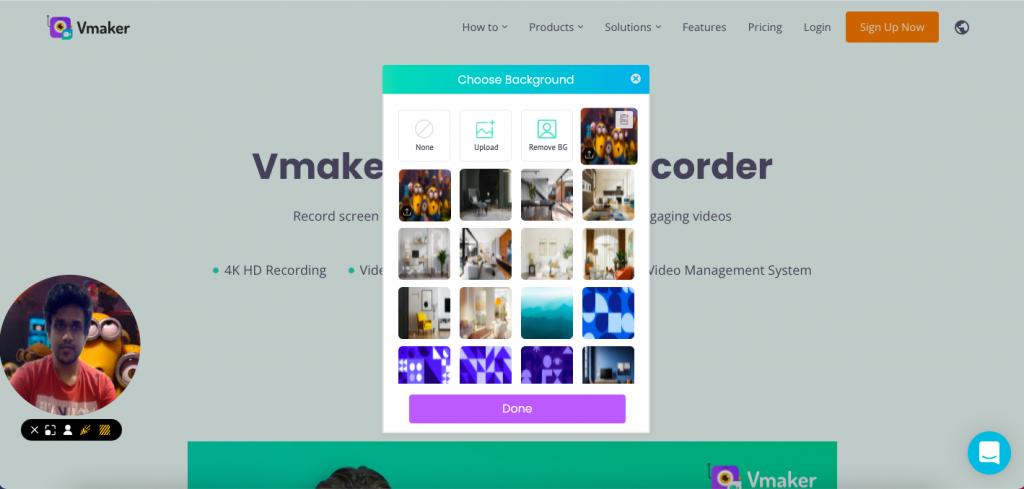
Step 5: Click on remove background to completely remove the background from your webcam bubble
The virtual background feature can come handy for different use cases. Here’s how this feature is helpful for the most common use cases
- Training/Tutorial videos
Training and tutorial video creators can choose to add their brand logo, tagline, or a picture of the office space to enhance the look of the video.
- Presentation videos
Presentation videos particularly can benefit from the virtual background. It allows you to use backgrounds such as office spaces. Even if you are working from home, the virtual background can give a professional look to the videos with an office setup-like background.
- Gaming videos
Most commonly gamers prefer having their webcam background transparent while recording games. This along with the frames feature allows you to have a square webcam bubble and a transparent background.
- Educational videos
Adding a background that reflects the topic or the subject covered in the video. This helps grasp the attention of the students and the video helps them connect to the subject in an engaging way.
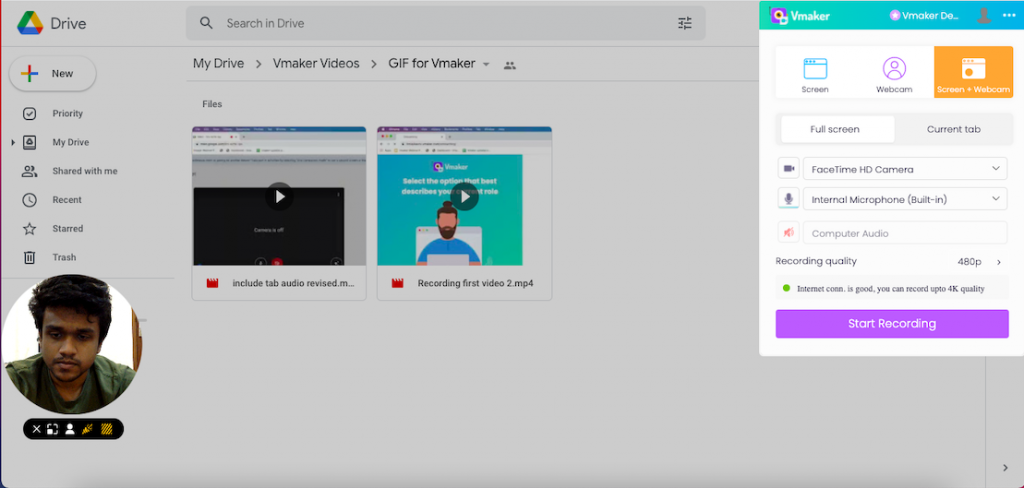
Recording videos with computer audio
The key to an engaging video is crisp and clear audio. If you work from home or have a workplace that has sound intrusion enough to disturb your video’s audio, the computer audio feature can come in extremely handy to you.
This feature allows you to record the audio directly from your computer with headphones connected while recording videos.
The prerequisite for using this feature is a headphone connected to your computer. For example, if you’re attending a meeting with your headphones connected, you can choose to record the audio of the meeting directly from the computer.
Let's look at how to use the computer audio feature on Vmaker
Step 1: Launch the Vmaker application and select the current tab recording
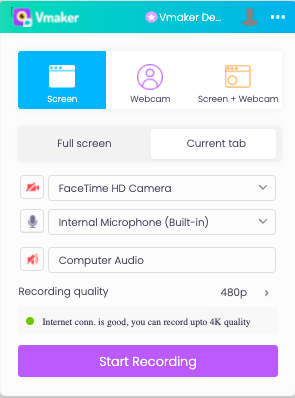
Step 2: Click on the computer audio button
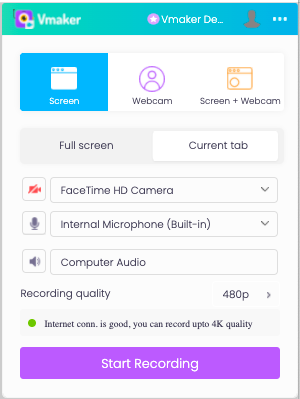
Step 3: Click on start recording
The audio from the video that you are recording will be recorded directly from the computer.
While using the Vmaker desktop application, the steps have to be followed. However, the current tab recording option need not be selected.
Advanced privacy and security on Vmaker
With advanced privacy and security settings, handling the visibility of Vmaker videos has been made extremely easy. You can set up privacy at two different levels on Vmaker. The first one is master privacy settings and the second one is privacy settings for individual videos. You can choose to use the privacy level that best suits your needs. Let's look at the two levels of privacy settings in detail
Bonus Read: Check all the Features of Vmaker Screen Recorder
Master privacy settings
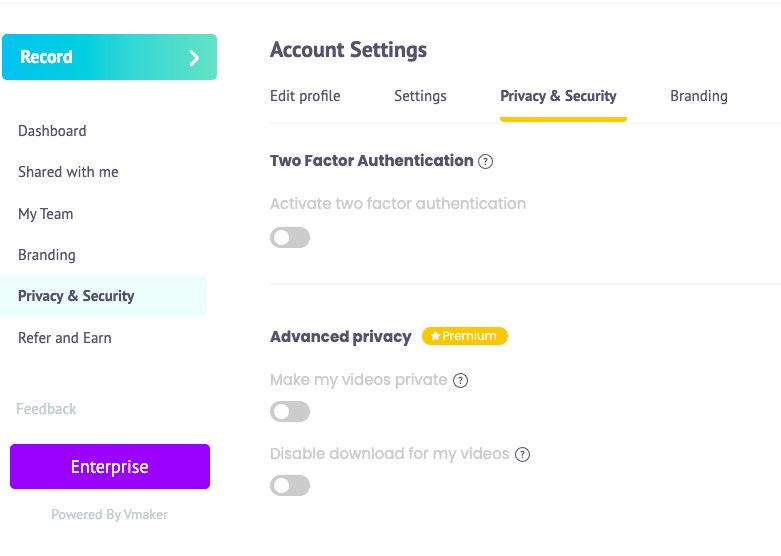
Under master privacy settings, you can control the privacy of your videos primarily in two ways.
- Disable download for all videos
As the name suggests, disabling download for all videos will remove the download button from all your Vmaker videos. If you are looking to share your videos with others but don’t want them to download your videos, you can disable downloading in the master privacy and security settings section.
- Make all my videos private
Under master privacy and security settings, you can make all your videos private by enabling ‘’make my videos private’’. This means only you will be able to view your videos. Anyone other than you with the link to your videos will not be able to view them.
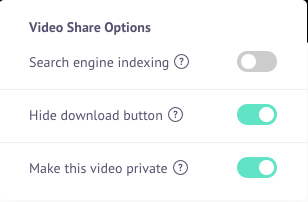
Privacy settings for individual videos
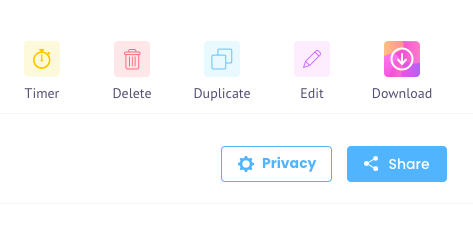
- Disable download for individual video
If you want to have privacy control over a specific video, you can do that using the disable download button on the player page. Before sharing the video, you can choose to disable the download button so the viewer can be restricted from downloading the video.
- Make video private
You can choose to make the specific video private by enabling make this video private. This means nobody else other than you can view the video. This video comes in handy when you want to make a video private after it has been shared with someone. Do note that to control the privacy and security of videos individually, the master privacy and security settings must be turned off.
With the advanced privacy and security settings, you get to flexibly control the privacy of your videos in the most convenient way.
Try the three new features on Vmaker
It’s time for you to try out these features on Vmaker! They’re focussed perfectly on creating an engaging video recording experience, along with enhanced recording quality. Not just that, you get complete control over the privacy of your videos. If you still haven’t had the chance to use Vmaker, you can sign up right away and experience.
Related Post
How to Record Webinars: A Simple 5 Step Process
How to record internal audio on Mac