Contents
How to blur a specific element or region in a screen recording?
1. Install Vmaker Chrome Extension
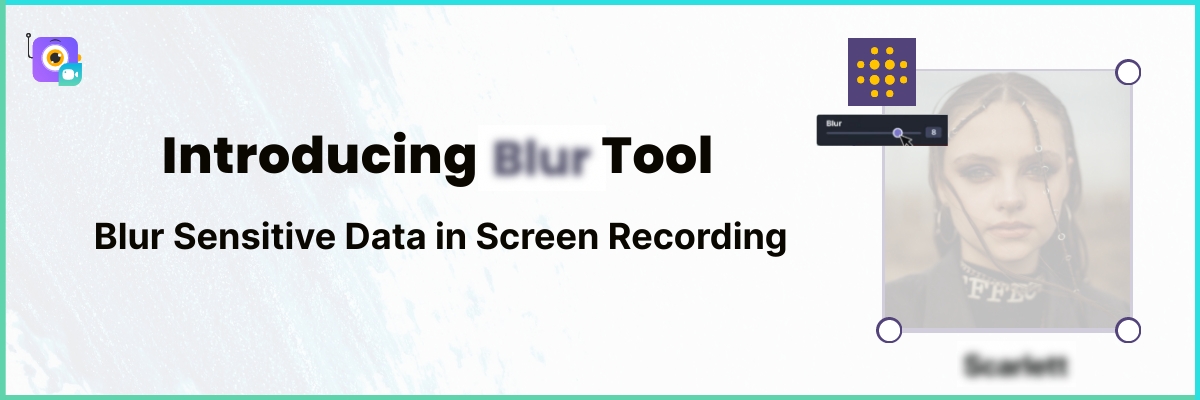
How to Blur Sensitive Data in Screen Recordings Using Vmaker
Do you really want to expose all your sensitive data when you record a tutorial or share a screen with others?
Probably not.
If you create screen recordings often, your screen might show things you don't want strangers to see. Emails, passwords, account IDs, addresses, card numbers, CVVs, social security numbers. All kinds of private data sit on screen while you record.
Picture this.
You record a quick year-end recap to share with a wide audience. You hit publish. Then you spot the things you forgot to hide:
- Financial info (income, expenses, investments)
- Social media profiles
- Photos of you or your family
- Family names and details
- Personal milestones
Now you have to open a video editor and blur each frame by hand. That takes hours.
Vmaker was built so anyone can record their screen, even with no editing skills. So we added a blur tool right inside our Screen Recorder.
Here is what one of our early users said:
❝ I used to spend a lot of time blurring private info by hand after every recording. With Vmaker's blur tool, I no longer have to. ❞
This guide shows you how to use blur before you record or while you record.
How to blur a specific element or region in a screen recording?
The blur tool sits inside the Vmaker Chrome Extension. Follow the steps below.
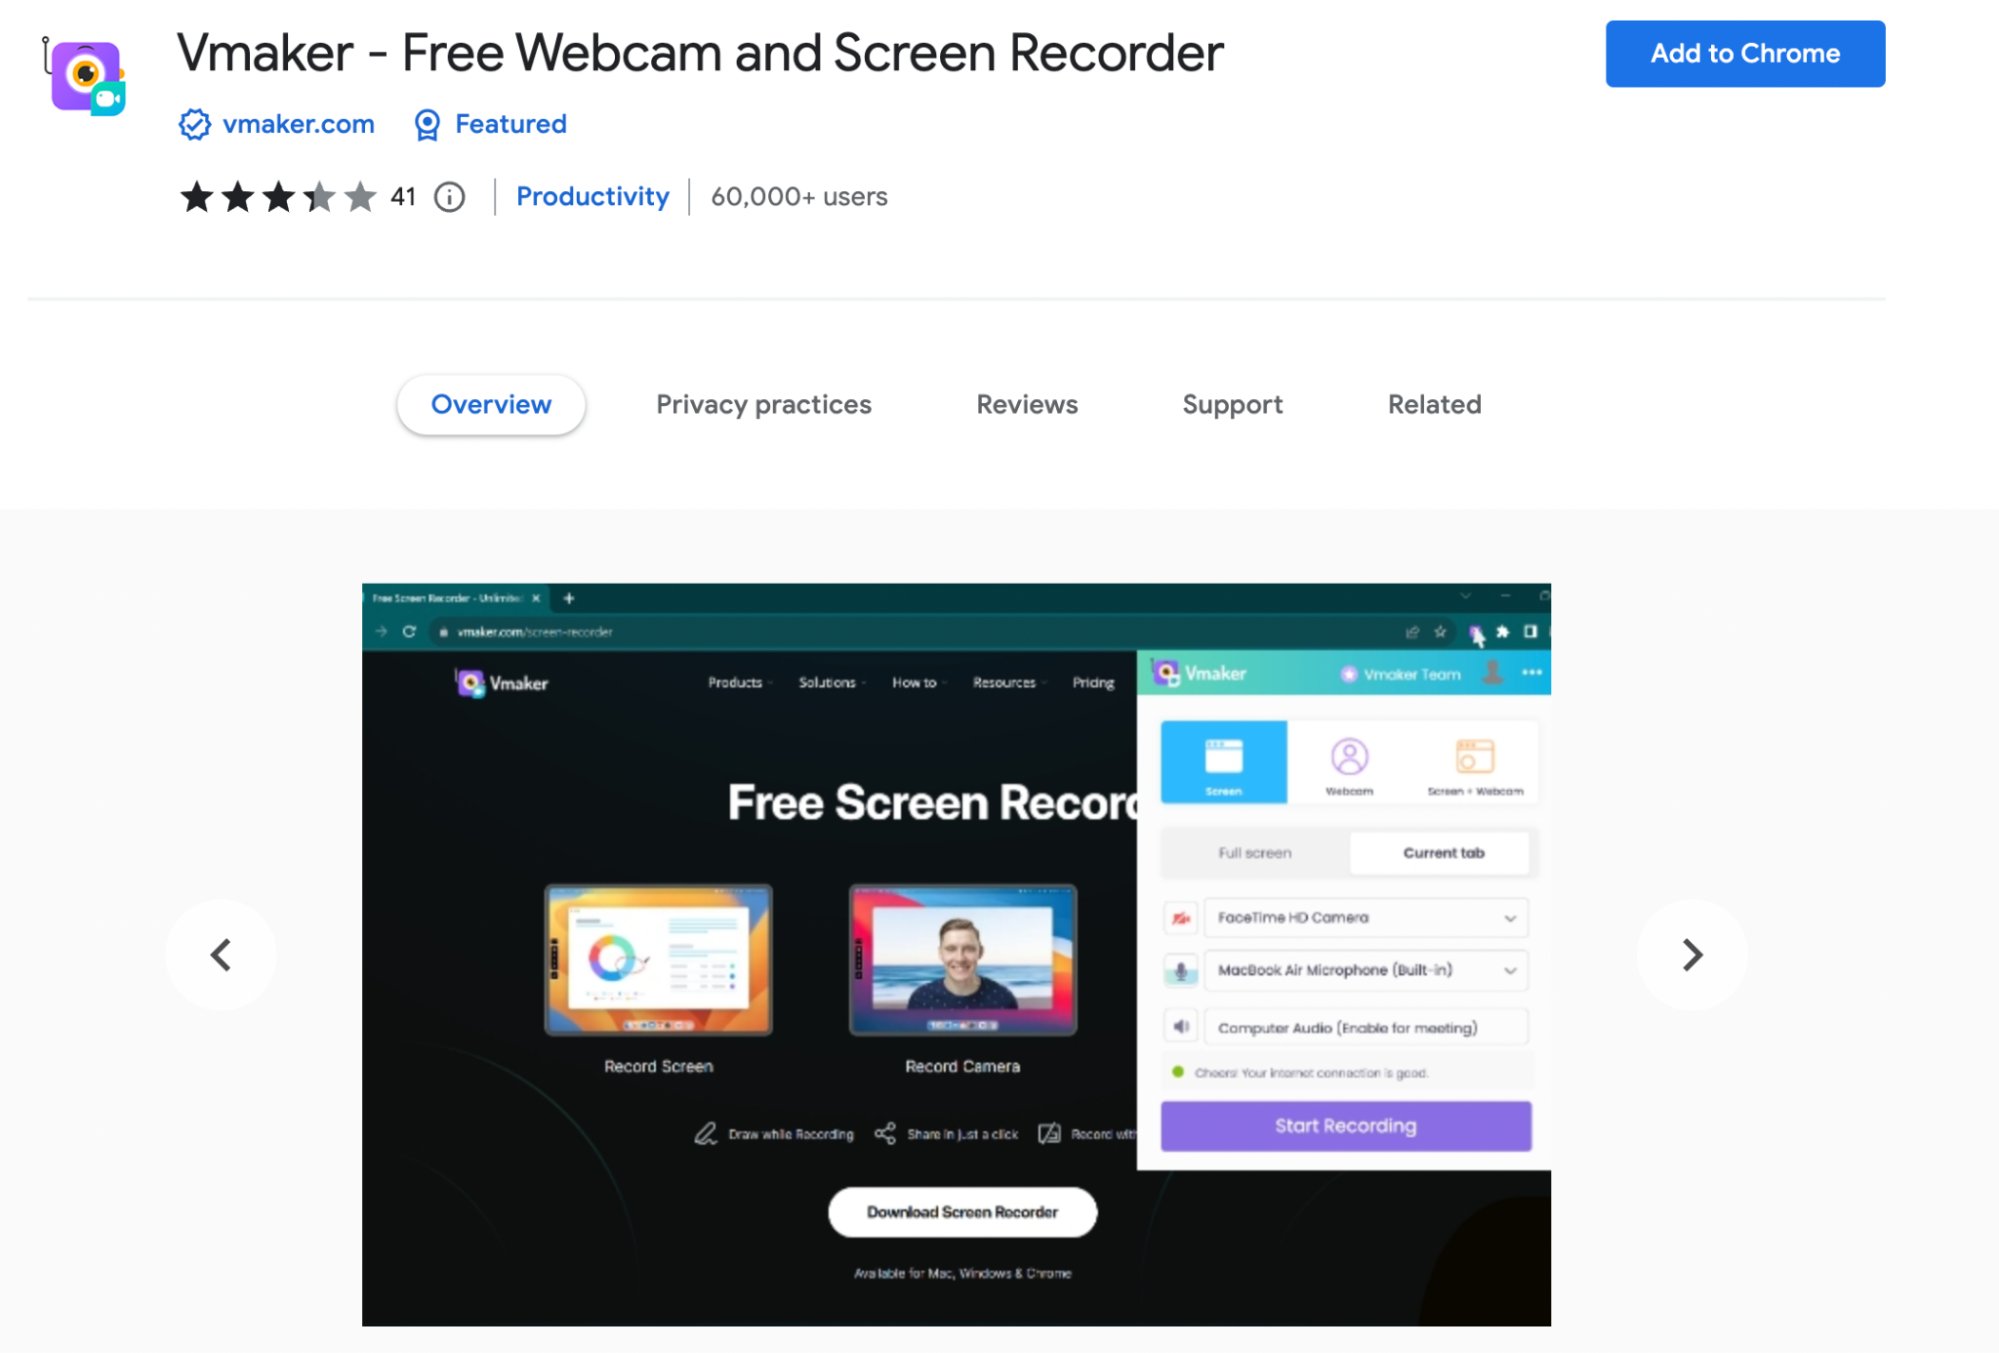
1. Install Vmaker Chrome Extension
New to Vmaker? Visit vmaker.com or the Chrome Web Store. Add the Vmaker extension to Chrome.
2. Sign up to Vmaker
Once added, sign up with Gmail or Facebook. Already a user? Just log in. Make sure you are on the latest version of the extension.
3. Launch Vmaker
After you sign up, click the Vmaker icon in your Chrome toolbar to open it.
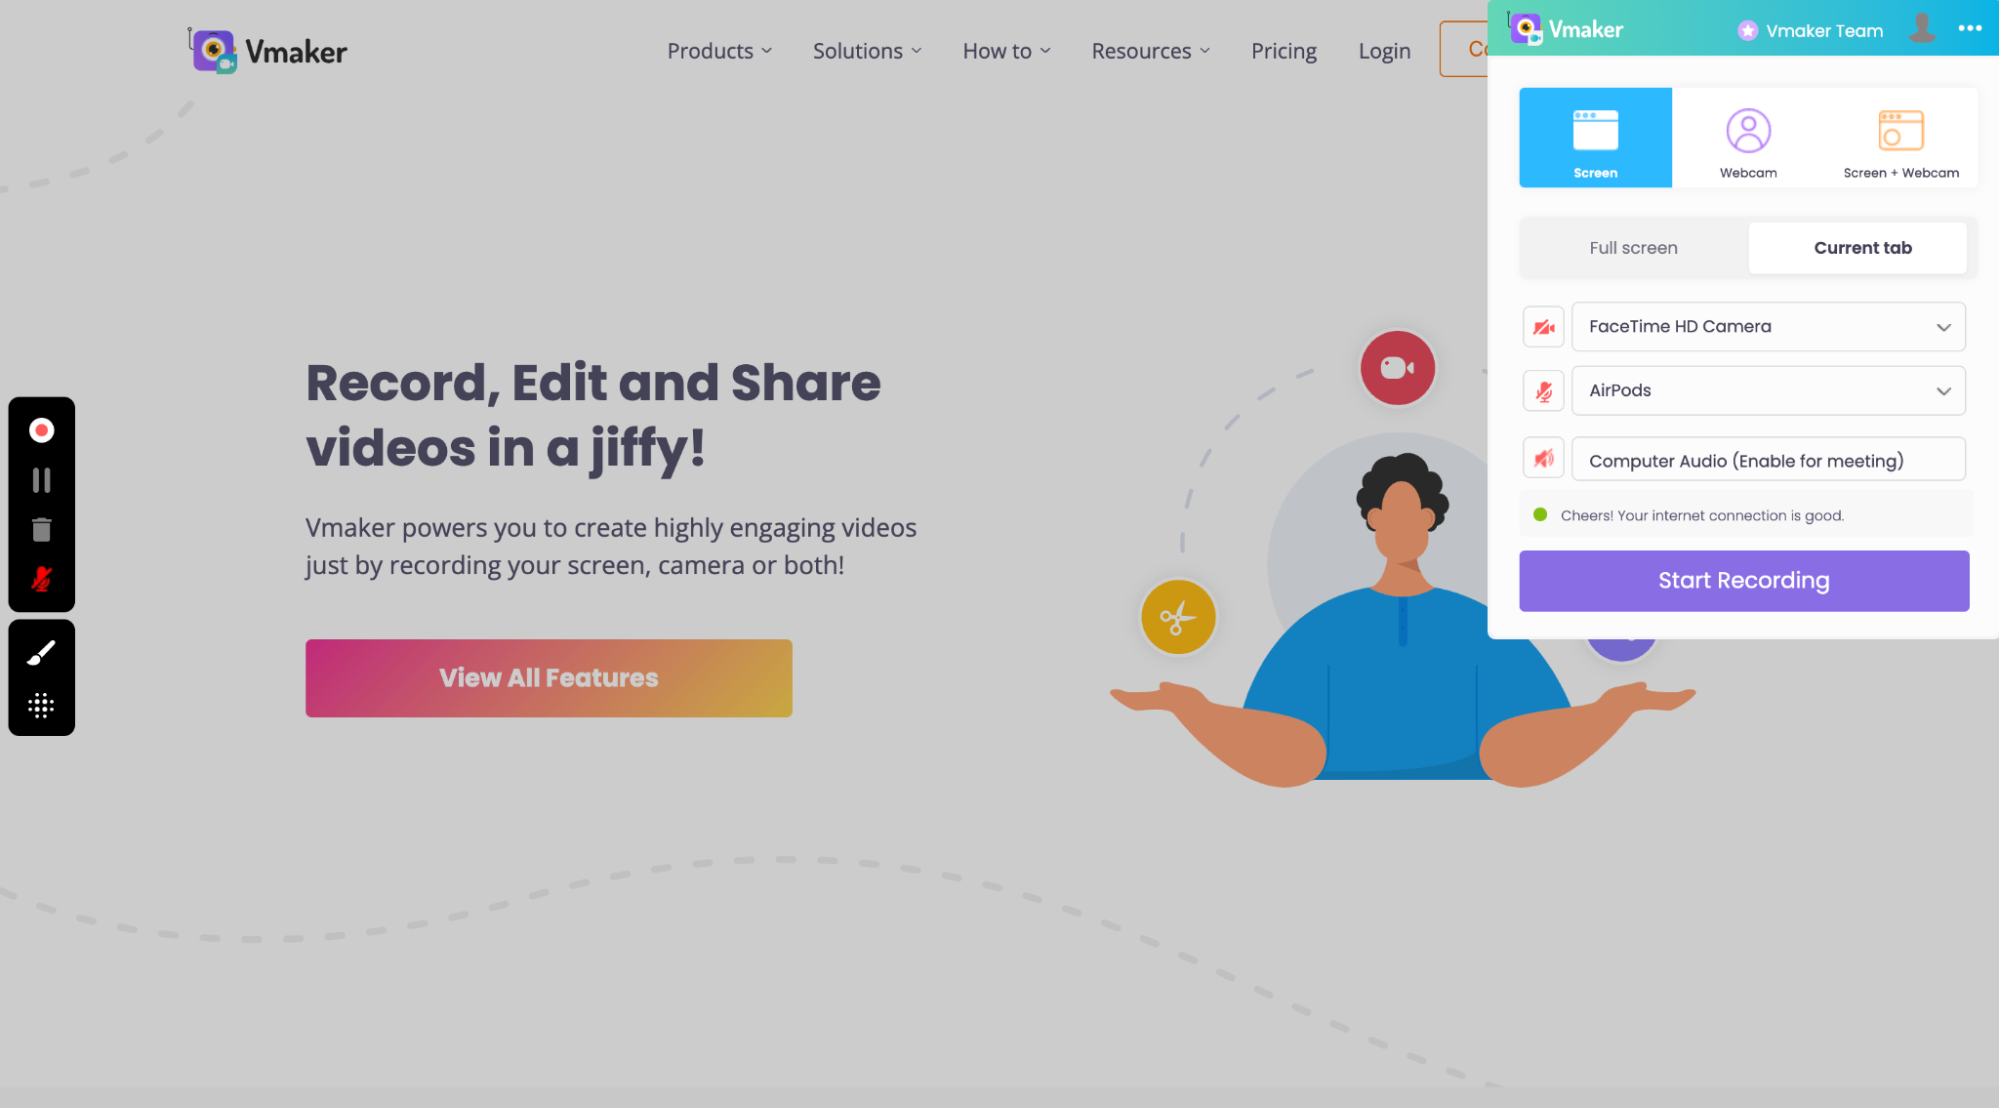
You are ready to record. The control menu has a blur icon. You can use it before recording or during recording.
4. Blur Option
Click the blur icon in the control menu. You will see two options:
i) Region Blur
ii) Element Blur
Pick the one that fits your need.
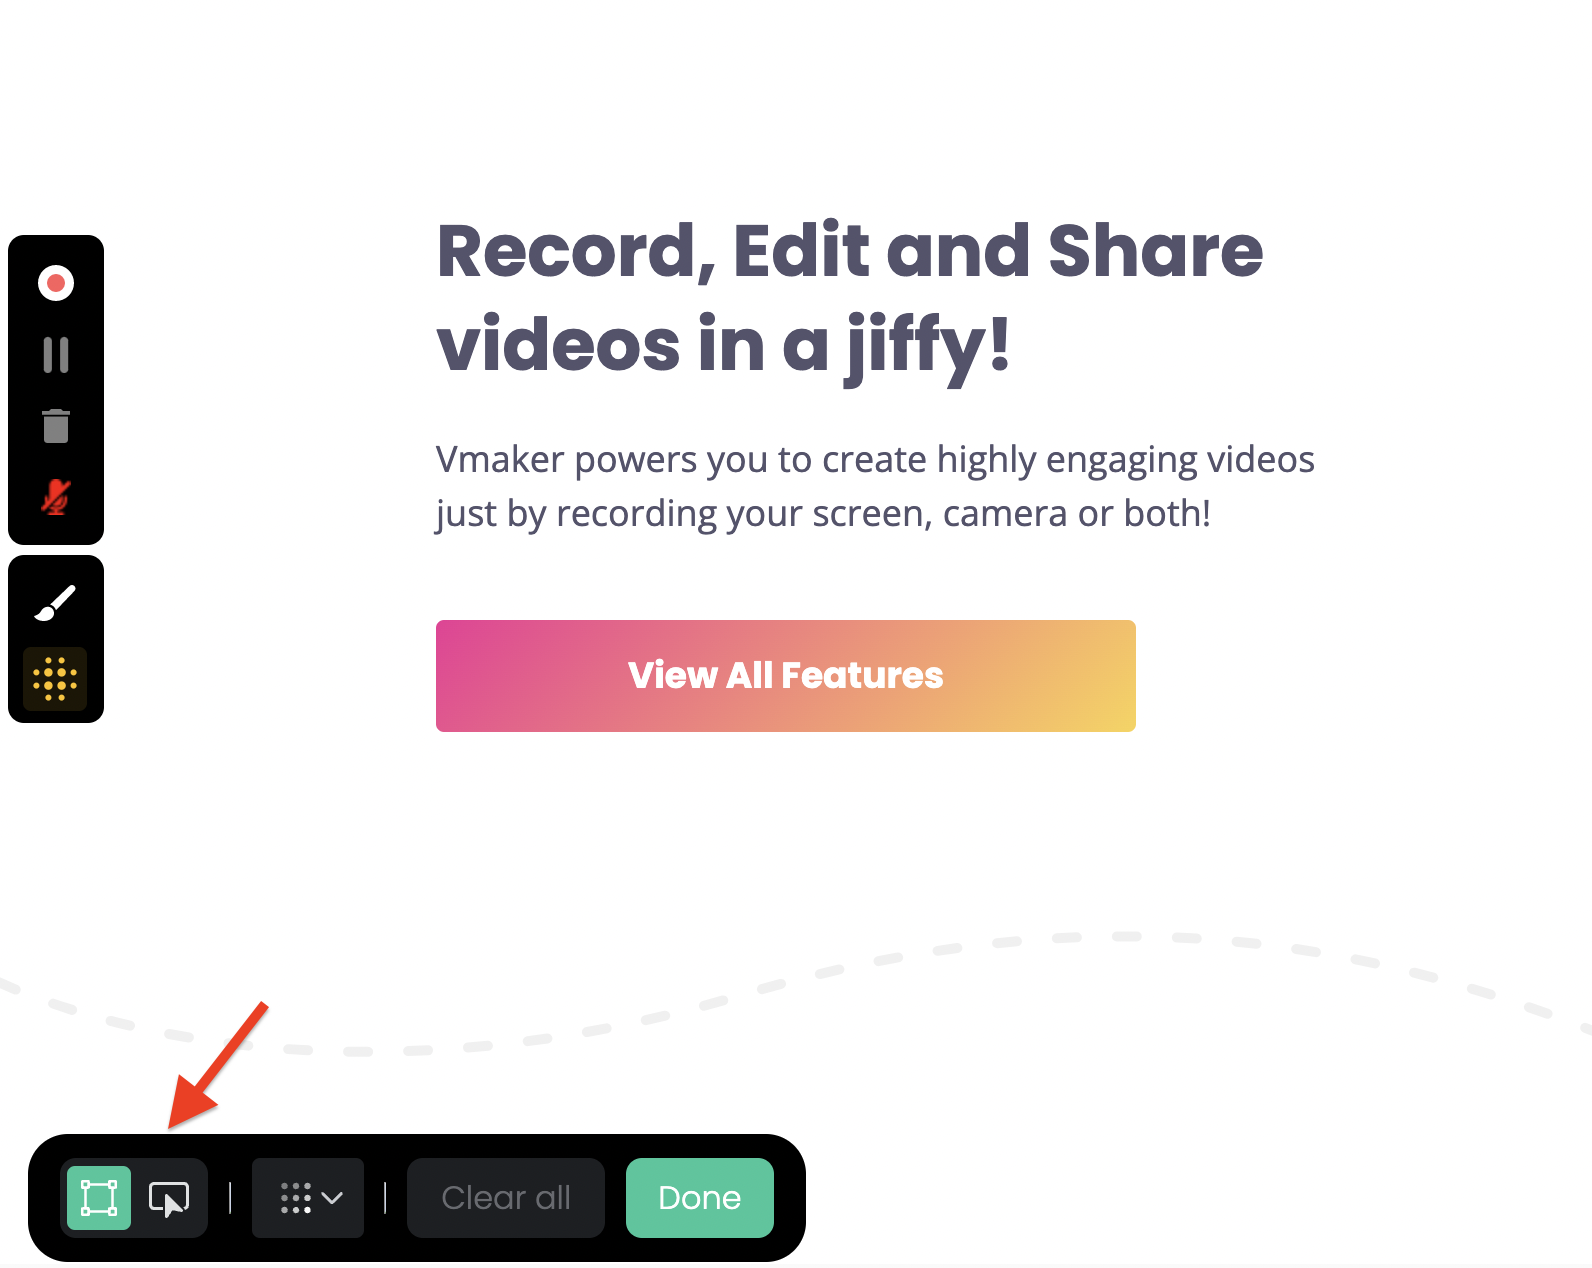
i) Blur a region by hand
Click the first icon. Drag a box over the area you want to hide.
You can blur many areas at once.
Region blur works well for legal docs, medical reports, client decks, personal notes, and other sensitive content.
It also fits PDFs, slides, Word docs, and spreadsheets.
ii) Blur a specific element
Click the second icon. Then click the element you want to hide.
You can blur any element, even images. To unblur, click the element again or hit "Clear all" in the menu.
Element blur is good for names, logins, card numbers, CVVs, licenses, IDs, and pay info. One click hides it.
It is also useful for software demos and tutorials. You can hide a button, a login screen, or an account ID without breaking the flow.
You can even use element blur to hide a surprise reveal in your video.
The blur tool also lets you adjust opacity.
Click the opacity icon in the control menu and slide it to the level you want.
Now set your recording mode and audio. Hit "Start Recording". The blur stays on until you stop.

5. Blur during recording
You can also blur while you record. The tool works the same way.
One difference: when you click the blur icon mid-recording, the recording pauses for a moment. Apply the blur, then click "Resume Recording" to continue.
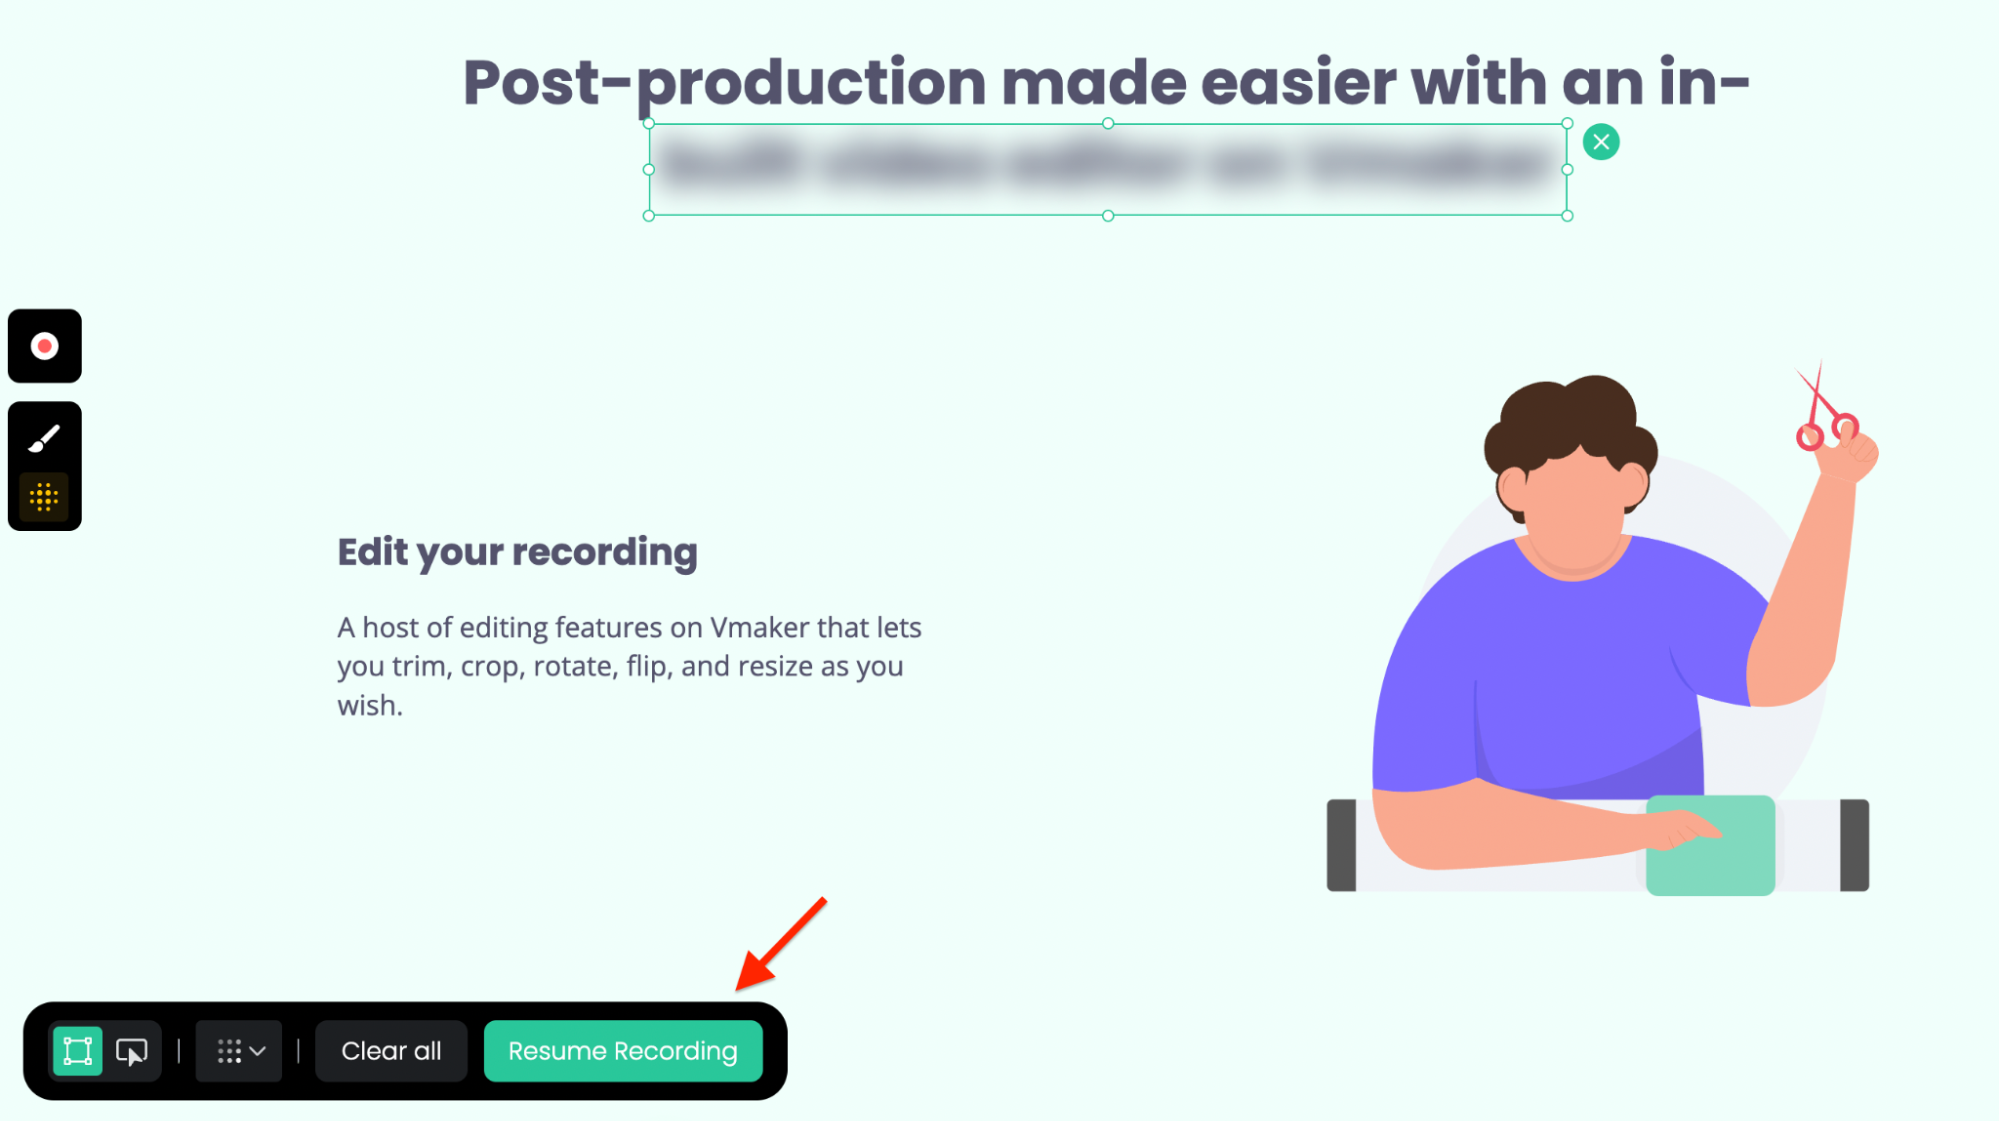
The blur stays in place even when you switch tabs or move between pages in Chrome.
That is it.
You no longer have to worry about private info while recording your screen.
Happy recording.
☛ Bonus Read: Vmaker How-to Guides
Frequently asked questions:
How to blur pictures in a screen recording?
With Vmaker, you can blur any text or image on your screen. You can also adjust the blur strength to your liking.
How to blur content across many Chrome tabs?
Once you apply blur, it stays on as you switch between tabs. It only resets if you refresh the tab.
Can I blur many areas at once?
Yes. Apply the blur tool to each area before or during recording.
Does blur work during a live recording?
Yes. The recording pauses for a second when you click the blur icon. Pick the areas to blur, then click "Resume Recording".
Does blur stay on if I move to a new page?
Yes. Blur stays on as you switch tabs or pages in Chrome. If you refresh the tab, you will need to reapply it.
Is blur available on the desktop app?
Right now blur is only on the Vmaker Chrome Extension. Use the latest version for the best result.
Recommended Reading: